
Arcane Staff Build
One of the best 1H Arcane Staff builds in Albion Online for aggressive solo PvP, built around lowering enemy defenses, removing their buffs, and weaving fast auto attacks between every ability.
Your equipment
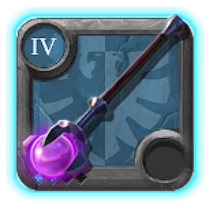
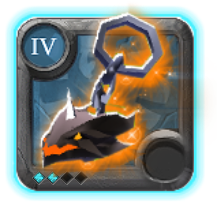
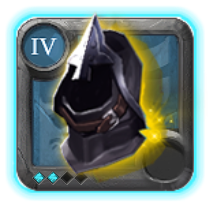
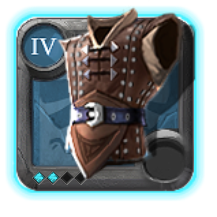

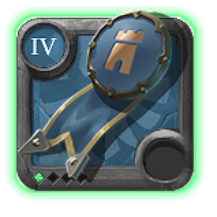
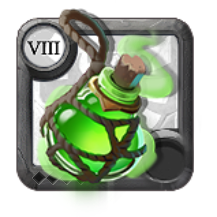
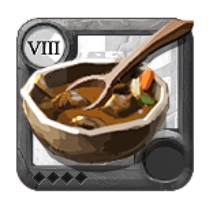
Copy an item name to search for it in game, or tap the chart to open the exact build item page with market prices.
Build Guide Contents8 sections
How to play this Arcane Staff build?
is one of those weapons that can be surprisingly strong in solo PvP, especially when your opponent doesn't know how much damage you can actually deal.
Most players think of Arcane Staffs as support weapons, but this particular build is focused on dealing damage with , , and your normal attacks while using to remove enemy buffs and silence them.
One of the most important parts of this build is , our weapon passive. It makes our normal attacks much stronger after casting spells, so you don't want to spend the entire fight just pressing Q and W.
We also have to increase our damage, to protect ourselves while reflecting damage, and for additional defense when our health gets low.
However, there's something you need to understand.
This build doesn't have much sustain.
We're using Poison Potions and for additional damage, so you can't rely on healing to survive long fights.
Instead, you need to deal damage efficiently, pay attention to your opponent's cooldowns, and use your defensive abilities at the right moments.
1. Main Abilities
Here's the default ability setup we're using.
| Slot | Ability | Purpose |
|---|---|---|
| Q | Main damage and Arcane Charges | |
| W | Damage and defense reduction | |
| E | Damage, purge, and silence | |
| Passive | Faster normal attacks with additional range |
Chain Missile (Q)
is our main damage ability, and you'll be using it constantly.
It fires a projectile toward your target, dealing magical damage to the first enemy hit.
If there are other enemies nearby, the missile can jump between them, hitting up to three targets in total.
This makes useful in both PvP and PvE.
However, the most important mechanic is Arcane Charges.
Every enemy hit by receives an Arcane Charge.
When you deal direct damage to an enemy with an Arcane Charge, the charge gets consumed and deals additional magical damage.
This means that simply casting Q repeatedly isn't always the best way to maximize your damage.
You want to follow your with a normal attack or another damaging ability to consume the charge.
For example, you can use , hit your opponent with a normal attack, and then continue attacking with .
This gives you additional damage without making the build much more complicated.
One important detail is that itself doesn't consume the Arcane Charges it applies.
You need to follow up with another source of direct damage.
And remember that is a projectile, so against mobile opponents, you still need to aim properly.
Habo Tip: Get comfortable with using a normal attack immediately after . You'll trigger the additional Arcane Charge damage while also benefiting from .
Frazzle (W)
is one of the strongest parts of this build.
It deals magical damage to your target and reduces their Defense by 30% for a short duration.
This makes your opponent much more vulnerable to incoming damage.
That's why I recommend using before committing your strongest attacks whenever possible.
For example, if you have and available, you can use first and then follow up with your other damage abilities.
However, also deals direct damage itself, which means it can consume the Arcane Charge from .
This gives us a nice interaction between our Q and W.
You can use to apply the charge, then to trigger the additional damage while lowering your opponent's defenses.
Another thing I recommend is not wasting when your opponent is about to become immune or use a strong defensive ability.
Its damage amplification lasts for a limited time.
You want to take advantage of that window by continuing to deal damage.
If your opponent becomes immune immediately after , you're losing a large part of its potential.
Arcane Orb (E)
is what makes the regular particularly interesting for PvP.
It fires an in the targeted direction, dealing damage to enemies hit.
But it also purges enemy buffs and silences them.
This makes the ability extremely useful against opponents who rely on important offensive or defensive buffs.
For example, if someone activates a purgeable defensive ability, you can use to remove it before continuing your damage.
You can also use the silence to interrupt certain enemy combinations or temporarily prevent them from casting abilities.
Another important detail is that applies its purge before the silence.
This means it can remove certain buffs that would otherwise protect an enemy against the silence.
However, don't assume removes every buff in the game.
Some effects cannot be purged.
That's why learning which abilities you can remove is extremely important when playing .
Don't Waste Your Purge
One of the biggest mistakes you can make with is using immediately at the beginning of every fight.
Yes, it deals damage, but its purge and silence can sometimes be much more valuable.
For example, if you're fighting someone who relies on a powerful defensive ability, you might want to save until they activate it.
If you use E too early, they can simply wait for your silence to expire and activate their defensive ability afterward.
Against opponents without important purgeable buffs, you can use more aggressively for damage and disruption.
The difficult part is recognizing which situation you're in.
Sometimes the best use of is removing your opponent's strongest ability rather than dealing damage immediately.
Lingering Power (Passive)
is one of the main reasons why this build can deal so much damage.
After casting a spell, your next three normal attacks receive increased attack speed and range for a short duration.
This makes your normal attacks significantly more effective than they would normally be.
And because we're constantly using and , we have plenty of opportunities to activate the passive.
However, there's something important you need to understand.
You don't want to ignore your normal attacks between abilities.
If you only use Q, W, and E without attacking, you're losing a lot of potential damage.
Instead, try to weave normal attacks between your spells.
For example:
| Step | Action | Benefit |
|---|---|---|
| 1 | Apply Arcane Charge | |
| 2 | Normal Attack | Consume the charge and benefit from |
| 3 | Deal damage and reduce defenses | |
| 4 | Normal Attacks | Continue pressure with |
| 5 | Apply another Arcane Charge | |
| 6 | Normal Attack | Trigger additional damage |
You don't need to finish all three empowered attacks before casting another spell.
The important thing is avoiding long periods where you're simply standing around waiting for abilities.
Once you get comfortable with this playstyle, the build starts feeling much stronger.
2. How to Fight With Arcane Staff
The main idea behind this build is to maintain constant pressure while using your damage amplification abilities at the right moment.
Unlike weapons that rely on one big damage combo, can deal good damage through repeated spells and normal attacks.
However, we also have the potential for some very strong burst damage when combining and .
Basic PvP Rotation
Here's an example of how I would approach a favorable fight.
| Step | What to Do | Why |
|---|---|---|
| 1 | Start with | Apply Arcane Charge and begin pressure |
| 2 | Follow with a normal attack | Trigger Arcane Charge and |
| 3 | Cast | Deal damage and lower enemy defenses |
| 4 | Continue normal attacking | Take advantage of the damage window |
| 5 | Use | Increase your damage when you can continue pressuring |
| 6 | Use when appropriate | Purge an important buff or silence your opponent |
| 7 | Keep using Q and normal attacks | Maintain pressure while your cooldowns recover |
This isn't a fixed combo you should follow against every opponent.
For example, you might need to save for an important defensive ability.
Or you might want to use before committing to damage if your opponent starts attacking aggressively.
The important thing is understanding how your abilities work together.
Use Frazzle Before Your Strongest Damage
makes your opponent more vulnerable, so you want to get as much damage as possible during its duration.
If you activate and then spend several seconds running away, you're losing most of its value.
Try to use it when you're already close enough to continue attacking.
You can combine with for additional damage.
And when your opponent is below 50% Health, becomes even more dangerous because it can reduce their resistances further.
This creates a good opportunity to finish someone before they recover.
However, be careful against opponents with strong damage immunity.
If they activate something like 's , you might want to wait until the protection expires before using your strongest damage combination.
Keep Using Normal Attacks
This is probably the most important thing to learn with .
gives you faster normal attacks with additional range after casting spells.
So even though we're playing a magical weapon, normal attacks are a major part of our damage.
Try to develop a rhythm where you're constantly alternating between spells and normal attacks.
For example, you can use , attack, cast , and continue attacking.
Once is available again, repeat the process.
You don't need to overcomplicate it.
Just remember that your normal attacks are part of your damage rotation, not something you only use when everything is on cooldown.
Don't Forget Your Defensive Abilities
Because this build deals good damage, it's easy to get carried away and forget that we don't have much healing.
You can't afford to take unnecessary damage.
That's why I recommend paying attention to when your opponent activates their offensive abilities.
For example, if someone commits to a strong melee damage combination, you can respond with .
If they're about to activate an important buff, you can use .
And if things get dangerous, you have to reposition and for additional protection.
Don't wait until you're almost dead before thinking about defense.
Knowing When to Disengage
Since we don't have much sustain, extended fights can become dangerous.
For example, if your opponent has significantly better healing, they might eventually outlast you even if you're dealing more damage at the beginning.
Try to recognize when the fight isn't going your way.
If you've already used , , and but your opponent still has plenty of Health and all their defensives available, think carefully before continuing.
Sometimes it's better to create distance and wait for your cooldowns rather than commit to a fight you can't finish.
3. Equipment and Defensive Abilities
The rest of our equipment is designed to increase our damage while giving us enough protection to survive direct fights.
| Equipment | Ability | Main Purpose |
|---|---|---|
| Passive bonuses | Increased damage at the cost of higher Energy usage | |
| Increased damage and resistance reduction | ||
| Defense and damage reflection | ||
| Movement speed and cooldown reduction | ||
| Automatic defense when Health gets low |
Muisak
For our off-hand, we're using .
It increases our damage, making it a good option for this aggressive setup.
Since we're combining with repeated spells and normal attacks, the additional damage is extremely useful.
However, has one important downside.
It also increases our Energy costs.
This means that if you're constantly using abilities without paying attention to your Energy, you can run into problems during longer fights.
Try to avoid wasting when you don't have a target.
And since we're using , make sure you're getting value out of your normal attacks instead of constantly casting spells.
Alternative: Mistcaller
If you prefer shorter cooldowns, is another useful off-hand.
It allows you to use your abilities more frequently, but you lose the additional damage from .
For this particular aggressive setup, I prefer because the extra damage is valuable when you're trying to finish opponents.
However, is a reasonable option if you prefer more frequent ability usage.
Stalker Hood
For our helmet, we're using .
This ability increases the damage you deal for a short duration.
It also affects nearby enemies, revealing invisible targets and reducing the resistances of opponents who are below 50% Health.
This makes it particularly useful for finishing low-health players.
For example, if you manage to bring someone below 50% Health, you can activate and continue attacking with and your empowered normal attacks.
If is also available, you can combine the effects to make your opponent much more vulnerable.
However, there's something important to remember.
The resistance reduction from only applies to enemies below 50% Health when they're hit by the ability.
Against healthier opponents, you still receive the damage bonus, but you won't get the same resistance reduction.
Another important thing is its limited range.
You need to be close enough to affect your opponent.
That's why I recommend paying attention to your positioning instead of activating it while your target is far away.
Habo Tip: You don't always need to wait until your opponent is below 50% Health to use . The damage bonus is still useful earlier, but getting the resistance reduction against a low-health opponent can make it much easier to finish them.
Assassin Jacket
For our chest, we're using .
It increases our damage resistances and reflects part of the damage we receive.
This is extremely useful because our build doesn't have much natural healing.
Against melee opponents, can help us survive while punishing them for continuing to attack.
For example, if someone activates an important offensive ability and starts dealing damage, you can use to reduce the damage you take.
And since they're damaging you, they'll also receive reflected damage.
However, is only useful while it's active.
Try not to use it too early when your opponent isn't actually attacking.
You want to activate it when you expect meaningful incoming damage.
Ambush (Alternative)
Since we're wearing , we can also switch to .
turns us invisible for a short duration and allows us to build a damage bonus for our next attack after revealing ourselves.
This can be useful for preparing burst damage or waiting for important cooldowns.
For example, if you're fighting someone who relies heavily on targeted abilities, you might be able to use to avoid some of their pressure.
You can also use it to prepare an attack when becomes available again.
However, you're giving up 's protection and damage reflection.
| Chest Ability | Best Use |
|---|---|
| Default PvP, direct fighting, and surviving damage | |
| Repositioning, avoiding targeted pressure, and preparing burst |
Personally, I recommend keeping as the default for this particular setup.
Assassin Shoes
For our boots, we're using .
This gives us movement speed and additional cooldown recovery.
Both are useful because we want to keep and available as frequently as possible.
also gives us some mobility, which helps when fighting opponents who are trying to kite.
However, remember that this is our main movement ability.
If you use your boots immediately at the beginning of a fight, you might not have them available when your opponent tries to escape.
Try to pay attention to their movement abilities before committing yours.
Swift Cut (Alternative)
also have access to .
This allows you to dash behind a targeted enemy while dealing damage.
It's a useful option when you want stronger chasing potential.
For example, if your opponent is trying to escape, you can use to close the distance and continue dealing damage.
However, requires an enemy target.
You can't use it to freely dash toward an empty location.
And since we're using a weapon without much built-in mobility, giving up can make escaping certain situations harder.
| Boots Ability | Best Use |
|---|---|
| General roaming, cooldown reduction, and flexible movement | |
| Aggressive chasing and closing distance to a target |
For general solo roaming, I'd keep selected.
Martlock Cape
For our cape, we're using .
Its automatically increases your defenses when your Health drops low enough.
This is useful because we don't have a dedicated healing ability.
If an opponent deals a lot of damage, can help you survive long enough to finish them or create some distance.
However, don't treat as a .
It doesn't directly recover your Health.
It simply helps you take less damage while its defensive bonus is active.
And since it activates automatically, you don't always get to choose when it triggers.
That's why it's important to use properly rather than depending entirely on your cape.
4. Food and Potions
For this setup, we're using and Major Poison Potions.
Both are focused on increasing our damage rather than sustain.
| Consumable | Main Purpose |
|---|---|
| Increased damage | |
| Additional damage against opponents | |
| (Alternative) | Health recovery during fights |
| (Alternative) | Damage and faster out-of-combat Health regeneration |
Beef Stew
is a straightforward food choice.
It increases the damage you deal, which works extremely well with this build.
We're already using and to increase our offensive pressure, so the additional damage from makes the setup even more aggressive.
And since makes our normal attacks stronger, the damage bonus is useful throughout the entire fight.
For direct PvP, I recommend keeping selected.
Major Poison Potion
For our potion, we're using Major Poison Potions.
They give us another source of damage against enemy players.
This works particularly well when you combine the potion with and .
For example, if your opponent is already vulnerable, throwing a can help you finish the fight before they recover.
However, I wouldn't recommend wasting Poison Potions on regular mobs.
We already have enough damage from and normal attacks to clear most basic enemies.
Save them for PvP or difficult enemies where the extra damage matters.
Major Healing Potion (Alternative)
If you want more sustain, Healing Potions are a good alternative.
This build doesn't have any direct healing from its weapon or armor, so having a can make longer fights much more manageable.
However, you're giving up the additional damage from Poison Potions.
Personally, I'd keep Poison Potions for aggressive PvP when you're comfortable with the build.
But if you're still learning or constantly losing close fights, Healing Potions can make the setup much more forgiving.
Avalonian Beef Stew (Alternative)
If you're doing a mixture of PvE and PvP, is another useful option.
It increases your damage while also improving your Health regeneration outside combat.
This makes it easier to recover between fights.
However, remember that the additional regeneration is for out-of-combat recovery.
It doesn't provide direct healing while you're actively fighting another player.
5. Matchup Tips
can be particularly strong against opponents who rely on purgeable buffs.
However, you still need to be careful against builds with better mobility, sustain, or strong burst damage.
| Opponent | What I Recommend |
|---|---|
| Save for when purgeable | |
| Buff-based damage builds | Use to remove important offensive buffs |
| Melee Brawlers | Use when they commit to damage |
| Burst Builds | Save and use to disrupt their combo |
| Healing Builds | Use and time 's silence against important casts |
| Highly Mobile Builds | Save and don't waste your purge |
| Reflect Builds | Avoid attacking into reflection unless you can safely remove or outlast it |
Against Mercenary Jacket
One of the best things about is its ability to remove important enemy buffs.
For example, against , can be useful for removing when the buff is purgeable.
This can make a huge difference because your opponent might be relying on that ability to recover Health.
However, you need to time your E properly.
If you use before they activate , they can simply use it afterward.
Try to recognize when your opponent activates their important abilities and respond at the right moment.
Against Melee Brawlers
Against melee opponents, is extremely useful.
Since they need to come close to deal damage, you can use and normal attacks to maintain pressure while keeping available for their strongest damage.
For example, if someone activates a powerful offensive ability, use to increase your protection and reflect some of the damage.
You can also use to remove important buffs or interrupt their combination.
However, don't assume you can outlast every melee build.
Some weapons have considerably better sustain than .
If your opponent is recovering more Health than you're dealing, you need to be careful about continuing the fight.
Against Burst Builds
Against weapons that rely on one big damage combination, can be extremely valuable.
Its silence can interrupt or delay certain abilities, and the purge can remove important buffs.
You also have for additional protection.
The difficult part is timing your defenses correctly.
For example, if you use before your opponent starts dealing damage, they might simply wait for it to expire.
Try to recognize when they're actually committing to their burst.
And remember that you don't need to use every defensive ability at once.
Sometimes is enough to stop their combination.
Against Healing Builds
Healing builds can be difficult because we don't have much sustain ourselves.
Our main advantage is that we can deal strong damage while reducing the enemy's defenses.
makes them more vulnerable, and can help finish opponents below 50% Health.
You can also use to silence important healing casts.
However, the silence won't permanently stop their healing.
You need to take advantage of the short window to deal meaningful damage.
If your opponent consistently heals back everything you deal, continuing the fight indefinitely is probably not a good idea.
Against Highly Mobile Builds
These fights can be difficult because doesn't have much built-in mobility.
We have , but weapons like or can cover distance much more frequently.
Try not to waste your boots immediately.
You might need them to follow an opponent after they use their movement.
And don't use just because someone is running away.
Unless you can hit them and remove an important movement speed buff, you might be wasting one of your strongest abilities.
If someone decides to escape and you don't have enough mobility to catch them, sometimes it's better to let them go.
Against Damage Reflection
Be careful against opponents using damage reflection.
Since a large part of our damage comes from repeated normal attacks, you can end up taking significant reflected damage if you keep attacking blindly.
If your opponent activates a reflect ability, consider stopping your attacks until it expires.
You can also use if the particular defensive buff is purgeable and you have a good opportunity to remove it.
However, not every defensive effect can be purged.
Make sure you understand what your opponent is using before committing.
6. PvE and Open World Roaming Tips
is also capable of clearing solo PvE.
is particularly useful against groups because it can hit multiple enemies and apply Arcane Charges.
However, the build is mainly designed around aggressive PvP, so there are faster options if your only goal is farming mobs.
Clearing Groups of Mobs
Here's a simple way to approach regular mob packs.
| Step | What to Do | Why |
|---|---|---|
| 1 | Group a few mobs together | Allow to bounce between enemies |
| 2 | Use | Deal damage and apply Arcane Charges |
| 3 | Follow with normal attacks | Consume charges and use |
| 4 | Use on stronger enemies | Increase damage against important targets |
| 5 | Continue using Q and normal attacks | Finish the group efficiently |
| 6 | Save when necessary | Keep your purge and silence available for PvP |
The important thing is making sure you're getting value from 's bouncing effect.
If you can hit several enemies with one cast, you'll deal more damage and apply Arcane Charges to multiple targets.
You can then use other direct damage to consume those charges.
And since increases your normal attack speed and range, you can keep attacking between abilities.
Fighting Stronger Mobs
Against stronger enemies, becomes particularly useful.
Its defense reduction helps you deal more damage throughout the fight.
You can also use when you're ready to pressure the enemy, especially once its Health drops below 50%.
However, be careful about using everything at once.
If you're in a dangerous area and another player appears, you might need or to defend yourself.
You don't necessarily need to maximize your damage against every PvE enemy.
Sometimes clearing a little more slowly while keeping your important abilities available is the safer choice.
Magic Shock (Alternative Q)
If you prefer a different playstyle, you can consider switching to .
gives you another ranged damage ability with an interrupt.
This can be useful against opponents who rely on interruptible casting or when you want more direct control.
However, you're giving up 's Arcane Charges and bouncing damage.
For this particular aggressive setup, I recommend keeping because it works well with and our other damage abilities.
| Q Ability | Best Use |
|---|---|
| Default PvP and PvE damage | |
| Situational interrupts and direct ranged pressure |
Choosing Your Fights
This build can deal a surprising amount of damage, but you still need to choose your fights carefully.
It's particularly good against opponents who rely on important purgeable buffs.
However, against weapons with much better mobility or sustain, you might struggle to finish the fight.
Before engaging, try to check your opponent's equipment.
Pay attention to their chest ability, boots, and weapon.
If you see an important buff you can remove with , that's a good opportunity.
But if someone has several ways to escape and no meaningful purge target, think carefully before committing.
Recover Between Fights
Since we're using and Poison Potions, we don't have much additional healing.
That's why I recommend letting your Health recover before engaging another player.
If you're mainly roaming and farming, can help with out-of-combat regeneration.
You should also check your cooldowns.
Starting another fight while , , and your boots are all unavailable can put you in a dangerous position.
7. Common Beginner Mistakes
| Mistake | What You Should Do Instead |
|---|---|
| Using without normal attacks | Weave normal attacks between spells |
| Forgetting Arcane Charges | Follow Q with direct damage to consume them |
| Using without following up | Deal damage during its defense reduction window |
| Wasting immediately | Save it for important purgeable buffs or interrupts |
| Using while too far away | Get close enough to affect the opponent |
| Expecting resistance reduction above 50% Health | Use below 50% when you want the extra debuff |
| Activating too early | Wait until your opponent commits to damage |
| Using immediately | Save it when you might need to chase or escape |
| Ignoring 's Energy costs | Avoid wasting spells and use your normal attacks |
| Fighting sustain builds indefinitely | Recognize when you can't overcome their healing |
| Depending entirely on | Use your other defensive abilities properly |
| Using Poison Potions on weak mobs | Save them for PvP and difficult enemies |
8. Final Tips
Weave normal attacks between your spells. is one of the most important parts of this build, so don't ignore it.
Consume Arcane Charges. applies charges that deal extra damage when triggered by another direct damage source.
Use before committing damage. The defense reduction can make a big difference, especially when combined with .
Don't waste . Its purge and silence are extremely valuable against opponents who rely on important buffs.
Use at the right moment. You get a damage bonus whenever you activate , but the resistance reduction only applies to enemies below 50% Health.
Activate when your opponent commits. The additional protection and reflected damage can help you survive difficult trades.
Watch your Energy. increases your damage but also your Energy costs, so don't waste abilities unnecessarily.
Don't forget your low sustain. This setup is focused on damage, so you need to be careful against opponents who can recover a lot of Health.
Carry Healing Potions if necessary. Poison Potions are excellent for aggressive PvP, but Healing Potions can make the build easier to play.
Choose your fights carefully. can punish buff-dependent builds extremely well, but it doesn't automatically win every matchup.
Overall, is an excellent choice if you enjoy aggressive solo PvP and want a weapon that feels different from the usual damage builds.
You have strong pressure from and , plenty of damage amplification from and , and one of the most useful purge and silence combinations in the game.
The biggest challenge is learning when to use and getting comfortable with your spell and normal attack rotation.
But once you understand those mechanics, this build can deal a surprising amount of damage while having some really good options for countering enemy abilities.