Fire Staff Corrupted
One of the best Fire Staff builds in Albion Online for Corrupted Dungeons, with strong sustained damage, good defensive tools, and several spell options that let you adapt to different matchups.
Your equipment


Copy an item name to search for it in game, or tap the chart to open the exact build item page with market prices.
Build Guide Contents9 sections
How to play this Fire Staff build?
is one of the strongest weapons for Corrupted Dungeons if you enjoy dealing a lot of damage while having several defensive abilities to survive difficult fights.
However, there's one important thing you need to understand about this particular setup.
We're not relying on mobility to win fights. We're using constant damage, crowd control, healing, and defensive cooldowns to outtrade our opponents.
Our main damage comes from and .
allows us to continuously pressure enemies while applying stacking burn damage. provides a powerful burst attack that becomes stronger the longer we channel it.
We're also using to create distance against melee opponents, to punish incoming damage, and to recover a large amount of Health and Energy.
, , and provide even more defensive options.
And since we're using and , our maximum Health is considerably higher than a regular setup.
This works particularly well with because its healing scales with our maximum Health.
However, having several defensive abilities doesn't mean we should activate everything immediately.
The biggest part of learning this build is understanding when to keep dealing damage, when to use your defensive abilities, and when it's safe to channel .
If you get comfortable with those three things, becomes an extremely strong weapon for Corrupted Dungeons.
1. Main Weapon Abilities
Here's our default ability setup for PvP.
| Slot | Ability | Main Purpose |
|---|---|---|
| Q | Consistent damage and stacking burns | |
| W | Crowd control and creating distance | |
| E | Powerful burst damage and knockback | |
| Passive | Faster casting after repeated spells |
One of the biggest advantages of is having several useful Q and W alternatives.
You can switch depending on whether you're fighting a melee opponent, a ranged player, or clearing mobs.
However, I recommend learning the default setup first.
Fire Bolt (Q)
is our main Q ability, and you'll be using it constantly throughout a fight.
It launches a fiery projectile at your target, dealing magical damage and applying a burning effect.
The burn deals damage over time and can stack up to five times.
But the biggest advantage of is that it doesn't have a cooldown.
You can continue casting it as long as you have enough Energy.
This makes it incredibly strong against opponents who want to stand close and trade damage.
For example, if someone is playing a melee weapon and needs to approach you, you can start using before they're close enough to attack.
By the time they reach you, they might already have several burning stacks.
And since the burning damage continues over time, you'll keep applying pressure while using your defensive abilities.
Maintaining Burning Stacks
Ideally, you want to maintain your burning stacks throughout the fight.
Each successful refreshes the pressure and helps you build toward the maximum stacks.
However, that doesn't mean you should stand still and cast continuously against every opponent.
For example, if you're fighting someone with a strong burst ability, taking several additional hits just to maintain your burning stacks might not be worth it.
Sometimes it's better to stop attacking, use , and reposition.
You might lose some offensive pressure, but you'll survive long enough to start dealing damage again.
Your goal is to maintain as much damage as possible without taking unnecessary damage in return.
Fire Bolt and Aggressive Caster
works extremely well with .
After using four spells, reduces your cast times for a short duration.
Since has no cooldown, you can activate this passive frequently during longer fights.
And once the casting speed bonus becomes available, you can apply significantly more damage.
However, don't forget your Energy.
Repeatedly casting consumes Energy, so you need to pay attention during extended engagements.
Fortunately, can help recover Energy when you get an opportunity to use it.
When to Use Fire Bolt
| Situation | Recommendation |
|---|---|
| Melee opponent approaching | Start stacking burns before they reach you |
| Opponent wants to brawl | Maintain constant pressure |
| Enemy is using dangerous abilities | Prioritize defense and repositioning |
| Opponent is outside your range | Consider |
| You're low on Energy | Find a safe opportunity for |
| Enemy activates damage reflection | Be careful about continuing direct damage |
Habo Tip: is incredibly strong, but don't get tunnel vision and keep casting while your opponent is preparing their strongest attack. Sometimes delaying one Q cast is much better than wasting a defensive cooldown afterward.
Searing Flame (Alternative Q)
is one of the most important alternatives you should learn.
Unlike , is a directional skill shot with longer range.
This makes it particularly useful against ranged opponents.
For example, if you're fighting a or player who constantly stays outside your range, allows you to pressure them from farther away.
However, there's an important difference.
requires accuracy to get the most out of its damage combination.
You can't simply select an opponent and expect every attack to connect.
You need to predict their movement and aim properly.
Understanding the Searing Flame Combo
has a combination mechanic.
The first three attacks fire projectiles.
If you successfully hit an enemy, you can progress through the sequence.
The fourth attack becomes Flame, which deals considerably more damage.
| Combo Stage | Ability | Purpose |
|---|---|---|
| 1 | Initial damage and burning | |
| 2 | Continue pressure | |
| 3 | Prepare the final attack | |
| 4 | Flame | Stronger finishing projectile |
The final attack is one of the biggest reasons to use this ability.
However, if you repeatedly miss your projectiles, you'll struggle to complete the combination.
That's why I recommend practicing before using it against experienced ranged players.
How to Land Searing Flame Consistently
Try to watch how your opponent moves.
Some players constantly change direction, while others follow predictable patterns.
For example, if someone is moving around a corner, you can aim toward the location they're about to reach.
You can also wait until an opponent begins using an ability that makes their movement more predictable.
However, don't spend so much time waiting for a perfect shot that you stop applying pressure entirely.
Sometimes taking a reasonable shot is better than doing nothing.
Fire Bolt or Searing Flame?
| Q Ability | Main Advantage | Recommended Use |
|---|---|---|
| Strong sustained damage and stacking burns | Melee and mid-range fights | |
| Longer range and stronger final combo hit | Ranged opponents | |
| Area damage against grouped enemies | PvE clearing |
Personally, I'd keep against most melee builds.
Against opponents who constantly stay outside its range, switch to .
Wall of Flames (W)
is our default W ability.
It's also one of the most important defensive abilities in the entire build.
When activated, it creates a wall of fire in front of your character.
Enemies touching the wall receive burning damage and briefly flee from you.
This makes particularly strong against melee opponents.
For example, if someone uses a dash to get close, you can place between yourself and the opponent.
If they try to walk through it without crowd control protection, they'll be affected by the fear.
This gives you more time to continue casting or create additional distance.
However, there's one important thing you need to understand.
isn't a physical barrier that stops every opponent.
Players with crowd control immunity can potentially pass through it.
Others can simply move around the wall.
That's why positioning is extremely important.
Where to Place Wall of Flames
You don't want to place randomly.
Try to position it somewhere your opponent needs to cross.
For example, imagine you're fighting inside a narrow Corrupted Dungeon corridor.
If you place across the passage, your opponent might need to use an important mobility ability or crowd control immunity to reach you.
This is much stronger than placing the wall somewhere they can easily walk around.
The same idea works when you're trying to retreat.
Instead of placing directly on your opponent, place it between you and the direction they're approaching from.
That way, they need to deal with the wall before reaching you.
Wall of Flames and Cultist Robe
This is one of the strongest defensive combinations in the build.
can restore a substantial amount of Health and Energy.
However, is a channeling ability, which means opponents can interrupt it.
helps us create enough distance to use more safely.
For example:
- Let your opponent commit an important movement ability.
- Place between yourself and the opponent.
- Move to a position where they can't immediately interrupt you.
- Activate .
- Recover Health and Energy while they struggle to reach you.
However, this combination isn't guaranteed to work against every weapon.
Some opponents have ranged interrupts.
Others might use crowd control immunity to cross .
Always consider your opponent's remaining abilities before committing to .
Don't Waste Wall of Flames
One of the biggest mistakes beginners make is using as soon as a melee opponent starts approaching.
You don't necessarily need to stop them immediately.
Sometimes you can continue dealing damage while they're still walking toward you.
Wait until they commit an important mobility ability.
Then use to punish that commitment.
If you activate it too early, they might simply wait until it disappears before engaging.
Fire Wave (Alternative W)
is another excellent defensive option.
It releases a cone of fire in front of your character, dealing damage and knocking enemies backward.
It also deals additional damage to enemies already affected by certain Fire Q abilities.
However, the most important part is the knockback.
can interrupt vulnerable channels and create distance immediately.
This makes it particularly useful against opponents who rely on interruptible abilities.
For example, if someone activates with , you can potentially use to interrupt their healing channel.
However, they need to be vulnerable to the knockback.
If they have suitable protection against forced movement, the interruption might not work.
Wall of Flames vs. Fire Wave
| W Ability | Main Advantage | Best Use |
|---|---|---|
| Creates a barrier opponents must respect | Default against melee | |
| Immediate knockback and channel interruption | Against channels and aggressive engages | |
| Area damage and self-cast movement speed | Primarily PvE |
is generally better when you want to prevent someone from approaching.
is better when you need to push someone away immediately or interrupt a vulnerable channel.
The important thing is choosing the correct ability for the matchup.
Fire Wave Against Aggressive Melee
can also be useful against melee opponents with strong offensive combinations.
For example, if someone reaches you and activates their main damage ability, can potentially push them away.
This might interrupt their pressure long enough for you to reposition or use another defensive ability.
However, be careful against opponents with multiple gap closers.
They might immediately return after the knockback.
That's why I generally prefer for the default setup.
But is absolutely worth learning.
Flame Blast (PvE Alternative)
is another useful ability, mainly for PvE.
You can cast it on an enemy, an ally, or yourself.
After a short delay, it creates an explosion that damages enemies around the target.
If the main target is an enemy, they also receive additional direct damage.
However, there's another useful interaction.
Casting on yourself provides a temporary movement speed bonus.
This can help with repositioning while clearing mobs.
For example, you can group several enemies, use , and continue moving while the explosion activates.
This makes it a good option for clearing Corrupted Dungeons.
However, for PvP, I recommend learning and first.
Those two abilities provide considerably more defensive utility against many opponents.
Pyroblast (E)
is our main burst damage ability.
When activated, you begin charging a powerful fire projectile.
The longer you channel, the stronger the damage becomes.
If you complete the full channel, also knocks enemies backward when it connects.
However, there's something very important you need to understand.
You don't need to fully channel every time.
Sometimes releasing it immediately is the correct decision.
Other times, you might want to hold it longer to deal maximum damage.
The biggest skill is recognizing which situation you're in.
Understanding Pyroblast Charge Time
can be released immediately or charged for up to approximately 1.2 seconds.
Its damage increases as you continue channeling.
A fully charged projectile also provides additional knockback.
| Charge | Main Advantage | When to Use |
|---|---|---|
| Immediate release | Fast damage without a long commitment | Under pressure or finishing |
| Partial charge | Stronger damage with less exposure | Regular trades |
| Full charge | Maximum damage and knockback | Safe burst windows |
Although 1.2 seconds doesn't sound very long, that's enough time for an experienced opponent to react.
For example, if they have an interrupt available, they might stop your channel.
Or if they're highly mobile, they might avoid the projectile.
That's why I recommend learning when to release early.
Pyroblast Can Be Interrupted
This is one of the biggest weaknesses of the ability.
While charging , you're channeling.
If your opponent interrupts the channel, you can lose your damage opportunity.
For example, against weapons with reliable stuns or knockbacks, charging carelessly can be dangerous.
Try to recognize whether your opponent has an interrupt available.
Sometimes you should wait for them to use it first.
Other times, you can simply release early before they have a chance to interrupt.
The Projectile Can Still Be Avoided
Even though aims toward your selected enemy, the projectile can still be body-blocked or avoided with well-timed movement.
This is particularly important in Corrupted Dungeons.
If there are mobs between you and your opponent, they might intercept the projectile.
And if the enemy has an important dash available, they might avoid it entirely.
That's why positioning matters.
Try to get a clear line toward your opponent before committing to a full .
Using the Knockback Defensively
A fully charged also knocks enemies backward.
This can be useful against melee opponents.
For example, if someone gets close and has already used their interrupt, you can fully charge and use the knockback to create distance.
However, don't rely on it against opponents protected from forced movement.
They might still take damage without being displaced.
You need to understand which defensive effects your opponent has available.
Don't Fire Into Reflection
can deal considerable damage.
However, that's also why you need to be careful against damage reflection.
For example, if your opponent activates with , firing your strongest into it can create a dangerous trade.
Sometimes it's better to wait for the defensive effect to expire.
And since has strong sustained damage from , you don't necessarily need to force every immediately.
Habo Tip: The strongest isn't always the one you fully charge. It's the one that actually connects when your opponent can't easily avoid or interrupt it.
Aggressive Caster (Passive)
For our passive, we're using .
After every four spells, your cast times are reduced by 40% for three seconds.
This works extremely well with because we're casting it frequently.
Once the passive activates, you can cast much faster.
That creates additional damage pressure.
However, remember that the effect doesn't last forever.
Try to get value from the temporary casting speed bonus.
You can also consider the timing when preparing .
Alternative: Furious
is another option if you prefer additional damage.
It increases your damage after repeatedly casting spells.
However, I prefer for this setup because faster casting helps us maintain more consistent pressure.
It's particularly useful against opponents who give us opportunities to keep using .
2. How to Fight With Fire Staff
The main goal is to deal damage while using your defensive abilities to survive the opponent's most dangerous attacks.
Unlike highly mobile weapons, doesn't have a reliable weapon dash.
That means your positioning and defensive timing are extremely important.
Basic PvP Rotation
Here's an example of how I'd approach a regular melee fight.
| Step | Ability | What to Do |
|---|---|---|
| 1 | Start applying burning stacks | |
| 2 | Continue damage while the opponent approaches | |
| 3 | Create distance when they commit | |
| 4 | Continue applying pressure | |
| 5 | Deal burst when you have a safe opportunity | |
| 6 | Protect yourself against committed damage | |
| 7 | Recover Health and Energy when safe | |
| 8 | Survive dangerous burst | |
| 9 | Additional protection when necessary |
This isn't a fixed rotation that you should always follow.
Sometimes your opponent might immediately engage with a powerful ability.
In that situation, you might need before you can start dealing much damage.
Other times, your opponent might play defensively and give you plenty of opportunities to cast .
The important thing is adapting to what they're doing.
The Most Important Rule: Don't Panic
This build has several defensive abilities.
But that can actually become a problem if you're not comfortable with them.
For example, imagine someone jumps on you and starts dealing damage.
You immediately activate , , and .
Now you have several defensive effects active simultaneously.
Your opponent might simply stop attacking or create distance.
A few seconds later, all your defensive abilities expire.
And now you're in a much worse position.
You want to use the minimum amount of defense necessary to survive the current damage window.
For example, if is enough, save .
If creates enough distance, you might not need at all.
This is one of the biggest things that separates experienced players from beginners.
Understanding Damage Windows
Most weapons in Albion Online have moments when they're particularly dangerous.
For example, some melee weapons deal their strongest damage after activating several buffs.
Others rely on one powerful E ability.
You want to recognize these moments.
When your opponent is preparing their main damage, you should consider using a defensive ability.
Once their important cooldowns are unavailable, you can become more aggressive.
For example:
- Start pressuring with .
- Let your opponent commit an important offensive ability.
- Respond with or .
- Continue casting while their main damage is unavailable.
- Use when you have a reliable opportunity.
- Create space for if you need recovery.
This is the general pattern I recommend learning.
When to Stop Casting
One of the biggest mistakes beginners make with is continuing to cast when they should be moving.
doesn't have a cooldown, so it's tempting to keep pressing Q.
However, you're still standing in place during the cast.
Against opponents with dangerous area damage or skill shots, this can make you an easy target.
Sometimes moving for a second and avoiding an important ability is worth much more than another .
For example, if your opponent is preparing a powerful area attack, move out of its path first.
Then continue dealing damage.
You don't need to sacrifice your Health to maintain perfect offensive uptime.
The Short Damage Trade
Against certain opponents, you won't have time to cast continuously.
For example, highly mobile weapons might repeatedly engage, deal damage, and create distance.
Against those players, you need to be comfortable taking shorter trades.
You can land one or two Fire Bolts, use a quick , and then reposition.
If they commit again, respond with or another defensive ability.
The goal is to deal enough damage during each opportunity without giving your opponent free attacks.
The Full Damage Trade
Against slower melee opponents, you might have more opportunities to stand still and attack.
In those situations, becomes extremely powerful.
You can build burning stacks, activate , and continue dealing damage.
If your opponent remains close enough, you can follow up with .
However, don't forget your defensive equipment.
If they're using a strong damage buff, you might need even when you're winning the damage race.
Don't confuse dealing more damage with automatically winning the fight. You still need to survive until the opponent dies.
3. Equipment and Defensive Abilities
The rest of our equipment is designed to provide a large Health pool, reliable healing, and several ways to survive dangerous damage.
| Equipment | Selected Ability | Main Purpose |
|---|---|---|
| Passive bonus | Increased maximum Health | |
| Damage resistance and reflection | ||
| Health and Energy recovery | ||
| Temporary Health and movement speed | ||
| Automatic defense at low Health | ||
| Armor Passives | , , | Additional stats |
Taproot
For our off-hand, we're using .
increases our maximum Health.
This is particularly useful because we're using .
The healing from is based on maximum Health, meaning that a larger Health pool also increases the amount of Health we can recover from its percentage-based healing.
And since we're also using , we can get considerably more maximum Health than a regular setup.
However, there's an important distinction.
doesn't provide healing by itself.
It increases our maximum Health, which makes us harder to kill and improves the value of percentage-based healing.
The actual healing comes from .
Why Maximum Health Matters
Imagine two players both using .
One player has a regular Health pool, while the other has significantly more maximum Health from and .
Because heals based on maximum Health, the second player can recover more Health from the same percentage-based healing.
This is one of the most important interactions in the build.
However, don't assume that more maximum Health automatically means you can ignore incoming damage.
Against strong burst combinations, you still need to use your defensive abilities correctly.
Hunter Hood
For our helmet, we're using .
temporarily increases your damage resistances while reflecting incoming damage.
This is particularly useful against opponents who commit to dealing a lot of damage quickly.
For example, if a melee opponent activates a strong offensive ability and starts attacking, you can use .
You'll take less damage while potentially reflecting part of their pressure back at them.
However, there's something important you need to understand.
is much less valuable if your opponent simply stops attacking.
That's why timing is so important.
When to Activate Retaliate
Try to use it when your opponent is already committed.
For example, if someone has started their main damage combination, activating can force them into an uncomfortable decision.
They can continue attacking and potentially take reflected damage.
Or they can stop attacking and waste part of their offensive window.
Both outcomes can be useful.
However, if you activate before they begin attacking, they might simply wait until it expires.
Retaliate Against Purge
Be careful against opponents using or another reliable Purge.
is a purgeable defensive effect.
If your opponent removes it immediately, you might lose one of your strongest defensive tools.
That's why I recommend inspecting your opponent's equipment before engaging.
If they have Purge, consider forcing it before relying on .
You can also use your other defensive abilities to survive.
Cultist Robe
is probably the most important defensive piece in this build.
We're using , which allows us to channel a healing effect while floating above the ground.
During the channel, we recover Health and Energy while gaining additional damage resistance.
This makes it extremely strong for longer fights.
However, there's one significant weakness.
can be interrupted by suitable enemy abilities.
That's why you shouldn't activate it randomly.
You need to understand when it's safe to heal.
How Levitate Works
restores a percentage of your maximum Health and Energy repeatedly during the channel.
This is why and are so valuable.
More maximum Health means more potential Health recovery.
And since we're using constantly, the Energy recovery also helps during longer fights.
However, ordinary Healing Cast modifiers don't increase 's percentage-based healing.
The main interaction is with maximum Health.
The Safe Healing Window
Ideally, you want to activate after your opponent has already used their important movement or interrupt abilities.
For example, imagine you're fighting a melee weapon.
You take some damage while applying pressure.
Your opponent uses their main dash to reach you.
You respond with and create distance.
Now they're temporarily unable to reach you easily.
That can be an excellent opportunity to activate .
However, check whether they have another interrupt available.
If they can still reach you or interrupt from range, the channel might not be safe.
Don't Wait Until You're Almost Dead
This is another important point.
If you wait until you're extremely low Health before using , you might die before recovering enough Health.
Sometimes it's better to use it earlier.
For example, if you're missing a significant amount of Health and your opponent has just used their main interrupt, that might be the perfect opportunity.
You don't necessarily need to wait until the last possible moment.
The goal is to get a meaningful healing channel, not to see how low you can get before activating it.
Don't Waste Levitate at Full Health
On the other hand, activating while you're barely missing any Health can also waste its value.
You want to recover enough Health that the ability makes a real difference.
Try to pay attention to both your missing Health and the opponent's available interrupts.
Alternative: Frost Shield
also has access to .
This is another defensive ability that increases your resistances while reflecting part of incoming damage.
It can be useful against opponents who consistently interrupt .
However, you're giving up the substantial healing from .
For the main setup, I recommend keeping because its sustain is one of the biggest reasons to use this build.
Guardian Boots
For our boots, we're using .
temporarily increases your maximum and current Health while also increasing movement speed.
This gives us an excellent way to survive dangerous burst damage.
And since our build already has a large Health pool, the temporary Health increase can be substantial.
However, there's something you need to understand.
provides temporary Health rather than permanent healing.
Once the effect expires, you lose that temporary Health increase.
So don't treat like a .
When to Use Giant
I recommend saving for dangerous damage combinations.
For example, if your opponent activates their strongest burst ability, can help you survive.
The movement speed bonus also helps with repositioning.
However, don't activate too early.
If your opponent recognizes the effect and simply waits for it to expire, you've wasted one of your strongest defensive abilities.
Try to use it when they're actually committed to dealing damage.
Giant and Cultist Robe
Since temporarily increases maximum Health, it can improve the amount recovered by percentage-based healing while the Health bonus is active.
However, that doesn't mean you should automatically combine and every fight.
Sometimes you'll need to survive a dangerous attack later.
And sometimes is already enough on its own.
Try to manage the cooldowns separately.
Martlock Cape
For our cape, we're using with .
When your Health drops below its activation threshold, the cape automatically provides additional defensive protection.
This is extremely useful because you don't need to activate it manually.
However, there's an important limitation.
only activates when your Health gets low enough.
That means you shouldn't rely on it to prevent every dangerous burst combination.
If you know an opponent is about to deal a lot of damage, use your defensive abilities before it's too late.
is another layer of protection.
It's not a replacement for , , or good positioning.
Don't Rely on Martlock Cape Alone
Sometimes beginners see activate and assume they can continue standing still and attacking.
But the defensive effect doesn't last forever.
If you're still taking damage and have no other abilities available, you can still die.
Try to use the protection to survive the dangerous part of the fight and make a better decision afterward.
For example, you might need to create distance or find an opportunity to use .
4. Food and Potions
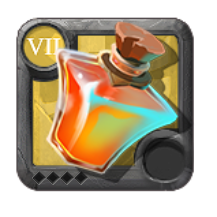
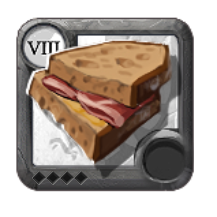
For our main consumables, we're using and .
Both fit the defensive playstyle of this build.
| Consumable | Main Purpose |
|---|---|
| Increased maximum Health | |
| Temporary Health and forced movement immunity | |
| Direct healing alternative | |
| Casting speed and cooldown reduction | |
| Additional damage |
Beef Sandwich
increases our maximum Health.
This works extremely well with and .
The additional Health makes us harder to kill while increasing the amount of Health we can recover through .
That's why we're using it instead of a more offensive food.
You might deal slightly less damage compared to , but the extra durability can be extremely valuable in Corrupted Dungeons.
However, remember that doesn't directly heal you during combat.
It's increasing the amount of Health you have available, not restoring lost Health.
Why Not Beef Stew?
is a perfectly reasonable alternative if you want more damage.
However, the main setup is designed around surviving difficult fights while using to deal consistent pressure.
Because we already have excellent damage, I prefer the additional Health from .
This is especially useful when you're still learning defensive cooldown management.
Major Gigantify Potion
For our potion, we're using .
It temporarily increases your maximum and current Health while making you immune to forced movement.
This is extremely useful against burst damage and certain knockback abilities.
For example, if an opponent is about to use a powerful attack that knocks you away, can protect you from that displacement while the effect is active.
However, there's one important distinction.
doesn't make you immune to all crowd control.
It protects against forced movement effects.
You can still be vulnerable to other types of crowd control, including certain stuns, silences, or interruptions.
That's why you shouldn't assume automatically guarantees a safe or channel.
When to Use Gigantify Potion
Try to use it when you expect significant damage or need the specific forced movement protection.
For example, against an opponent with a dangerous knockback combination, it can help prevent them from disrupting your positioning.
However, don't automatically activate it together with .
Both provide substantial temporary Health.
Sometimes using one is enough.
If you save the other, you'll have another defensive option available later.
Major Healing Potion Alternative
If you prefer more direct recovery, is another option.
It restores Health during combat.
However, this build already has substantial healing from .
That's why I generally prefer .
The additional temporary Health and forced movement protection help against dangerous damage combinations.
| Potion | Main Advantage | Best Use |
|---|---|---|
| Temporary Health and displacement protection | Default build | |
| Direct Health recovery | Additional sustain | |
| Temporary damage reduction | Dangerous burst matchups |
5. Matchup Tips
is strong in Corrupted Dungeons because you can change your Q and W depending on what you're fighting.
However, that doesn't mean you need a completely different strategy for every individual weapon.
I recommend focusing on three main things:
Can your opponent stay close to you? Can they interrupt ? And do they have a defensive ability that can stop your damage?
Once you understand those three questions, most matchups become much easier to approach.
Quick Matchup Table
| Opponent | Q | W | What to Focus On |
|---|---|---|---|
| Melee Brawlers | Maintain damage and stop their engage | ||
| Punish normal attack damage with | |||
| Keep pressure while respecting their healing | |||
| Protect yourself from the execute | |||
| or | Watch mobility and burst | ||
| Use range and dungeon terrain | |||
| Avoid important crowd control | |||
| Other Fire Staffs | Manage and defensive cooldowns | ||
| Healing Builds | Pressure continuously and interrupt channels | ||
| Channeling Builds | Either | Save knockback for important channels |
These are starting recommendations, not fixed rules.
The exact opponent's equipment can change the matchup considerably.
Against Melee Brawlers
Against most melee opponents, I recommend and .
Your main advantage is dealing damage before they reach you.
Try to maintain burning stacks while they're approaching.
Once they use their important movement abilities, place to create distance.
If they manage to reach you and start dealing significant damage, can punish their commitment.
The biggest mistake is using every defensive ability immediately.
You want to force their cooldowns while keeping enough protection available for the next trade.
Against Ranged and Mobile Opponents
Against longer range weapons, becomes much more useful.
You can pressure opponents without constantly needing to move into range.
However, accuracy becomes important.
Try to predict movement and use dungeon corners to break line of sight when necessary.
can provide an additional defensive knockback, but it won't necessarily help you against someone who's already maintaining considerable distance.
The main thing is not chasing blindly.
Make your opponent move into a position where you can realistically deal damage.
Against Burst and Reflection
Against burst builds, defensive timing matters more than dealing as much damage as possible.
Save , , or for the opponent's dangerous damage window.
Against reflection, don't commit your strongest while the effect is active.
Wait for the defense to expire or force it before using your main burst.
And if your opponent has Purge, remember that some of your defensive buffs might not last their full duration.
Against Healing and Channeling Builds
Against healing builds, your main advantage is sustained damage.
Try to maintain pressure while keeping your burning stacks active.
If the opponent relies on an important interruptible channel, can be extremely valuable.
However, you need to save it for the right moment.
Using randomly for a little additional damage can mean losing the opportunity to interrupt a major healing ability afterward.
6. Corrupted Dungeon Strategy
is particularly effective in Corrupted Dungeons because you're fighting one opponent at a time.
You can inspect their equipment, adjust your abilities, and prepare your approach.
However, the dungeon itself still matters.
Hunter, Stalker, and Slayer
| Difficulty | PvP Rules | Recommended For |
|---|---|---|
| Hunter | Nonlethal | Learning abilities and matchups |
| Stalker | Full loot | Regular lethal 1v1 PvP |
| Slayer | Full loot | Experienced players |
If you're new to , I recommend starting in Hunter.
You can practice timing, placement, and healing without risking your equipment in PvP.
Once you're comfortable, move into Stalker.
PvE Setup
When clearing mobs, I recommend switching your Q and W.
| Slot | PvE Ability | Why |
|---|---|---|
| Q | Area damage against grouped mobs | |
| W | Additional area damage and movement speed | |
| E | Strong damage against tougher enemies | |
| Passive | Faster casting |
Burning Field
is excellent for clearing groups of mobs.
It deals damage at a targeted location while leaving burning ground behind.
Enemies standing inside the area continue taking damage.
This makes it useful against multiple mobs at once.
However, you need to position the field properly.
If enemies immediately leave the area, you'll lose much of its damage.
Try to group mobs before using it.
Flame Blast
is another useful PvE ability.
It creates an explosion around its target after a short delay.
You can also cast it on yourself to receive a temporary movement speed bonus.
This helps with repositioning.
For example, you can cast on yourself while approaching a group of mobs, then continue moving as the explosion activates.
However, remember that you might need or for PvP afterward.
Basic PvE Rotation
| Step | Ability | What to Do |
|---|---|---|
| 1 | Place area damage under grouped mobs | |
| 2 | Add another area damage source | |
| 3 | Focus a tougher enemy when safe | |
| 4 | Continue damage | |
| 5 | Reposition | Avoid dangerous mob abilities |
| 6 | Recover Health and Energy when necessary |
You don't need to use every ability against regular weak mobs.
Sometimes and are enough.
And since we're in Corrupted Dungeons, you should keep important defensive cooldowns available when an invasion is underway.
Switch Back to PvP Abilities
This is one of the easiest mistakes to avoid.
If you're clearing mobs with and , remember to switch back to your preferred PvP setup before fighting another player when spell changes are allowed.
Against melee opponents, you probably want and .
Against ranged opponents, you might prefer .
And against opponents with important interruptible channels, can be valuable.
Don't accidentally take a difficult fight using your PvE setup.
Use Dungeon Terrain Properly
Corrupted Dungeons contain narrow corridors, corners, obstacles, and environmental hazards.
All of these can affect your fight.
becomes particularly valuable in narrow passages.
For example, you can place it across a corridor and force a melee opponent to use an important ability to cross.
You can also use corners to break line of sight against ranged opponents.
However, be careful about your own positioning.
Since this build has limited mobility, getting trapped against a wall can be dangerous.
Try to fight in areas where you have enough room to reposition.
Don't Fight While Surrounded by Mobs
Another common mistake is fighting another player while several mobs are attacking you.
Even though this build has excellent defensive abilities, taking unnecessary damage from mobs can completely change the fight.
Whenever possible, try to move toward a safer area.
However, don't waste every important cooldown trying to clear mobs while the opponent is already approaching.
You want , , and available for the actual PvP fight.
Inspect Before Fighting
If you have an opportunity to inspect your opponent, pay attention to these things.
| Check | Why It Matters |
|---|---|
| Weapon | Identifies their damage and mobility |
| Helmet | Shows Purge, reflection, or interrupts |
| Chest Armor | Reveals healing and defensive abilities |
| Shoes | Helps predict chasing and escaping |
| Potion | Indicates extra healing, burst, or protection |
| Item Power | Helps judge whether the fight is favorable |
You don't need to memorize every ability in the game immediately.
Start by recognizing the most important ones.
For example, knowing whether someone has Purge or an interrupt can completely change how you use your defensive abilities.
When to Break Crystals
If you're invaded by an opponent you really don't want to fight, destroying the required Demonic Shards gives you a way to end the invasion.
For example, if you're carrying valuable loot and facing a particularly unfavorable matchup, you don't necessarily need to force the fight.
However, you need to decide early.
isn't particularly mobile.
If you wait until you're already almost dead, escaping or destroying crystals becomes much harder.
Sometimes avoiding the fight is the correct decision.
7. Advanced Defensive Timing and Positioning
This is where the build becomes particularly interesting.
You have several ways to survive, but you need to understand what each ability is supposed to accomplish.
Defensive Cooldown Priority
Here's how I recommend thinking about your abilities.
| Situation | First Option | Backup |
|---|---|---|
| Melee opponent approaching | ||
| Strong direct damage | ||
| Need to recover Health | after creating space | Reposition until safe |
| Dangerous burst combination | ||
| Important knockback | Reposition | |
| Low Health | Existing Martlock protection | or other available defense |
| Opponent has Purge | Positioning and cooldown baiting | Non-purge-dependent defenses |
This isn't a fixed priority list for every situation.
Sometimes you'll need to use two abilities together.
But the goal is to avoid wasting everything on the first engage.
Understanding Defensive Overlap
Defensive overlap happens when you activate several abilities that solve the same problem.
For example, imagine someone activates a moderate damage ability.
You use .
Then immediately activate .
And then use .
You've used three powerful defensive abilities to deal with one damage window.
Your opponent might simply disengage and wait.
Once your abilities expire, they can attack again.
That's why you want to understand which defensive effect is actually necessary.
Good Defensive Timing
A better approach might look like this:
- Use to delay the initial engage.
- Activate when the opponent commits to damage.
- Save for their next offensive window.
- Use when their interrupts are unavailable.
- Keep for an emergency or a specific displacement threat.
This spreads your defensive value across a longer fight.
And since provides strong sustained damage, surviving multiple trades can be enough to win.
Recognizing Interrupt Windows
One of the biggest weaknesses of this build is that both and rely on channels.
That means interrupts are extremely important.
You should always pay attention to whether your opponent has an ability that can stop your channel.
For example, if they're using an important stun or knockback, try to force that ability before activating .
You can also create distance with .
However, remember that some opponents have ranged interrupts.
Against those players, simply placing might not be enough.
You might need to use dungeon terrain to break their line of sight.
Sometimes waiting for an interrupt to be used is much more valuable than activating immediately.
Positioning Against Melee
Against melee builds, try to maintain enough distance that they need to spend mobility to reach you.
You don't necessarily need to run away constantly.
Sometimes standing at a comfortable casting distance while applying pressure is enough.
Once they commit, use .
If they cross it with crowd control protection, you still have and other defenses available.
The important thing is not letting them attack you for free.
Positioning Against Ranged
Against ranged builds, you need to think more about line of sight.
For example, if someone has superior range, chasing them through an open corridor might be a bad decision.
Instead, use corners to force them into a closer engagement.
You can also switch to to apply pressure from farther away.
However, don't trap yourself in a corner without an escape route.
Since we don't have a reliable weapon dash, bad positioning can be difficult to recover from.
Don't Forget Energy Management
has no cooldown, but it still consumes Energy.
During longer fights, repeated casting can become expensive.
This is another reason why is so useful.
restores both Health and Energy.
However, if your opponent interrupts it immediately, you might lose your opportunity to recover resources.
Try to pay attention to your Energy before it becomes a serious problem.
If you're already nearly out of Energy, you're going to have a much harder time maintaining pressure.
When to Commit Pyroblast
is one of your strongest damage abilities.
However, I wouldn't recommend using it automatically every time it's available.
Instead, look for opportunities where your opponent has already used important movement or defensive abilities.
For example, if someone just used their main dash to engage, they might have fewer ways to avoid your .
If their interrupt is also unavailable, that can create an excellent damage window.
However, don't wait forever.
Sometimes using a quick is better than saving it for a perfect opportunity that never happens.
8. Common Beginner Mistakes
| Mistake | What You Should Do Instead |
|---|---|
| Spamming without moving | Reposition when dangerous abilities are coming |
| Ignoring burning stacks | Maintain pressure whenever it's safe |
| Using against every ranged opponent | Consider |
| Missing repeatedly | Practice predicting movement |
| Using too early | Wait until the opponent commits mobility |
| Assuming stops everyone | Watch for crowd control immunity |
| Using at full charge every time | Release early when necessary |
| Channeling into an interrupt | Wait until the interrupt is unavailable |
| Using into reflection | Recognize defensive abilities first |
| Forgetting | Take advantage of its faster casting window |
| Activating randomly | Use it during important damage trades |
| Using while the opponent can interrupt | Create a safer healing opportunity |
| Waiting too long to heal | Use before you're in lethal danger |
| Forgetting restores Energy | Take advantage of both resources |
| Using too early | Save it for dangerous damage windows |
| Activating and together unnecessarily | Spread out your defenses |
| Thinking heals you | Remember it increases maximum Health |
| Expecting to stop every crowd control effect | It specifically protects against forced movement |
| Relying entirely on | Use your other defenses proactively |
| Forgetting to switch from PvE abilities | Prepare your spells before PvP |
| Fighting in bad terrain | Use corridors and corners to your advantage |
| Taking every fight without inspecting | Check equipment and Item Power |
9. Final Tips
Keep applying pressure. It's one of the strongest parts of this build, especially when you maintain your burning stacks.
Use against longer range opponents. The additional range and powerful Flame combination can help against weapons that don't want to approach.
Learn proper placement. Try to place it where your opponent actually needs to move, not simply wherever they're currently standing.
Don't waste . Its knockback can interrupt vulnerable channels and create distance against aggressive opponents.
Don't fully channel every time. Sometimes releasing it early is much better than getting interrupted or letting your opponent escape.
Take advantage of . The faster casting window makes much more dangerous during longer fights.
Use when your opponent commits. can punish strong offensive abilities, but experienced opponents might simply stop attacking if you use it too early.
Protect your channel. is one of your strongest abilities, but it can be interrupted. Try to create a safe opportunity first.
Remember the and interaction. Increasing your maximum Health improves your durability and the value of 's percentage-based healing.
Don't activate every defensive ability immediately. Spread out , , and whenever possible.
Use against dangerous damage. The temporary Health and movement speed can help you survive a burst combination while repositioning.
Understand . The forced movement immunity is useful, but it doesn't protect against every form of crowd control.
Don't rely entirely on . It's another layer of protection, not a replacement for good defensive timing.
Pay attention to your Energy. Continuous pressure can consume a lot of Energy, so use to recover when necessary.
Switch your PvE abilities before PvP. and are useful for clearing mobs, but you'll often want different abilities against another player.
Use dungeon terrain. Corners and narrow corridors can make it much easier to control an opponent's movement.
Don't fight while surrounded by mobs. Unnecessary mob damage can completely ruin an otherwise favorable fight.
Learn which opponents can interrupt your channels. This is one of the most important things to understand before using or .
Choose your fights carefully. deals excellent damage, but highly mobile opponents can punish your limited movement.
Overall, is an excellent weapon for Corrupted Dungeons if you enjoy dealing strong sustained damage while having several defensive abilities to work with.
You have constant pressure from , powerful burst from , and excellent healing from .
With , , , and , you also have enough defensive options to survive many difficult situations.
However, the build isn't particularly mobile.
You're relying on good positioning, crowd control, and defensive timing rather than constantly dashing away from your opponent.
The biggest thing you need to learn is when to keep casting, when to create distance, and when to use your defensive abilities instead of forcing more damage.
Once you get comfortable with those decisions, becomes an extremely strong option for solo Corrupted Dungeons PvP.