
Light Crossbow Build
One of the best Light Crossbow builds in Albion Online for solo PvP, built around cycling your Q as often as possible and using your E for huge burst damage.
Your equipment

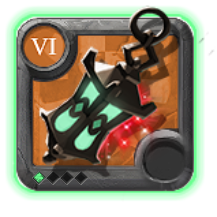
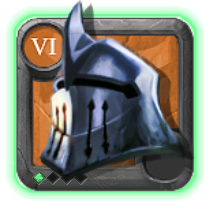
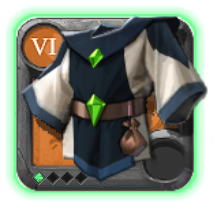
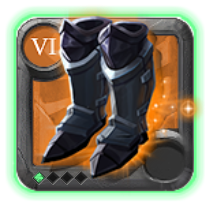

Copy an item name to search for it in game, or tap the chart to open the exact build item page with market prices.
Build Guide Contents7 sections
How to play this Light Crossbow build?
1. Main Abilities
Here's the setup I recommend for most fights.
| Slot | Ability | Purpose |
|---|---|---|
| Q | Main damage and constant pressure | |
| W | Slow enemies, gain movement speed, and reset Q faster | |
| E | Main burst damage | |
| Passive | Reset Q after every 4 spell casts |
Explosive Bolt (Q)
This is your main damage ability, and you'll be using it constantly throughout fights.
It has a very short cooldown, deals damage in a small area, and works extremely well with our passive.
Unlike some other Crossbow abilities, you don't have to stand still and channel it, which makes it much easier to keep dealing damage while moving around.
Try to use your Q whenever it's available, especially when your opponent is within range.
Caltrops (W)
For most PvP fights, I recommend using .
You place a trap on the ground, and when an enemy triggers it, they get slowed while you gain extra movement speed.
This is useful for both chasing and keeping your distance.
For example, if someone is running away, you can place in front of them to slow them down.
And if a melee player is chasing you, you can use it to create some distance while continuing to deal damage.
You can even use on nearby mobs to trigger the movement speed bonus when you need help chasing someone.
Another reason why I like this ability is its short cooldown, which helps us activate our passive more often.
Sunder Shot (Alternative W)
If you're fighting someone who doesn't have much mobility, you can switch to .
It deals damage and reduces your opponent's resistances, which allows your other abilities to deal more damage.
It's especially useful when you want to maximize your burst damage with your E.
Just keep in mind that you're giving up the slow and movement speed from , so I wouldn't recommend using it against highly mobile opponents.
Exploding Shot (E)
This is our main burst ability.
You attach a bomb to your opponent, dealing a small amount of damage immediately, followed by a much stronger explosion after 2 seconds.
The explosion also deals area damage, so you can hit multiple enemies if they're standing close together.
And another important thing is that the explosion damage cannot be reflected, which is really useful against builds with damage reflection.
However, your opponent can still use defensive abilities to avoid the damage.
Try to pay attention to their equipment and don't waste your E right before they're about to become immune to damage.
Well-Prepared (Passive)
This passive is extremely important for the build.
After every 4 spell casts, it resets the cooldown of your Q.
Since and have short cooldowns, we can activate this passive quite often.
And this is where a big part of our damage comes from.
A useful trick is to make your Q the fourth spell you cast, so its cooldown resets immediately and you can use it again.
For example:
Q → W → E → Q → Q
Of course, you won't always be able to follow this exact order during PvP, but understanding how the passive works will help you deal much more damage.
2. How to Fight With Light Crossbow
This isn't a build where you use one big combo and then wait for all your cooldowns.
Instead, you want to keep applying pressure with while using your other abilities to control the fight.
Here's how I usually approach it.
| Step | What to Do | Why |
|---|---|---|
| 1 | Start dealing damage with Q | Begin applying pressure |
| 2 | Use | Slow your opponent and gain movement speed |
| 3 | Apply | Prepare your main burst damage |
| 4 | Keep using Q | Maintain pressure and trigger |
| 5 | Use your defensives when needed | Survive while your damage abilities recharge |
Keep Your Q Going
The biggest mistake you can make with this build is not using your Q enough.
It's your main source of consistent damage, and thanks to , you can use it much more frequently than your opponent might expect.
Try to keep track of your passive so you don't waste potential Q resets.
Don't Waste Your E
Even though has a relatively short cooldown, you still want to get as much damage out of it as possible.
Against opponents with damage immunity or other strong defensives, try to make them use those abilities before committing your E.
Remember that the explosion happens after 2 seconds, so your opponent has time to react.
If you're using , try to apply the resistance reduction before your E explodes.
Keep Moving
doesn't have a built-in dash, so you need to be careful with your positioning.
Against melee builds, use to slow them down and create distance while you continue dealing damage.
Against ranged builds, pay attention to their cooldowns and try not to take unnecessary damage just to land another Q.
You have plenty of damage. You don't need to tank everything to win fights.
3. Defensive Abilities
Even though we're using for extra damage, we still have quite a few ways to survive.
| Equipment | Ability | Main Purpose |
|---|---|---|
| Absorb damage and cleanse damage over time effects | ||
| Avoid burst damage and increase your damage | ||
| Escape or turn fights when low on health | ||
| Gain extra defenses when your health gets low |
Guardian Helmet
gives us another defensive ability with .
The shield becomes stronger when your health drops below 40%, which can make a pretty big difference in close fights.
It also removes damage over time effects, making it especially useful against Cursed Staffs and other builds that rely on those effects.
Depending on the fight, you can use it early to reduce incoming damage and potentially have it available again later.
But if you're expecting a big burst combo, you might want to save it for that instead.
Cleric Robe
For our chest piece, we're using with .
When you activate it, you have a short window where taking damage triggers the protective effect.
Once triggered, you become immune to damage for a short time and receive a damage bonus.
This is extremely useful because you can avoid your opponent's burst while continuing to deal damage yourself.
Just make sure your opponent is actually going to hit you when you activate it.
If you use too early and they simply stop attacking, you can waste your most important defensive ability.
I also recommend not using and at the same time unless you really need both.
It's usually better to spread out your defensive abilities so you can survive longer.
Demon Boots
are both an escape tool and a way to turn around close fights.
The lower your health is, the more Vengeance Charges you receive when using .
These charges increase your movement speed and damage.
So, if you're losing a fight, you can use them to create distance and escape.
But if your opponent is also low on health, you can use the additional damage to try to finish them off.
Just don't intentionally let yourself get too low for the extra damage. Sometimes it's better to use your boots earlier and stay alive.
Martlock Cape
Since increases the damage we take, gives us some extra protection.
When your health drops below its activation threshold, it automatically increases your defenses.
This works really well with our , , and Gigantify Potion.
The important thing is that activates automatically, so try to pay attention to when its effect is active.
4. Cryptcandle or Facebreaker?
You have two good options for your off-hand, depending on how you want to play.
| Off-Hand | Main Benefit | Best For |
|---|---|---|
| Maximum damage | Aggressive burst-focused PvP | |
| More balanced damage and defense | Safer fights and longer engagements |
Cryptcandle
This is what I'm using in the main build.
gives us quite a bit of extra damage, which works extremely well with our Q resets and .
The downside is that we also take more damage.
That's why I'm using and Gigantify Potions for extra protection.
If you're comfortable managing your defensive abilities, this setup can deal some pretty ridiculous damage.
Facebreaker
If you want something more balanced, is another good option.
You sacrifice some damage but gain additional defenses, making the build more forgiving.
With , I recommend switching to and Healing Potions for better sustain during longer fights.
It's a good alternative if you feel like you're taking too much damage with .
5. Food and Potions
| Consumable | When to Use | Benefit |
|---|---|---|
| Main setup | Increased damage and cooldown rate | |
| setup | Extra maximum health and protection against burst | |
| alternative | Recover health during longer fights |
Deadwater Eel Stew
I'm using because it gives us both additional damage and cooldown rate.
Both bonuses work really well with .
More damage means stronger Q spells and E explosions, while the cooldown bonus allows us to use our abilities even more often.
Major Gigantify Potion
Since makes us take more damage, Gigantify Potion gives us another way to survive dangerous situations.
You can use it when your opponent commits to a big damage combo or when you need some extra protection to survive.
Just like your other defensives, try not to waste it when you're not actually in danger.
6. PvE Tips
Even though this particular setup is mainly focused on solo PvP, is also pretty good for PvE.
deals area damage, and your E can hit multiple enemies when the bomb explodes.
You can also switch your W to for additional area damage when you're focusing on clearing mobs.
Just remember that you lose the mobility and slow from , so I wouldn't recommend keeping that setup when you're expecting PvP.
You can continue using to reset your Q and clear groups of mobs quickly.
7. Final Tips
Keep using your Q. Your main source of damage comes from and its cooldown resets. Try to make the most of .
Pay attention to your E timing. The explosion happens after 2 seconds, so don't waste it into damage immunity.
Don't stack all your defensives. , , , and Gigantify Potion give you several ways to survive, but you should try to use them at the right moments.
Use properly. It's not just a slow. The movement speed bonus is extremely useful for both chasing and escaping.
Choose the right off-hand. is great for maximum damage, but is a good alternative if you want a more balanced build.
Overall, is a really strong solo PvP weapon with excellent damage and quite a few defensive options.
It might take some practice to manage your Q resets and defensive cooldowns properly, but once you get comfortable with it, you can deal a ridiculous amount of damage while still having enough protection to survive difficult fights.
Quick alternatives
 Replace Off-handFacebreaker T4.3
 Replace CapeSmuggler Cape T4.2