
Spear Cripple Build
One of the best Spear builds in Albion Online for solo Open World and Mists, especially if you want a cheap setup with strong chase potential, auto attack pressure, and plenty of ways to adapt to different fights.
Your equipment

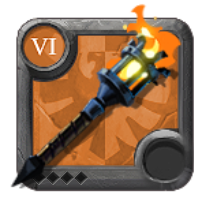

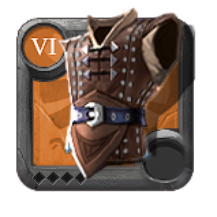
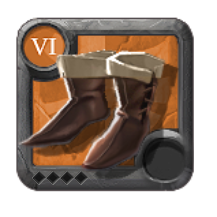


Copy an item name to search for it in game, or tap the chart to open the exact build item page with market prices.
Build Guide Contents9 sections
How to play this Spear build?
Spear is one of the most versatile weapons in Albion Online, but I wouldn't necessarily recommend it to someone who's completely new to PvP.
The weapon itself isn't too complicated. The difficult part is knowing when to use your abilities and how to deal with different opponents.
This particular setup is built around , which allows us to remove enemy movement speed buffs while slowing them and reducing their damage.
That makes it particularly useful against players who rely on their boots to escape or kite.
We also have good damage from , normal attacks, and , alongside some decent sustain from , , and Healing Potions.
However, you don't want to use every ability as soon as it's available.
The biggest thing you need to learn with this build is how to manage your Spirit Spear Charges, save for important moments, and recognize when you should commit to a fight.
1. Main Abilities
Here's the default ability setup.
| Slot | Ability | Purpose |
|---|---|---|
| Q | Damage, slow, and Spirit Spear Charges | |
| W | Remove movement speed buffs, slow, and reduce damage | |
| E | Burst damage, mobility, and knockup | |
| Passive | Health recovery from normal attacks |
Lunging Strike (Q)
is our main damage ability, and you'll be using it constantly.
It attacks enemies in a straight line in front of you, dealing physical damage and slowing them.
Every enemy you hit also gives you a Spirit Spear Charge.
You can have up to three charges, and each charge significantly increases your normal attack damage.
This is one of the main reasons why Spear works so well with .
You want to maintain three Spirit Spear Charges whenever possible.
With three stacks, your normal attacks become much stronger, allowing you to deal consistent damage between ability casts.
And since has a short cooldown, maintaining your stacks usually isn't too difficult as long as you keep hitting your opponent.
However, there's something important you need to understand.
Your Spirit Spear Charges also increase the damage of , and using your E consumes all of them.
This means that after using E, you'll need to start building your stacks again.
That's why I recommend paying attention to your charges instead of simply pressing Q whenever it's available.
Habo Tip: Against multiple enemies or mobs, you can build Spirit Spear Charges much faster because gives you a charge for each enemy hit. Try to hit several targets with the same cast whenever possible.
Cripple (W)
is the most important ability in this particular setup.
It deals physical damage to a nearby enemy, slows them, and reduces all the damage they deal for a short duration.
But the main reason we're using is its ability to remove movement speed buffs.
If your opponent has an active movement speed buff when you hit them, purges it and gives you a large movement speed bonus.
This makes it extremely useful against players who rely on their boots to escape.
For example, if someone activates and tries to run away, you can hit them with to remove their movement speed bonus while gaining movement speed yourself.
Now you're much faster than they are, making it easier to stay close and continue dealing damage.
However, there's one important limitation.
has a very short range.
You need to get close enough to hit your opponent before you can remove their movement speed buff.
That's where becomes extremely useful.
You can use to close the distance and then immediately follow up with .
This combination makes the build particularly dangerous against players who try to escape using their boots.
Cripple Is Also a Defensive Ability
One thing I don't want you to overlook is 's damage reduction.
Even when your opponent isn't using a movement speed buff, still reduces the damage they deal.
This can be extremely useful against aggressive brawling builds.
For example, if an opponent is about to use their strongest damage abilities, hitting them with can reduce the damage you receive.
So don't think of as something you should only use when someone is running away.
It's also a really good defensive ability.
The difficult part is deciding when the movement speed purge is more important than the damage reduction.
Against a mobile opponent, I would usually save it for their sprint.
Against someone who wants to stand still and trade damage, using it to reduce their offensive pressure can be much more valuable.
Reckless Charge (E)
is our main burst damage ability.
It allows you to dash toward a targeted location, damaging and briefly knocking up enemies you pass through.
However, its damage depends on your Spirit Spear Charges.
The more charges you have, the more damage deals.
And once you use the ability, all your Spirit Spear Charges are consumed.
That's why you generally want three Spirit Spear Charges before using E.
If you're fighting someone and use with zero stacks, you're losing a significant amount of potential damage.
Instead, try to build your charges with first.
Once you have three stacks, you can use for a much stronger hit.
However, there's another important thing about this ability.
is also one of your main mobility tools.
You can use it to close the distance, move through an opponent, or escape a dangerous situation.
And sometimes, using it to escape is more important than getting the maximum damage.
For example, if several players suddenly appear while you're fighting, don't waste time trying to build three charges just so you can use E.
Use it to create distance and get away.
Don't Waste Your Knockup
also knocks enemies into the air briefly.
This can interrupt certain abilities or create an opportunity to deal additional damage.
For example, you can use it to interrupt an enemy who's channeling an important ability.
You can also use the knockup to prevent your opponent from responding immediately after your burst.
But remember that the crowd control is short.
It's not going to keep someone locked down for several seconds.
Habo Tip: For damage, try to use with three Spirit Spear Charges. For escaping or interrupting an important ability, don't be afraid to use it with fewer stacks.
Life Leech (Passive)
For our passive, we're using .
It provides healing through your normal attacks, giving us some additional sustain during fights.
This works particularly well with our setup because Spirit Spear Charges increase our normal attack damage.
And since we're using , we can attack more frequently.
That means we get more opportunities to recover health through .
However, don't forget that works through normal attacks.
If you spend the entire fight running away or only casting abilities, you won't get much value from it.
Try to use normal attacks between your abilities whenever you can safely stay close enough.
This is particularly important against opponents who aren't dealing too much damage.
You can sometimes recover a meaningful amount of health while continuing to pressure them.
2. How to Fight With Spear
The biggest strength of this build is that it gives you several different ways to approach a fight.
You can deal consistent damage with and normal attacks, punish movement speed buffs with , and use for burst damage or repositioning.
However, this also means that you need to pay attention to what your opponent is doing.
There's no single rotation that's going to work against every build.
Basic PvP Rotation
Here's a simple example of how I would approach a favorable fight.
| Step | What to Do | Why |
|---|---|---|
| 1 | Start with | Apply a slow and build Spirit Spear Charges |
| 2 | Use normal attacks between Q casts | Deal additional damage and recover health |
| 3 | Reach three Spirit Spear Charges | Prepare your strongest |
| 4 | Save for their movement or damage window | Punish their sprint or reduce incoming damage |
| 5 | Use when necessary | Close the distance and stay on top of the opponent |
| 6 | Use | Deal burst damage and briefly knock up the enemy |
| 7 | Rebuild your Spirit Spear Charges | Continue pressure after E consumes your stacks |
This isn't a combination you need to follow exactly every single time.
For example, if your opponent activates their boots immediately, you might want to use and before you have three Spirit Spear Charges.
Or if they're about to deal a lot of damage, you might need to activate or instead of continuing to attack.
The important thing is knowing what each ability does and when you should use it.
Maintain Your Spirit Spear Charges
A large part of your damage comes from maintaining your Spirit Spear Charges.
Try to keep hitting your opponent with whenever you have the opportunity.
Once you have three stacks, your normal attacks become much more threatening.
However, you also need to decide when to use .
Your E consumes your stacks, which means your normal attack damage drops afterward.
Against certain opponents, it might actually be better to hold your E for a little longer and continue dealing damage with normal attacks.
For example, if your opponent has an important defensive ability available, you might want to wait until they use it before committing your E.
The Swift Cut and Cripple Combination
This is one of the main reasons why I like this particular setup.
allows you to dash behind an enemy target, dealing damage and immediately closing the distance.
requires you to be close to your opponent.
By combining the two abilities, you can reach someone who's trying to escape and remove their movement speed buff.
Here's an example.
| Step | Situation | Your Response |
|---|---|---|
| 1 | Opponent activates | Wait until the buff is active |
| 2 | They start creating distance | Use to reach them |
| 3 | You're now close enough | Immediately use |
| 4 | Their movement speed buff is removed | You receive the movement speed bonus |
| 5 | They struggle to escape | Continue attacking with Q and normal attacks |
| 6 | They get low | Finish with when appropriate |
This combination is particularly strong against opponents who rely on movement speed buffs rather than repeated dashes or teleports.
However, don't assume counters every mobility ability in the game.
It removes movement speed buffs, but it doesn't prevent someone from using another dash, blink, or similar movement ability.
And requires an enemy target, so it's not a free movement ability you can use anywhere.
Don't Commit Reckless Charge Too Early
can deal good burst damage, but you need to think about what happens afterward.
Once you use E, your Spirit Spear Charges disappear.
And since is also a mobility ability, you might not have it available if the fight goes badly.
That's why I usually recommend keeping it until you have a good opportunity.
For example, if your opponent is already low health and has used their defensive abilities, that's a good moment to commit.
But if they're still at full health and have several ways to escape, it might be better to continue pressuring them with Q and normal attacks.
Resetting the Fight
One of the biggest advantages of using is that we can reset certain fights with .
For example, if you've taken a bad trade, you can activate and use the invisibility to reposition.
This gives you a little time to wait for your cooldowns or force your opponent to lose track of your position.
However, remember that doesn't make you immune to damage.
Enemies can still hit you with area abilities or reveal your position.
You also need to be careful about how far you move from your original position.
I recommend using before you're almost dead, rather than treating it as a guaranteed escape.
3. Equipment and Defensive Abilities
Besides our weapon, we're using relatively affordable equipment that gives us additional mobility, protection, and cooldown reduction.
| Equipment | Ability | Main Purpose |
|---|---|---|
| Passive bonuses | Faster normal attacks and shorter cooldowns | |
| Shield and Energy recovery | ||
| Invisibility and additional damage | ||
| Targeted dash and additional damage | ||
| Armor passives | Additional cooldown rate |
Torch
For our off-hand, we're using .
It increases our attack speed and cooldown rate, which works extremely well with Spear.
Since Spirit Spear Charges increase our normal attack damage, having additional attack speed allows us to get more value from those stacks.
It also works well with because we're attacking more frequently.
The cooldown bonus is another nice benefit because it helps us get and our other abilities back sooner.
And is relatively cheap, making it a great option for this build.
Mercenary Hood
For our helmet, we're using .
This ability gives us a small shield that absorbs incoming damage while restoring some of our missing Energy.
It's a simple ability, but it works well with Spear.
Since we're constantly using and other abilities, Energy can become a problem during longer fights.
helps prevent that while providing some additional protection.
You can activate it when you're taking damage or when you're running low on Energy.
However, I wouldn't recommend wasting it when you're already at full Energy and don't need the shield.
Alternative: Any Leather Hood
You don't specifically need for this ability.
Any Leather Hood with can work.
Since we're mainly using a generic helmet ability, feel free to choose whichever option is cheapest.
Just make sure you're using the correct spell and passive.
Assassin Jacket
is one of our most important defensive pieces.
We're using , which turns us invisible for a short duration.
While invisible, we can build up a damage bonus for our next attack after revealing ourselves.
This makes useful both offensively and defensively.
Ambush for Damage
If you have a good opportunity to attack, you can use to prepare a stronger hit.
For example, you might activate while your opponent is waiting for your next move.
Once you've built up a damage bonus, you can reveal yourself and use .
However, keep in mind that your Spirit Spear Charges have a limited duration.
You don't want to stay invisible so long that your stacks expire before you're ready to attack.
Ambush for Defense
Personally, I think the defensive potential is even more important.
can help you avoid targeted pressure, reposition, and wait for your important cooldowns.
It's particularly useful against opponents who rely on predictable damage combinations.
But remember that invisibility doesn't make you invulnerable.
Area damage and reveal effects can still punish you.
And if someone knows where you activated , they might be able to predict where you're moving.
Inferno Shield (Alternative Chest Ability)
Against certain opponents, I recommend switching to .
Instead of giving you invisibility, it increases your defenses and reflects part of the damage you receive.
This is particularly useful against opponents who want to stand close and trade damage.
For example, if you're fighting a melee brawler, can help you survive while continuing to attack with your Spear.
And since we have and , being able to stay close and continue dealing damage can provide additional healing.
| Chest Ability | Best Use |
|---|---|
| Roaming, repositioning, defensive resets, and preparing burst | |
| Direct brawling and matchups where you need additional protection |
For general roaming, I'd keep selected.
But if you're expecting a proper 1v1 against a build with strong direct damage, can be a better option.
Assassin Shoes
are an important part of this setup because of .
allows you to dash behind a targeted enemy and deal damage.
It gives us another way to close the distance without using .
This works particularly well with .
For example, if your opponent uses their boots to escape, you can use to reach them and immediately remove their movement speed buff with .
However, there are two important things to understand.
First, requires an enemy target.
You can't use it to dash toward an empty location.
This means that while it's excellent for chasing someone, it's not necessarily the best ability for escaping when no enemy is in range.
Second, can be interrupted.
If your opponent has the right ability available, they can potentially stop your dash and prevent its damage.
That's why I recommend not blindly using against every opponent.
Refreshing Sprint (Alternative)
If you want a more straightforward movement ability, you can switch to .
It gives you increased movement speed and cooldown rate for a short duration.
This is particularly useful for roaming and situations where you want more freedom of movement.
It also helps you get your abilities back sooner.
| Boots Ability | Best Use |
|---|---|
| Chasing players and setting up | |
| General roaming, cooldown recovery, and escaping |
Personally, I prefer when I'm specifically looking for PvP with .
However, is a perfectly reasonable alternative, especially if you're more comfortable using a regular sprint.
4. Food and Potions
For this build, we're using and Major Healing Potions.
Both help compensate for the fact that Spear doesn't have a dedicated active healing ability on its weapon.
| Consumable | Purpose |
|---|---|
| Maximum health and healing from damage dealt | |
| Direct healing during fights | |
| Faster health recovery outside combat | |
| Approaching targets or escaping certain situations |
Roasted Clearhaze Snapper
is an excellent food choice for this build.
It increases your maximum health and heals you based on the damage you deal.
Since we're using , normal attacks, and to deal consistent damage, we can get some additional healing throughout the fight.
This also works alongside , making our sustain considerably better.
However, there's something important to understand.
has a limit on how much healing it can provide over a short period.
This means you shouldn't expect to recover your entire health bar just because you deal a large amount of damage with .
It's a source of additional sustain, not unlimited healing.
Major Healing Potion
For our potion, we're using Major Healing Potions.
They provide additional healing when you're taking damage.
Since we already have some sustain from our passive and food, Healing Potions give us another way to survive longer fights.
I recommend using them when you've taken enough damage to benefit from the healing rather than waiting until you're almost dead.
You can also combine your with to create distance and recover before continuing the fight.
Cabbage Soup (Alternative Food)
If you're mainly roaming and recovering between fights, is another useful option.
It increases your health regeneration outside combat.
This allows you to recover faster after clearing mobs or finishing a fight.
However, you're giving up the additional maximum health and healing from damage that provides.
That's why I prefer for actual PvP fights.
Use when you want faster recovery between engagements rather than additional sustain during combat.
Invisibility Potion (Alternative)
Invisibility Potions are also useful when roaming alone.
You can use them to approach an opponent who isn't paying attention or escape certain dangerous situations.
However, remember that you're giving up your .
And since this build relies on sustaining through normal attacks and food, losing that additional healing can make certain fights more difficult.
For most direct PvP fights, I'd keep Healing Potions selected.
5. Cape Options
One nice thing about this build is that you don't necessarily need an expensive cape.
You can simply use a regular cape or skip the special cape effect to keep the build cheaper.
However, there are several useful options if you want to spend a little more silver.
| Cape | Main Benefit | When I'd Use It |
|---|---|---|
| Regular Cape | Cheap with no special combat effect | Budget roaming |
| Additional protection at low health | More defensive setup | |
| Additional damage | Aggressive PvP | |
| Reduced potion cooldown | Longer fights | |
| Emergency invisibility | More expensive solo sets |
Martlock Cape
is a good option if you want more protection.
It automatically increases your defenses when your health drops low enough.
This is particularly useful against burst damage because it can give you enough time to use or another defensive ability.
Avalonian Cape
gives you additional damage.
This is useful when you're trying to pressure opponents and finish fights more quickly.
However, you're giving up the defensive value of .
I'd mainly use it if you're comfortable with the build and want a more aggressive setup.
Smuggler Cape
reduces your potion cooldown.
This can be useful in longer fights where getting your back sooner makes a difference.
However, it doesn't provide the same immediate defensive protection as .
Undead Cape
is a more expensive option that gives you emergency invisibility when your health drops critically low.
It can be useful for escaping dangerous situations, especially when you're risking more valuable equipment.
However, don't depend entirely on to save you.
You can still take damage from certain area abilities while invisible.
For a cheap version of this build, I wouldn't prioritize buying .
6. Matchup Tips
Spear can handle a lot of different situations, but it's important to recognize which matchups are favorable.
The most important thing is understanding whether your opponent relies on movement speed buffs, direct brawling, or repeated mobility abilities.
| Opponent | What I Recommend |
|---|---|
| Movement Speed Builds | Save for their sprint |
| Melee Brawlers | Use 's damage reduction and consider |
| Ranged Kiters | Use to close distance and when they sprint |
| Burst Builds | Save , , and for their strongest damage |
| Reflect Builds | Avoid committing your burst into active reflection |
| Healing Builds | Keep attacking consistently, but be careful about long fights |
| Highly Mobile Builds | Don't waste before they use their escapes |
Against Movement Speed Builds
These are the matchups where can be extremely strong.
If your opponent relies on , , or another purgeable movement speed buff to create distance, you can punish them.
Try to wait until they activate their movement speed ability.
Then use to reach them and follow up with .
You'll remove their movement speed buff and gain a large movement speed bonus yourself.
That makes it much easier to keep attacking.
However, if you use before they activate their sprint, you might struggle to catch them afterward.
Patience is extremely important in these matchups.
Against Melee Brawlers
Against opponents who want to stay close and trade damage, 's damage reduction becomes much more important.
You can use it to reduce their offensive pressure while continuing to attack.
For example, if someone activates an important damage ability, using can make it easier to survive their strongest attacks.
You can also switch to for additional protection.
However, I wouldn't recommend standing still and trading damage against every brawler.
Some weapons have considerably stronger sustain or burst damage than Spear.
You still need to pay attention to their cooldowns and know when to create distance.
Against Ranged Kiters
Against ranged builds, closing the distance can be difficult.
has a decent range, but most of our damage comes from getting close enough to use normal attacks.
That's why and are so important.
Try to use when your opponent creates distance.
Once you're close enough, use if they have an active movement speed buff.
Then continue attacking with Q and normal attacks.
However, remember that doesn't stop every dash or teleport.
Against opponents with several movement abilities, you might need to save to follow them.
Against Burst Builds
Against opponents who rely on one large damage combination, you need to be careful with your defensive abilities.
provides some additional protection, while reduces the damage your opponent deals.
You can also use to avoid targeted pressure or reposition.
Try to recognize when your opponent is preparing their strongest attack.
If you use every defensive ability too early, you might have nothing available when their burst actually arrives.
Against Reflect Builds
Be careful when attacking into damage reflection.
For example, if your opponent activates with , continuing to deal damage can cause you to take significant reflected damage.
Try to stop attacking or create some distance until the reflection expires.
You don't want to waste into an opponent who's actively reflecting your damage.
Against Healing Builds
Against opponents with strong healing, maintaining consistent damage is important.
Try to keep three Spirit Spear Charges active so your normal attacks remain threatening.
You can also use when you have a good opportunity to deal burst damage.
However, unlike some other Spear abilities, doesn't directly reduce healing received.
You might struggle against opponents who can consistently outheal your damage.
If you're unable to make meaningful progress, consider disengaging rather than forcing a fight that keeps getting worse.
7. PvE and Roaming Tips
Spear is also a good weapon for solo PvE.
You have consistent damage from and normal attacks, reasonable sustain, and enough mobility to escape certain dangerous situations.
However, this specific setup is mainly designed around PvP.
That's why some of the selected abilities aren't necessarily the fastest options for farming mobs.
Clearing Groups of Mobs
Here's how I recommend approaching regular mob packs.
| Step | What to Do | Why |
|---|---|---|
| 1 | Group a few mobs together | Hit multiple targets with |
| 2 | Use | Deal damage and build Spirit Spear Charges |
| 3 | Reach three stacks | Increase your normal attack damage |
| 4 | Continue with normal attacks | Deal consistent damage and recover health |
| 5 | Use when needed | Hit several mobs for additional damage |
| 6 | Rebuild your stacks | Continue clearing with stronger normal attacks |
One important thing to remember is that consumes your Spirit Spear Charges.
If you're fighting several weak mobs, you don't always need to use E.
Sometimes maintaining three stacks and continuing to attack is enough.
And if you're in a dangerous area, you might want to save in case another player attacks you.
Alternative W Abilities for PvE
is excellent for PvP, but it isn't always necessary against regular mobs.
You can consider switching your W depending on the content.
| W Ability | When I'd Use It |
|---|---|
| Default PvP and chasing players | |
| Additional damage against groups of mobs | |
| Ranged damage and a strong slow | |
| Defensive option against incoming damage |
can be useful when you want to clear groups of mobs faster.
It deals repeated damage in a cone in front of you while channeling.
This can help you finish groups quickly, especially when you've already gathered several mobs together.
However, the channel can leave you vulnerable if another player approaches.
is another useful option when you want additional ranged damage and a strong slow.
It's particularly useful when you want to control enemies without immediately getting close.
However, if your main goal is catching players who rely on movement speed buffs, is the better choice.
is useful when you're expecting to take a lot of damage.
It increases your resistances, reflects damage, and helps with Energy recovery.
This can be particularly useful against certain bosses or opponents with predictable attacks.
Fighting Stronger Mobs
Against stronger enemies, focus on maintaining your Spirit Spear Charges and avoiding unnecessary damage.
You can use normal attacks between casts to recover health through .
And since we're using , dealing damage also provides some additional healing.
If an enemy uses a dangerous attack, don't stay in the area just to finish your rotation.
You can use to reposition or escape.
However, remember that using E consumes your stacks, so you'll have to rebuild them afterward.
Choosing Your Fights
One of the most important parts of playing Spear is learning which fights are worth taking.
This build can be particularly effective against opponents who rely on movement speed buffs.
But against weapons with repeated dashes, strong burst damage, or considerably better sustain, fights can become difficult.
Before committing, try to inspect your opponent's equipment.
Pay attention to their boots, chest ability, and weapon.
If you recognize a matchup where will be particularly valuable, that's a good opportunity.
But if someone has several ways to escape that can't remove, you might struggle to finish them.
Don't Waste Your Mobility While Farming
Since we're using , we don't have a traditional sprint selected.
And requires an enemy target.
This means that is particularly important for escaping when no suitable enemy target is available.
Try not to waste E against regular mobs if you think another player might attack you.
If you're clearing in a dangerous area, keeping your E available can make a big difference.
8. Common Beginner Mistakes
| Mistake | What You Should Do Instead |
|---|---|
| Using with zero stacks for damage | Build three Spirit Spear Charges first |
| Forgetting normal attacks | Use them between Q casts for damage and |
| Using before an opponent sprints | Save it to remove their movement speed buff |
| Trying to purge every movement ability | Remember removes movement speed buffs, not all dashes |
| Using to escape without a target | Remember it requires an enemy target |
| Using too late | Activate it before you're in serious danger |
| Forgetting 's damage reduction | Use it defensively against dangerous opponents |
| Using every mobility ability immediately | Keep available when possible |
| Fighting healing builds indefinitely | Recognize when you can't overcome their sustain |
| Forgetting that E consumes Spirit Spear Charges | Rebuild your stacks after every E |
| Using expensive equipment while learning | Start cheap until you understand the matchups |
9. Final Tips
Maintain three Spirit Spear Charges. A large part of your damage comes from your normal attacks, so keeping your stacks active is extremely important.
Don't waste . It can remove enemy movement speed buffs, slow them, and reduce their damage. Use it when you can get the most value.
Combine with . This is one of the strongest parts of the setup, especially against players trying to escape with their boots.
Use with three stacks whenever possible. Your E deals considerably more damage with Spirit Spear Charges, but don't hesitate to use it defensively when necessary.
Don't forget . Normal attacks provide additional healing, and helps you attack more frequently.
Use to reset fights. You don't always have to use it offensively. Sometimes waiting for your cooldowns is much more valuable.
Switch to when necessary. Against opponents who want to brawl directly, the additional protection can make a big difference.
Consider for general roaming. is excellent for chasing enemies, but it requires a target and doesn't provide the same freedom as a regular sprint.
Keep your equipment affordable. You don't need an expensive cape or extremely high tier equipment to learn this build.
Learn your matchups. Spear is versatile, but understanding when to commit your abilities is what makes the weapon effective.
Overall, this Spear setup is a strong option for solo PvP if you enjoy a playstyle based on consistent damage, chasing opponents, and adapting to different situations.
is particularly useful against players who rely on movement speed buffs, while and give us reliable damage and sustain.
It's not the easiest build to master, especially because you need to pay attention to Spirit Spear Charges and enemy cooldowns.
But once you get comfortable with those mechanics, Spear becomes a very flexible weapon that can handle quite a few different situations.