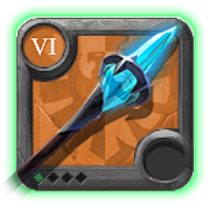
Chillhowl Corrupted
One of the best Chillhowl builds in Albion Online for Corrupted Dungeons if you want strong ranged pressure, reliable crowd control, and enough defensive tools to survive while learning the weapon.
Your equipment
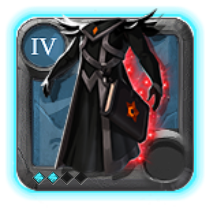

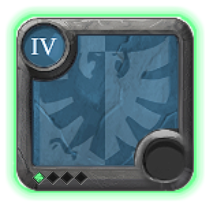
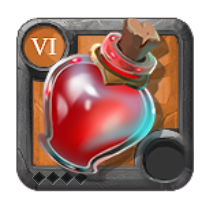
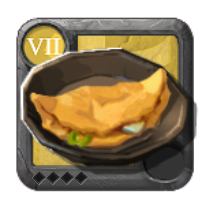
Copy an item name to search for it in game, or tap the chart to open the exact build item page with market prices.
Build Guide Contents8 sections
How to play this Chillhowl build?
is one of the most annoying weapons to fight against in Albion Online, especially in Corrupted Dungeons.
You have excellent range with , several ways to control your opponent, and one of the strongest defensive abilities in the Frost Staff tree.
The main idea behind this build is to keep pressuring your opponent with while using and to avoid their most dangerous abilities.
We're also using to reflect damage, for additional healing, and to get more value out of our Healing Potions.
However, isn't really about winning fights with one big damage combo.
You want to maintain distance, force your opponent to use their important cooldowns, and take advantage of the opportunities you create.
The build can be extremely difficult to kill when played properly, but missing too many casts or wasting your defensive abilities can put you in a bad position very quickly.
1. Main Abilities
Here's the default ability setup we're using for Corrupted Dungeons.
| Slot | Ability | Purpose |
|---|---|---|
| Q | Main damage and a stun after three stacks | |
| W | Teleport, stun, and brief damage immunity | |
| E | Crowd control, delayed damage, and defensive immunity | |
| Passive | Frost | Root an opponent with an empowered normal attack |
Frostbite (Q)
is our main damage ability, and you'll be using it throughout pretty much every fight.
It fires a projectile in a straight line, dealing magical damage to the first enemy it hits.
Every successful hit also applies one stack to your target.
These stacks last for three seconds, and when you reach three stacks, your opponent gets stunned briefly.
This makes consistently landing extremely important.
You're not just dealing damage. You're also building toward another opportunity to control your opponent.
And since has a very short cooldown and excellent range, you can keep applying pressure without needing to stay close.
However, the ability is a skill shot.
Against mobile opponents, you need to pay attention to where they're moving.
If you keep aiming directly at their current position, they're going to have an easier time dodging your attacks.
Try to predict their movement and aim slightly ahead of them.
Getting the Three-Stack Stun
The most important part of is building three stacks before the previous ones expire.
If you miss too many casts or spend too much time running without attacking, you'll lose your progress toward the stun.
For example:
| Action | Result |
|---|---|
| First hit | Applies one stack |
| Second hit | Reaches two stacks |
| Third hit | Reaches three stacks and stuns the enemy |
| Missing too many casts | Previous stacks can expire |
The stun is short, but it's enough to interrupt certain abilities, create distance, or prepare another attack.
You can also use that moment to reposition if your opponent is getting too close.
Habo Tip: Don't focus entirely on landing damage. Sometimes getting the third stack at the right moment is more valuable because it can interrupt your opponent and give you another opportunity to escape.
Frost Nova (W)
is one of our most important abilities.
It allows you to teleport toward a targeted location while releasing a around your original position.
Enemies standing near where you started take damage and get stunned.
The ability also provides a very brief moment of damage immunity during the teleport.
This makes useful for both escaping and avoiding dangerous damage.
For example, if a melee opponent gets close and starts attacking, you can teleport away while stunning them at your original position.
Now you've created distance and have another opportunity to start using .
However, there's something important you need to understand.
The stun happens around your starting position, not where you teleport.
This means that if your opponent is already far away, isn't going to stun them simply because you teleport toward them.
For general kiting, the ability works best when your opponent is already close to you.
Using Frost Nova to Avoid Damage
also gives you a very short period of damage immunity.
With good timing, you can avoid certain powerful abilities.
However, the immunity window is extremely short.
You can't just activate whenever you're taking damage and expect everything to miss.
You need to recognize the timing of the incoming attack.
For example, if you know your opponent is about to land a big burst ability, you might be able to time to avoid that damage.
But if you're not comfortable with the timing yet, simply using the ability to create distance is perfectly fine.
Another important limitation is that cannot teleport through obstacles.
Pay attention to your surroundings, especially when fighting near walls or other terrain.
Glacial Prison (E)
is what makes such a strong defensive weapon.
It creates a freezing area around a target and slows enemies standing inside it.
Depending on whether you target yourself or an enemy, the ability works differently.
| Target | Effect | Main Use |
|---|---|---|
| Yourself | Immediately freezes you inside a protective crystal | Avoid dangerous incoming damage |
| Enemy | Freezes the enemy after a short delay if they remain inside the area | Crowd control and delayed burst |
| Frozen target | Cannot move, take damage, or receive healing | Temporarily removes the target from the fight |
| Crystal expiration | Deals magical damage to nearby enemies | Additional damage and pressure |
Using Glacial Prison Offensively
When you cast on an enemy, it creates a freezing field around them.
After a short delay, the opponent becomes trapped in a crystal if they haven't escaped the area.
While frozen, they cannot move, take damage, or receive healing.
Once the crystal expires, it explodes and deals magical damage.
This can be extremely useful for setting up damage or interrupting your opponent's plans.
However, there's an important weakness.
Your opponent can escape the freezing area before the crystal activates.
That's why I don't recommend using randomly against highly mobile opponents.
Instead, try to wait until they've used their movement abilities.
You can also use the stun from or the root from your Frost passive to make it harder for them to escape.
Just remember that crowd control resistance and immunity effects can change how your setup works.
Don't Attack Into the Crystal
One of the biggest mistakes beginners make is continuing to attack an enemy who's already frozen inside .
While frozen, the target is immune to damage.
That means your attacks aren't going to deal damage during that period.
Instead, use the time to reposition, prepare your next attack, or recover with .
You want to be ready to continue pressuring your opponent as soon as the crystal expires.
And since the opponent cannot receive healing while frozen, they can't simply recover health inside the crystal either.
Using Glacial Prison Defensively
This is probably my favorite thing about .
You can cast on yourself to immediately become frozen inside the crystal.
While frozen, you're protected from incoming damage.
This makes the ability incredibly useful against opponents who rely on one big damage combination.
For example, if a player is about to land a dangerous burst ability, you can use on yourself to avoid that damage if you time it correctly.
The same idea applies to other weapons with predictable burst windows.
However, there's one important downside.
You cannot heal yourself while frozen.
That means you shouldn't expect to use or a during the crystal and recover health.
Use your defensive E to avoid damage, then heal after the freeze ends if you still need to.
Another thing to remember is that freezing yourself also gives your opponent time to recover their cooldowns and reposition.
So don't automatically use on yourself whenever you're taking a little damage.
Save it for situations where the protection actually matters.
Habo Tip: Against opponents with predictable burst damage, holding can be more valuable than using it offensively. You don't need to deal damage with every E. Sometimes completely avoiding your opponent's strongest ability is what wins the fight.
Frost (Passive)
For our passive, we're using Frost.
After casting four spells, your next normal attack roots the enemy briefly.
This is another useful crowd control ability that works really well with .
Since we're constantly casting , activating the passive isn't particularly difficult.
However, you need to remember to use a normal attack to trigger it.
The root won't activate automatically just because you've cast four spells.
You can use the root to create distance, interrupt someone's movement, or make it harder for an opponent to escape your .
For example, if your passive is ready and your opponent is trying to get away, landing the empowered normal attack can give you another opportunity to continue attacking.
Aggressive Caster (Alternative Passive)
Against certain ranged opponents, you can also consider .
After casting four spells, it temporarily reduces your casting times.
This can make your pressure feel smoother, especially when you're fighting another ranged build.
| Passive | Best Use |
|---|---|
| Frost | Default PvP, additional roots, and controlling melee opponents |
| Ranged matchups where faster casting is more useful |
Personally, I'd keep Frost as the default.
The additional root is particularly useful because relies heavily on controlling its opponent's movement.
2. How to Fight With Chillhowl
The main goal with is to maintain distance while dealing consistent damage.
You don't want to stand still and trade damage against melee builds.
Instead, use to apply pressure, to escape, and to avoid dangerous abilities.
You also have and to help survive longer fights.
Basic PvP Rotation
Here's an example of how I would approach a regular fight.
| Step | What to Do | Why |
|---|---|---|
| 1 | Start with | Deal damage and begin stacking toward a stun |
| 2 | Keep moving between casts | Maintain distance and avoid unnecessary damage |
| 3 | Reach three stacks | Stun your opponent |
| 4 | Use when they approach | Create distance and potentially stun them |
| 5 | Use when needed | Trap an opponent or avoid important damage |
| 6 | Activate against their burst | Reflect damage and increase defenses |
| 7 | Use when safe | Recover Health and Energy |
| 8 | Continue casting | Maintain pressure while managing your cooldowns |
This isn't a fixed combo you should always follow.
For example, if your opponent immediately commits to a dangerous ability, you might need to use before anything else.
Or if you're fighting a ranged opponent, you might prefer saving to avoid a specific attack rather than using it for general movement.
The important thing is adapting to what your opponent is doing.
Keep Your Distance
is a ranged weapon.
You want to take advantage of that whenever possible.
Against melee opponents, try to stay far enough away that they can't constantly hit you with their normal attacks or short-range abilities.
Use to apply pressure while moving between casts.
If someone uses their movement abilities to catch you, respond with .
And if your Frost passive is ready, you can use the root to create additional distance.
However, don't spend the entire fight running without dealing damage.
You still need to land consistently to pressure your opponent.
The goal is to deal damage while minimizing the damage you receive.
Save Your Important Defensive Abilities
One thing I see a lot of players doing wrong with builds like is using every defensive ability immediately.
For example, they activate , , , and their boots within a few seconds.
Now they have nothing available for the opponent's next attack.
You want to avoid that.
Try to use your defensive abilities one at a time whenever possible.
If is enough to escape, you don't necessarily need .
If allows you to survive their burst, you can save your E for another dangerous moment.
Of course, sometimes you need to use several defensives together to survive.
But don't make that your default approach.
Using Offensive Glacial Prison to Recover
One of the strongest combinations in this setup is using offensively and then recovering with .
If you successfully freeze your opponent, they cannot attack you while trapped.
That gives you a short opportunity to use and recover some Health and Energy.
However, remember that the freeze doesn't last long enough for a full channel.
You might only get part of the healing before your opponent becomes active again.
That's why positioning is important.
If possible, create some additional distance before channeling so you aren't immediately interrupted when the crystal expires.
Knowing When to Finish a Fight
is excellent at surviving, but finishing opponents can sometimes be difficult.
You don't have the same immediate burst as a dedicated damage weapon.
Instead, you usually need to win through consistent pressure, correct defensive timing, and your opponent running out of options.
Once your opponent gets low, try to maintain your damage instead of giving them unnecessary opportunities to recover.
However, don't chase recklessly.
If your opponent still has strong mobility or defensive abilities available, they might be able to turn the fight around.
Sometimes it's better to remain patient and keep controlling the distance.
3. Equipment and Defensive Abilities
The rest of our equipment is focused on making even harder to kill.
| Equipment | Ability | Main Purpose |
|---|---|---|
| Passive cooldown bonus | More frequent ability usage | |
| Damage reflection and increased defenses | ||
| Recover Health and Energy | ||
| Movement speed and additional healing | ||
| Reduce your potion cooldown |
Mistcaller
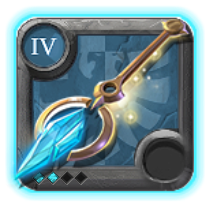
For our off-hand, we're using .
It increases our cooldown rate, which works extremely well with .
We rely on several important abilities, including and .
Getting those abilities back sooner can make a huge difference in longer fights.
It also works well with , which gives us additional cooldown reduction.
This setup is designed around having our defensive and crowd control abilities available as frequently as possible.
Hunter Hood
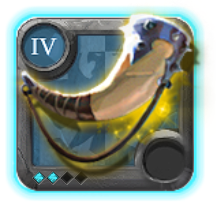
For our helmet, we're using .
increases your damage resistances while reflecting a large amount of incoming damage back at your opponent.
It's particularly useful against aggressive builds that rely on dealing continuous damage.
For example, if someone activates a powerful damage ability and commits to attacking you, can punish them for continuing.
However, there's something important you need to understand.
Your opponent can stop attacking while is active.
That's why I recommend using it when they're already committed to dealing damage rather than activating it randomly.
Against experienced opponents, they might recognize your and stop attacking immediately.
In those situations, you still get some defensive protection, but you won't receive as much value from the reflection.
Hunter Hood Against Burst Damage
can also help against certain burst abilities.
However, the timing matters.
If you activate it too early, your opponent might simply wait until it expires.
Try to recognize when they're actually committing to their damage.
And remember that damage reflection doesn't make you immune to damage.
You still need to use your other defensive abilities when necessary.
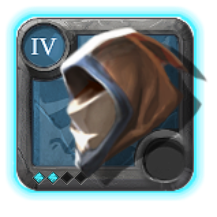
Cultist Robe
is one of the biggest reasons why this build has such strong sustain.
We're using , which allows us to recover Health and Energy while channeling.
It also increases our damage resistances during the channel.
This can help you recover from a bad trade or prepare for another engagement.
However, there's one very important downside.
can be interrupted.
If your opponent has an interrupt ready, they might be able to stop your healing before you recover much Health.
That's why I recommend thinking carefully before activating it.
When to Use Levitate
The best opportunities are when your opponent cannot easily interrupt you.
For example, you can use after creating distance with .
You can also use it while your opponent is trapped inside .
However, the enemy freeze is relatively short, so you might not get the full channel.
Against opponents with strong ranged interrupts, you need to be particularly careful.
Sometimes it's better to force their interrupt first and then activate .
Habo Tip: Don't wait until you're almost dead before using . You want to recover early enough that you can survive if your opponent manages to interrupt the channel.
Frost Shield (Alternative)
Against certain opponents, you can switch to .
This gives you additional defenses, reflects some incoming damage, and slows enemies who attack you.
It can be useful when your opponent has several ways to interrupt .
However, you're giving up a major source of healing.
For this particular build, I recommend keeping as the default because it works extremely well with and .
Soldier Boots
For boots, we're using .
It provides increased movement speed while restoring some Health.
This is an excellent option because we need both mobility and sustain.
You can use it to create distance from melee opponents, chase someone who's trying to escape, or recover some Health while repositioning.
And since we're playing Corrupted Dungeons, having a reliable movement ability is extremely important.
You can also use other Plate Boots with .
If another option is cheaper, feel free to use it.
Just check that you're using the correct spell and preferred passive.
Smuggler Cape
is one of the most important parts of this setup.
We're using , which activates when we use a potion.
It reduces the cooldown of our potion slot ability, allowing us to use another potion much sooner than normal.
This is particularly strong with Healing Potions.
Since we're already using and , getting another sooner gives us even more sustain.
However, there's something important to remember.
doesn't immediately give you another potion.
It reduces your potion cooldown, and itself has a long cooldown.
This means you can't keep using Healing Potions repeatedly without waiting.
Try to get good value out of your first and use the second opportunity when you actually need it.
Martlock Cape (Alternative)
If you want a simpler defensive option, you can use .
It automatically increases your defenses when your Health drops low enough.
However, you're giving up the extra sustain potential from .
For this particular Corrupted Dungeon build, I prefer because longer fights give you more opportunities to benefit from its cooldown reduction.
4. Food and Potions
We're using and Major Healing Potions.
Both are particularly useful for a weapon that relies on cooldown management and surviving longer fights.
| Consumable | Purpose |
|---|---|
| Faster casting and shorter cooldowns | |
| Additional Health recovery | |
| (Alternative) | Protection against dangerous burst damage |
Pork Omelette
is an excellent food choice for .
It increases our casting speed and cooldown rate.
The casting speed makes feel smoother, allowing us to maintain ranged pressure more comfortably.
And the cooldown reduction helps us get , , and our other abilities back sooner.
Since we're also using , we have a lot of cooldown support from our equipment.
This works extremely well with the general playstyle of .
Personally, I wouldn't change the food for this particular build.
Major Healing Potion
Healing Potions are another important part of our sustain.
Since we're using , we can potentially use another much sooner than usual.
However, you still need to pay attention to when you activate it.
Don't wait until you're almost dead before using a .
You want to recover Health while you're still able to defend yourself.
You should also be careful about activating it immediately before entering your own .
Since you cannot receive healing while frozen, you can lose some of the value from the potion's healing over time.
Try to use your healing abilities when you're actually able to receive their healing.
Major Resistance Potion (Alternative)
Resistance Potions are another option against opponents who rely on very dangerous burst combinations.
They provide additional protection during a short window.
However, you're giving up the sustain that works so well with .
For most Corrupted Dungeon fights, I recommend keeping Healing Potions selected.
5. Matchup Tips
can handle a lot of different situations, but you still need to pay attention to your opponent's weapon and defensive abilities.
| Opponent | What I Recommend |
|---|---|
| Melee Brawlers | Kite with and save for their engage |
| Burst Builds | Use defensively to avoid important damage |
| Cursed Staffs | Time around dangerous delayed burst |
| Highly Mobile Builds | Save your E until their mobility is unavailable |
| Reflect Builds | Stop attacking into reflection and wait for it to end |
| Healing Builds | Maintain pressure and avoid giving them free resets |
| Interrupt Heavy Builds | Create distance or bait interrupts before using |
| Ranged Builds | Consider for faster pressure |
Against Melee Brawlers
These are the fights where becomes extremely valuable.
Since melee opponents need to get close to deal damage, you can use to pressure them while maintaining distance.
Once they commit their mobility and reach you, respond with .
This creates distance while potentially stunning them at your previous position.
You also have the root from your Frost passive for additional control.
However, don't automatically use every mobility ability at once.
If is enough to escape, you can save your boots for their next engage.
Against Burst Builds
Against opponents who rely on one big damage combination, is one of your strongest defensive options.
You can use it on yourself to become immune to incoming damage while frozen.
However, you need to recognize when their important damage is actually coming.
If you activate too early, your opponent can wait for the crystal to expire and use their burst afterward.
You also have to reflect damage and to recover afterward.
Try to use the correct defensive ability for each situation.
Against Cursed Staffs
can be particularly useful against Cursed Staffs.
Some builds rely on delayed damage or predictable burst abilities.
If you time your defensive E correctly, you can avoid their most dangerous damage.
However, this requires understanding when the damage will actually land.
Don't activate simply because you see your opponent applying their first damage over time effect.
Pay attention to their weapon and ability cooldowns.
And remember that while you're frozen, you cannot heal yourself.
Use your healing abilities after the crystal expires when necessary.
Against Highly Mobile Builds
These fights can be difficult because has a delay before freezing an enemy.
If your opponent has several movement abilities available, they might simply escape the area.
That's why I recommend saving your E until they've used their important mobility.
You can also use your stun or Frost passive root to help set it up.
However, don't force the offensive freeze every time.
Against certain opponents, saving defensively might be much more valuable.
Against Reflect Builds
Be careful when attacking into damage reflection.
For example, if your opponent activates with , continuing to cast into them can cause you to take significant reflected damage.
Try to stop attacking or reposition until the effect expires.
Since our build is focused on longer fights, there's no reason to take unnecessary reflected damage.
You can afford to wait for a better opportunity.
Against Healing Builds
Against healing builds, you need to maintain consistent pressure.
The difficult part is that your opponent might recover most of the damage you deal if you give them too much space.
Try to keep landing your Q while managing your defensive abilities.
can also temporarily prevent healing when you successfully freeze an opponent.
However, the crystal only provides a short opportunity.
It isn't going to permanently prevent them from recovering Health.
If the opponent has significantly better sustain and you can't make meaningful progress, consider whether continuing the fight is worth it.
Against Builds With Interrupts
These are the opponents you need to watch carefully when using .
If they have an interrupt available, they might stop before you recover much Health.
Try to force their interrupt first.
You can also use to create distance or offensively to temporarily prevent them from acting.
However, don't assume every successful freeze guarantees a full channel.
You still need to pay attention to when the opponent becomes active again.
6. Corrupted Dungeon PvE Tips
Although this build is mainly focused on PvP, you'll also need to clear mobs while progressing through Corrupted Dungeons.
can handle PvE comfortably, but our default setup is designed around surviving enemy players rather than maximizing clearing speed.
Clearing Groups of Mobs
Here's a simple rotation for regular mob packs.
| Step | What to Do | Why |
|---|---|---|
| 1 | Group a few mobs together | Make area damage more efficient |
| 2 | Use | Start dealing damage and build toward a stun |
| 3 | Keep using | Maintain pressure while avoiding enemy attacks |
| 4 | Use when needed | Reposition or interrupt nearby mobs |
| 5 | Use on stronger enemies when useful | Control dangerous targets |
| 6 | Recover with or | Prepare for the next encounter |
Since is mainly a single-target ability, it isn't the fastest option for clearing large groups.
However, it still deals enough damage to get through regular mobs.
And since we have plenty of healing, we can recover between encounters without relying entirely on food.
Ice Shard (Alternative Q)
If you want faster area damage for PvE, you can consider switching to .
deals magical damage in a targeted area, making it easier to hit multiple mobs.
This can be useful when you're clearing groups.
However, you're giving up the ranged pressure and stun mechanic from .
| Q Ability | Best Use |
|---|---|
| Default PvP and single-target pressure | |
| Area damage against grouped mobs | |
| Situational area damage and slowing enemies |
Personally, I'd recommend keeping selected when you're expecting another player to invade.
It's the ability this particular PvP setup is designed around.
Don't Waste Your Important Cooldowns
One of the biggest mistakes you can make in Corrupted Dungeons is using every defensive ability against regular mobs.
If another player appears while , , , and are all unavailable, you're going to have a much harder time surviving.
Try to avoid using unnecessary defensive abilities when clearing weak enemies.
And whenever possible, recover your Health and Energy before committing to another PvP fight.
Use the Dungeon Environment
Corrupted Dungeons have plenty of walls, corners, and narrow areas.
You can take advantage of these to control how opponents approach you.
For example, you can create distance around corners when a melee player is trying to get close.
However, remember that cannot teleport through obstacles.
Be careful about choosing a teleport destination that isn't actually reachable.
You should also avoid putting yourself in a position where you have no room to kite.
Since relies on controlling distance, getting trapped in a corner without your important cooldowns can be extremely dangerous.
7. Common Beginner Mistakes
| Mistake | What You Should Do Instead |
|---|---|
| Missing too many casts | Predict movement and maintain your three-stack pressure |
| Using too early | Save it for important damage or when someone gets close |
| Expecting to stun at the destination | Remember the stun happens at your starting position |
| Using offensive against a mobile target | Wait until their movement abilities are unavailable |
| Attacking a frozen enemy | Reposition or recover while they're immune to damage |
| Using on yourself for minor damage | Save it for dangerous burst combinations |
| Trying to heal while frozen | Use your healing abilities when the crystal is no longer active |
| Channeling into an interrupt | Create distance or bait the interrupt first |
| Using randomly | Wait until your opponent commits to attacking |
| Forgetting Frost passive | Use your empowered normal attack for the root |
| Using every defensive at once | Spread your cooldowns out over the fight |
| Wasting your | Take advantage of without wasting healing |
| Standing still against melee opponents | Keep moving and maintain distance |
8. Final Tips
Keep landing . Your Q is your main source of damage, and reaching three stacks gives you a useful stun.
Use when someone gets close. The teleport creates distance while potentially stunning enemies around your starting position.
Learn when to use offensively and defensively. Freezing an opponent can create an opportunity, but freezing yourself can completely avoid dangerous incoming damage.
Don't attack frozen enemies. They're immune to damage while inside , so use that time to reposition or recover instead.
Don't heal while frozen. Your own also prevents you from receiving healing.
Pay attention to . is excellent against committed damage, but experienced players might stop attacking when they see it.
Be careful with . provides excellent sustain, but it can be interrupted. Try to create a safe opportunity before channeling.
Take advantage of . The potion cooldown reduction is extremely useful during longer Corrupted Dungeon fights.
Don't forget your Frost passive. The additional root can help you create distance or make it easier to set up .
Use your abilities one at a time when possible. is strongest when you always have another defensive option available.
Overall, is an excellent weapon for Corrupted Dungeons if you enjoy ranged PvP and prefer controlling fights instead of relying on one big burst combo.
You have excellent crowd control, plenty of defensive options, and enough healing to survive difficult matchups.
However, you need to get comfortable with landing , timing , and recognizing when it's safe to use .
Once you understand those mechanics, becomes one of the most frustrating weapons for your opponents to deal with.