
Great Frost Staff Build
One of the best Great Frost Staff builds in Albion Online for solo PvP, built around keeping enemies at range, constantly slowing them, and using your mobility to avoid their biggest abilities.
Your equipment


Copy an item name to search for it in game, or tap the chart to open the exact build item page with market prices.
Build Guide Contents7 sections
How to play this Great Frost Staff build?
is one of my favorite weapons for solo PvP, especially if you enjoy playing at range and making it difficult for your opponents to reach you.
The main idea behind this build is pretty simple. Keep slowing your opponent, deal damage while maintaining distance, and use your mobility to avoid their most dangerous abilities.
We also have and for additional protection, which makes the build quite forgiving when something goes wrong.
However, you still need to pay attention to your positioning. If you waste all your mobility abilities at once, certain builds can easily catch you.
1. Main Abilities
Here's the ability setup I recommend for most fights.
| Slot | Ability | Purpose |
|---|---|---|
| Q | Constant damage and slowing enemies | |
| W | Mobility, stun, and avoiding damage | |
| E | Main burst damage | |
| Passive | Frost | Root enemies after every 4 spell casts |
Frozen Surge (Q)
This is what I use against most melee and medium range builds.
deals damage in a straight line and slows everyone it hits, making it extremely useful for kiting.
Since it has a short cooldown, you can keep slowing your opponent while dealing damage.
Try to use whenever it's available, but don't just stand still to hit every Q.
You want to keep moving and maintain enough distance that your opponent can't comfortably deal damage to you.
Against melee builds, this is especially important because even a small amount of extra distance can prevent them from landing their abilities.
Frostbite (Alternative Q)
Against longer range weapons, such as certain Bows or Fire Staffs, you can switch to .
It has a longer range than , which makes it easier to fight opponents who don't need to come close to deal damage.
It also applies stacks, and hitting the same target with three stacks can stun them briefly.
Just keep in mind that you lose the constant area slow from .
Personally, I prefer for most matchups, but can be a better choice when you need that additional range.
Frost Nova (W)
This is one of our most important abilities.
allows you to teleport a short distance while stunning nearby enemies at your starting position.
It also gives you a very brief moment of damage immunity during the teleport.
This means you can use it to escape someone who's on top of you, interrupt their pressure, or even avoid certain heavy hitting abilities if you time it correctly.
However, don't waste just to move around faster.
Against melee builds, I usually prefer saving it until they actually get close to me.
If you use it too early, they might simply use their own mobility to catch you again, and then you'll have nothing available to escape.
And that brief damage immunity is useful, but the timing is pretty tight, so don't rely on it to avoid every attack.
Hail (E)
is our main burst damage ability.
It allows you to summon a wave of ice at the targeted location, dealing damage and slowing enemies.
You can also cast it a second time shortly afterward, which gives us some pretty strong burst damage.
The important thing is that doesn't deal damage instantly. There is a short delay before it lands.
That's why you want to predict where your opponent is going rather than simply casting it at their current position every time.
makes landing your E much easier since slowed enemies have a harder time moving out of the area.
You can also combine with 's stun or your passive root to make it more difficult for your opponent to avoid the damage.
Frost (Passive)
After every four spell casts, your next normal attack roots your target.
This is actually pretty useful, especially against melee builds.
You can use the root to create some extra distance, interrupt their movement, or make landing your E easier.
Just remember that you need to use a normal attack to activate it.
Try to keep track of when your passive is ready instead of wasting the root when you don't need it.
2. How to Fight With Great Frost Staff
Unlike some other weapons, isn't really about using one big combo and killing your opponent immediately.
You want to keep dealing damage while controlling the distance between you and your target.
Here's how I usually approach fights.
| Step | What to Do | Why |
|---|---|---|
| 1 | Start with | Apply damage and slow your opponent |
| 2 | Use when you have a good opportunity | Deal burst damage while they're slowed |
| 3 | Keep moving and using Q | Maintain pressure without taking unnecessary damage |
| 4 | Use when they get close | Stun them and create distance |
| 5 | Use when necessary | Avoid dangerous abilities and recover cooldowns |
| 6 | Chase once you have the advantage | Use your remaining mobility to finish the fight |
Keep Your Distance
The most important thing about this build is understanding how much distance you need between yourself and your opponent.
You want to be close enough to hit them with your abilities, but far enough that they can't easily hit you back.
Against melee builds, keep using to slow them while moving away.
If they use their mobility to catch you, that's when you can respond with .
Don't use your and boots together unless you really need to escape.
It's usually better to keep one of them available for your opponent's next attempt to catch you.
Landing Your E
Since has a small delay before dealing damage, you need to pay attention to how your opponent is moving.
If they're chasing you, try placing along the path they're taking.
If they're running away, aim slightly ahead of them.
And if they're already slowed or stunned, you have a much better opportunity to land both hits.
One combination you can use when your opponent gets close is:
Stun → → →
This allows you to create distance while dealing quite a bit of damage.
Of course, you won't always be able to use this exact combination, but it's something worth keeping in mind.
Don't Rush Your Defensives
You have , , , and .
That's quite a few ways to survive dangerous situations.
But if you waste everything at the same time, you'll be pretty vulnerable until your cooldowns come back.
Try to use one defensive ability at a time whenever possible.
For example, if is enough to avoid your opponent's damage, there's no reason to immediately use as well.
3. Equipment and Defensive Abilities
Each piece of equipment has an important role in this build.
| Equipment | Ability | Main Purpose |
|---|---|---|
| Ranged damage and interrupts | ||
| Avoid damage and recover cooldowns | ||
| Mobility and cooldown reduction | ||
| Emergency invisibility when low on health |
Cowl of Purity
I'm using for additional ranged damage.
can also interrupt enemy casts and channeled abilities, which is extremely useful against certain builds.
For example, if you're fighting someone with an important channeled spell, you can save your to interrupt it instead of simply using it for extra damage.
Against opponents without anything important to interrupt, feel free to use it offensively.
Alternative:
If you want to make the build cheaper, is a good alternative.
You'll lose the interrupt from , but it's a reasonable option if you're trying to keep your equipment costs low.
Assassin Jacket
is one of our main defensive abilities.
allows you to become invisible, giving you time to reposition, avoid dangerous attacks, or wait for your cooldowns.
This works extremely well with because we rely heavily on our Q, W, and E abilities.
For example, if you use to escape and your opponent manages to catch you again, you can use to buy yourself some time until your mobility is available again.
You can also use to waste certain enemy abilities.
Just be careful against builds that can reveal invisible players.
And don't forget that you can gain extra damage while staying invisible, which can be useful when you decide to start attacking again.
Hunter Shoes
For boots, I'm using with .
You can actually use other Leather Shoes with the same ability if you want.
gives you movement speed and improves your cooldown rate, allowing you to use your and more frequently.
This is particularly useful because has a fairly long cooldown.
Against melee builds, you can use to keep your distance while waiting for to become available again.
And when you're winning a fight, you can use it to chase your opponent.
Just try not to waste your boots when you're already at a safe distance.
Undead Cape
gives us another opportunity to survive when our health gets dangerously low.
When it activates, you become invisible for a short time, allowing you to reposition or escape.
You can still use abilities while the cape is active, but your damage and healing are reduced.
That's why I usually recommend using it to survive rather than trying to deal as much damage as possible while invisible.
You can also combine the invisibility with your mobility to create enough distance to escape.
However, don't depend on to save you from everything. If you're taking too much damage or your opponent can reveal you, it might not be enough.
Cheaper Cape Alternatives
| Cape | Benefit |
|---|---|
| Extra chance to escape when low on health | |
| Additional damage | |
| More protection when your health gets low |
Personally, I prefer for solo PvP, but the other options are perfectly fine if you want a cheaper setup.
4. Food and Potions
| Consumable | Benefit |
|---|---|
| Faster casting and shorter cooldowns | |
| Additional healing during fights | |
| (Alternative) | More damage while keeping some cooldown reduction |
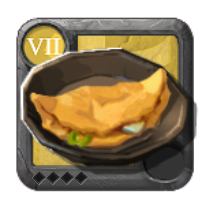
Pork Omelette
I'm using because it reduces our cooldowns and casting times.
Even though is instant, shorter cooldowns on our other abilities are extremely useful.
Being able to use or more frequently can make a huge difference, especially in longer fights.
If you prefer more damage, you can use instead.
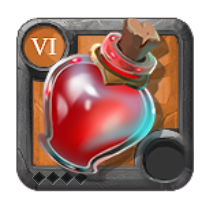
Major Healing Potion
For potions, I'm using Major Healing Potions.
Since the build doesn't have any built-in healing from our weapon or armor, Healing Potions are our main source of sustain.
Try to use them when you can benefit from the healing without wasting too much of it.
Against opponents with dangerous burst damage, you might want to save your potion until after their main combo, depending on the situation.
5. Matchup Tips
Different builds require different approaches, so you should adjust your abilities and positioning depending on your opponent.
| Opponent | What I Recommend |
|---|---|
| Melee Brawlers | Keep slowing them with and save |
| Mobile Weapons | Don't waste your mobility before they commit to chasing |
| Bows | Consider for additional range |
| Fire Staffs | Use your range and mobility to avoid their biggest abilities |
| Burst Builds | Save or for their main damage |
| Healers | Maintain pressure and try to interrupt important healing abilities |
| Damage Reflection | Avoid using your strongest damage into active reflection |
Against Melee Builds
These are generally the fights where really shines.
You can keep slowing your opponent while dealing damage from a distance.
The important thing is not allowing them to stay on top of you for too long.
If they use their mobility to catch you, respond with and create some distance.
And if isn't available, you still have and .
Try to make them waste their mobility before committing to your own.
Against Highly Mobile Builds
These fights can be a little more difficult because your opponent might have enough mobility to catch you multiple times.
Don't waste just because someone starts running toward you.
Wait until they actually commit to their engage.
You also need to be careful about using too early.
If your opponent still has their mobility available, they might simply catch up to you again.
Your main advantage is being able to constantly slow them with .
Against Bows and Other Ranged Builds
Against certain ranged builds, I recommend switching your Q to .
The additional range makes it easier to trade damage without having to move too close.
You also want to pay attention to their important abilities.
For example, against a Bow, try not to waste before they use their main mobility or damage abilities.
And if you're fighting a Fire Staff, try to avoid standing still and taking unnecessary damage.
Against Burst Damage Builds
Against weapons that rely on one big damage combo, your and become extremely important.
You can use 's brief immunity to avoid certain attacks, but you'll need good timing.
is usually the safer choice when you need to avoid a longer sequence of abilities.
Just remember that your opponent might wait for your invisibility to end before using their damage.
Don't rush back into the fight if their important abilities are still available.
Against Healers
Against healers, you generally want to keep applying pressure without giving them too much time to recover.
Use to maintain damage, and try to land both parts of your E whenever possible.
can also interrupt important healing abilities.
Just keep in mind that certain healers can sustain themselves for a long time, so don't waste all your abilities immediately and leave yourself vulnerable.
Also you can change your W spell to to be able to deal more damage.
6. PvE Tips
Even though this particular setup focuses on solo PvP, is also pretty decent for clearing mobs.
deals damage in a line, so you can hit multiple enemies if you position yourself correctly.
And deals area damage, making it useful against groups of mobs.
| Ability | PvE Recommendation |
|---|---|
| Q | for line damage and slows, or for targeted area damage |
| W | for mobility and avoiding damage |
| E | for area damage |
| Food |
Try to group enemies together before using so you can hit multiple mobs with both casts.
You can also use to reposition when you're surrounded or taking too much damage.
Just remember that this setup is designed around PvP, so it won't necessarily clear mobs as quickly as a dedicated PvE build.
And if you're using different spells for clearing mobs, make sure to switch back before fighting another player.
7. Final Tips
Keep using . It's your main source of constant pressure and helps you control the distance between yourself and your opponent.
Don't waste . It's one of your most important abilities, especially against melee builds with good mobility.
Predict your opponent's movement. has a small delay before dealing damage, so try to aim where your opponent is going instead of where they are.
Use your passive root. After four spell casts, your next normal attack roots your opponent. It's a great way to create distance or make landing easier.
Don't use all your defensives together. , , , and give you multiple ways to survive, but you need to manage them properly.
Switch your Q when needed. is excellent for kiting, but can be a better option against certain ranged opponents.
Overall, is an excellent solo PvP weapon if you enjoy ranged combat and controlling fights through slows and mobility.
It might take some practice to get comfortable with your positioning and timing, but once you get used to it, you can make things extremely difficult for your opponents while dealing quite a bit of damage yourself.
