Dagger Pair Gank
One of the best Dagger Pair builds in Albion Online for solo invis ganking, built around setting up 3 Assassin Spirit stacks, bursting from invisibility, and resetting for another combo if the target survives.
Your equipment
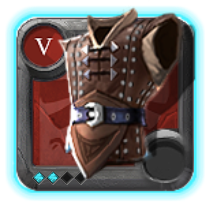
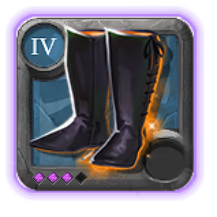

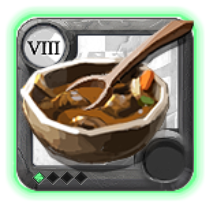
Copy an item name to search for it in game, or tap the chart to open the exact build item page with market prices.
Build Guide Contents9 sections
How to play this Dagger Pair build?
is one of the strongest weapons in Albion Online when it comes to dealing a huge amount of single-target burst damage.
However, this particular build is very different from a regular solo PvP setup.
We're not trying to take fair 1v1 fights. Our main goal is to catch players off guard and deal as much damage as possible before they have time to react.
To do that, we're combining , , , and .
If everything goes according to plan, you can deal an incredible amount of damage within a very short period.
But there's also a pretty big downside.
If your opponent survives your first combination and starts fighting back, things can get difficult very quickly.
We don't have much sustain, and our mobility is heavily dependent on abilities that require an enemy target.
That's why learning how to choose your targets, prepare your stacks, and reset fights is extremely important.
1. Main Abilities
Here's the default ability setup we're using.
| Slot | Ability | Purpose |
|---|---|---|
| Q | Build damage stacks before engaging | |
| W | Long-range engage, stun, and chasing | |
| E | Main burst damage and bleeding | |
| Passive | Additional damage over time from normal attacks |
Assassin Spirit (Q)
is the foundation of this entire build.
When activated, you start generating Charges every two seconds.
Each charge increases all your damage by 6%, and you can have up to three stacks.
That gives us an additional 18% damage when fully stacked.
But the most important part is that the damage of also scales with your Charges.
This means that using your E with three stacks is considerably stronger than using it without any.
That's why I recommend preparing all three charges before engaging your target.
However, there's one downside.
While is active, your defenses are reduced.
This makes you more vulnerable to incoming damage, which is another reason why we're using invisibility to approach our opponents.
Preparing Your Stacks
You want to start generating Charges before your opponent realizes you're about to attack.
Here's how I recommend approaching it.
- Find a suitable target and check their surroundings.
- Activate and begin building charges.
- Once you're close to three stacks, prepare your .
- Approach your target while invisible.
- Use to finish the engage.
- Land while you still have three charges.
Pay attention to how long your charges last.
Each Charge has a limited duration, so you can't prepare all three stacks and spend forever looking for someone.
You need to time your approach properly.
You can also deactivate once you've prepared your charges. That stops its ongoing effect, but your existing stacks still need to be used before they expire.
Habo Tip: Your biggest damage difference comes from landing with three Charges. If your charges expire before you reach the target, it's usually better to reset the engage than waste your E.
Shadow Edge (W)
is one of our most important abilities for catching players.
It throws a knife in a targeted direction, stunning the first enemy it hits.
If you successfully hit an enemy, your character immediately moves behind them.
While traveling toward the target, you're protected against crowd control effects and debuffs.
This makes an excellent ability for closing distance.
However, there's one important thing to remember.
is a skill shot.
You need to aim the knife properly.
If you miss, you lose one of your main ways to catch someone.
And since has a relatively long cooldown, missing it can make finishing your target considerably harder.
When to Use Shadow Edge
I generally recommend saving until you actually need it.
For example, if you land your opening combination but your opponent survives and starts running away, gives you another opportunity to catch them.
You can also use it to stun an opponent before using when the situation allows.
However, remember that we're already using to approach our target.
You don't necessarily need to use both movement abilities just to start the fight.
Sometimes saving for the chase is much more valuable.
Shadow Edge for Escaping
You can also use defensively.
If an enemy is positioned in a useful direction, hitting them can pull you behind them and create distance from other players.
However, unlike a regular dash, requires an enemy target.
You can't simply use it to move toward an empty location.
And if several enemies or mobs are standing between you and your intended target, the knife might hit something else.
That's why I recommend being careful about where you aim it.
Slit Throat (E)
is our main damage ability and the reason why is so dangerous.
It delivers a powerful single-target attack, dealing physical damage to an enemy within melee range.
The damage depends on how many Charges you have, or how many Charges are applied to your target.
It also applies additional bleeding damage over time and reduces the healing your target receives.
For this build, you should almost always use with three Charges.
That's where most of our burst damage comes from.
However, there's something important to understand.
After using , your charges are consumed.
That means you can't immediately repeat the same damage without rebuilding them.
Why Timing Matters
has a very short cast time and cannot be interrupted by normal interrupt effects once cast.
However, your opponent can still protect themselves with certain defensive abilities.
For example, if someone activates damage immunity before your E connects, you might waste most of your burst.
The same applies to damage reflection.
Against certain builds, using into their defensive ability can be extremely dangerous.
That's why I recommend looking at your opponent's equipment before committing.
Don't assume every three-stack will automatically kill someone.
Item Power, resistances, defensive abilities, shields, and timing all matter.
The Bleeding Damage
also applies a bleed that deals damage over several seconds.
This is particularly useful when your initial attack doesn't quite finish the target.
Sometimes your opponent survives with a little Health, only to die from the bleeding afterward.
However, don't rely entirely on that happening.
Your opponent might have healing, a cleanse, or another defensive ability available.
If they're still alive and trying to escape, be ready to follow up.
Deep Cuts (Passive)
For our passive, we're using .
After every four normal attacks, you apply a bleed that deals additional damage over time.
This gives us a little more damage when we have to continue fighting after our opening combination.
However, there's something important to understand.
isn't the main reason we're playing this build.
We're primarily focused on preparing three Charges and dealing enormous damage with .
If your opponent survives, can help you finish them while waiting for your other abilities.
But don't force yourself to stay in melee range just to trigger the passive.
Against certain opponents, that can get you killed.
2. The Main Solo Ganking Combo
This is the most important section of the entire guide.
The main idea is to prepare your damage before approaching, use invisibility to get close, and activate to land a powerful .
However, there's also an important interaction with Invisibility Potions that you need to understand.
Standard Ganking Rotation
| Step | Ability | What It Does |
|---|---|---|
| 1 | Prepare three damage charges | |
| 2 | Approach your target without being seen | |
| 3 | Mark the target and channel the engage | |
| 4 | dash | Close the distance and gain the damage bonus |
| 5 | Deal your main burst damage with three charges | |
| 6 | Follow up if your opponent survives and escapes | |
| 7 | Remove an important movement or defensive buff | |
| 8 | Reset the fight if you cannot finish the target |
This is the standard idea behind the build, but you won't always follow every step in exactly the same order.
Sometimes your target will die from the initial damage.
Other times, they'll survive and immediately activate their boots.
And occasionally, you'll realize that engaging was a mistake and need to escape instead.
The important thing is understanding what you're trying to accomplish.
Important: Invisibility Potion Damage Penalty
There's one mechanic that makes the timing of this combination particularly important.
Invisibility Potions reduce all damage you deal by 50% while invisible and for another two seconds after leaving invisibility.
This means that if you reveal yourself and immediately use , you could lose a huge amount of damage.
That's not what we want.
Fortunately, help with this problem.
makes you invisible while channeling for two seconds before dashing toward your target.
That channel can give the damage penalty from your time to expire.
This is one of the main reasons why the combination works so well.
But be careful about the timing.
If your potion invisibility ends at the wrong moment, or you get revealed unexpectedly, your damage penalty might still be active when you're ready to attack.
Always pay attention to your buffs and debuffs.
You want to land with three Charges, the damage bonus from , and without the damage penalty.
Habo Tip: Practice the combination a few times before taking it into the Black Zone. Getting the timing right is much more important than pressing every button as quickly as possible.
Why Hellion Shoes Are So Important
is one of the strongest parts of this setup.
When you activate it, you mark an enemy and become invisible during a short channel.
At the end of the channel, you dash toward the marked target.
You also receive a 35% damage bonus for four seconds.
This is extremely useful for because we want to increase the damage of our as much as possible.
However, the ability does have some limitations.
You need an enemy target within range to activate it.
The dash also happens at the end of the channel, not immediately.
And if you cancel the channel, you lose the dash.
Don't expect to work like a regular sprint.
It's primarily an offensive engage tool, not something that gives you complete freedom of movement.
When to Use Shadow Edge During the Combo
There are situations where you might want to use before .
For example, if your opponent moves away after your engage, can help you reach them and briefly stun them.
That gives you another opportunity to land E.
However, you need to be careful about the timing of your damage bonus.
If you spend too long chasing or repositioning, the bonus can expire.
That's why I recommend keeping the opening as simple as possible.
Ideally, you want to place you close enough to land immediately.
Save for situations where you need another gap closer.
3. What to Do If Your Target Survives
One of the biggest mistakes beginners make with is assuming the first combination will always kill their target.
It won't.
Some opponents have enough Health or defenses to survive.
Others might react quickly and use their defensive abilities.
And sometimes you simply won't have enough Item Power.
That's where the rest of our equipment becomes important.
If They Try to Escape
If your target survives and activates their boots, you can use with .
This removes purgeable buffs from your opponent.
For example, if someone activates and starts running away, you can purge their movement speed bonus.
That makes it much easier to catch them.
However, has a limited range and a short delay before it takes effect.
You need to get close enough to use it.
And remember that doesn't remove every movement ability in the game.
It can remove purgeable movement speed buffs, but it doesn't automatically stop someone from using another dash or teleport.
You can also follow up with if your opponent creates distance.
If They Decide to Fight Back
If your opponent survives and starts attacking you, you need to be careful.
This build isn't designed around taking long trades.
We don't have much healing, and our strongest damage ability is now on cooldown.
That's why I recommend using to reset the fight.
You can activate , become invisible, and reposition while waiting for your abilities.
This gives you an opportunity to recover some cooldowns and potentially prepare another .
However, don't assume every opponent will allow you to reset safely.
They might have area damage, reveal abilities, or enough mobility to stay close.
Sometimes it's better to escape completely rather than attempt another combo.
Preparing Another Burst
If you have enough room to reset, you can start preparing Charges again.
Once you have three charges and is available, you can look for another opportunity.
However, you'll probably no longer have the same damage bonuses as your initial engage.
might still be on cooldown, and your may be unavailable.
That's why your second combination might deal considerably less damage.
Don't force another engage just because your E is available.
Think about whether you can actually finish the target.
If they still have plenty of Health and important defensive abilities available, disengaging might be the better decision.
4. Equipment and Defensive Abilities
The rest of our equipment is designed around making our opening combination stronger while giving us a few options when things go wrong.
| Equipment | Ability | Main Purpose |
|---|---|---|
| Remove important enemy buffs | ||
| Invisibility, damage bonus, and resets | ||
| Targeted engage and major damage increase | ||
| Reduce potion cooldown | ||
| Armor Passives | Additional cooldown rate |
Fiend Cowl
For our helmet, we're using .
This allows us to remove purgeable buffs from an enemy.
It's particularly useful against players who rely on their boots to escape.
For example, if you land your first and your opponent activates their sprint, you can use to remove the movement speed bonus.
You can also use it against certain defensive or offensive buffs.
However, not every ability can be purged.
And since has a fairly long cooldown, I don't recommend using it randomly.
Try to save it for something important.
Against most ganking targets, I'd prioritize their escape ability unless there's a more dangerous defensive buff you need to remove.
Assassin Jacket
is one of our main defensive options.
We're using , which turns us invisible for a short duration.
While invisible, you build a damage bonus that can increase your next attack after revealing yourself.
This means can be used both offensively and defensively.
Offensive Ambush
If you're preparing another burst combination, you can use to increase your damage.
The longer you stay invisible, the larger the damage bonus becomes, up to its maximum.
Once you reveal yourself, you have a short window to use the bonus.
This can make your next considerably stronger.
However, don't forget about your Charges.
If you wait too long inside , your charges might expire before you attack.
You want to time everything so your damage bonuses are active when your E lands.
Defensive Ambush
Personally, I think this is the more important use for the main ganking setup.
If your target survives and starts fighting back, allows you to break their focus and reposition.
You can use that time to wait for cooldowns or decide whether you want to continue fighting.
However, doesn't make you immune to damage.
Area attacks can still hit you.
And you can't move too far from the location where you activated without breaking your invisibility.
Use it before you're in serious danger rather than expecting it to save you at the last second.
Hellion Shoes
are probably the most important equipment piece after itself.
We're using , which gives us a targeted engage and a huge damage bonus.
Without , we'd have a much harder time approaching opponents while maximizing 's damage.
However, they're not particularly good for escaping.
You need an enemy target to activate , and the movement happens after the channel.
If you're being chased by several players, this can make escaping difficult.
That's why I recommend thinking carefully before starting a fight.
Once you commit your , you might not have a reliable way to create distance.
Smuggler Cape
For our cape, we're using .
Its ability activates when we use a potion, reducing the cooldown of our potion slot.
This is particularly useful because Invisibility Potions have a long cooldown.
Normally, you'd have to wait quite a while before preparing another invisible engage.
reduces that waiting time considerably.
However, there's something important to understand.
doesn't immediately give you another potion.
It reduces the potion cooldown by 80 seconds when its passive is available.
also has its own cooldown, so you can't activate the effect with every single potion.
For our build, this means we can prepare another invisible approach sooner after our first attempt.
Undead Cape (Alternative)
is another useful option when you want more survivability.
It automatically makes you invisible when your Health drops critically low.
This gives you an opportunity to escape if your initial engage goes badly.
However, you're giving up the potion cooldown reduction from .
Personally, I prefer for the main ganking setup because Invisibility Potions are such an important part of our approach.
But is a reasonable option if you're risking more expensive equipment and want another emergency escape tool.
Avalonian Cape (Alternative)
If you want additional damage, is another option.
Its offensive effect can increase your damage and help finish opponents who survive your initial attack.
However, you're losing the utility of .
For this particular build, I would stick with unless you specifically want a more aggressive alternative.
5. Food and Potions
We're using and Invisibility Potions.
Both are focused on making our opening combination as effective as possible.
| Consumable | Purpose |
|---|---|
| Increase all damage dealt | |
| Approach targets without being seen | |
| (Alternative) | Additional damage and pressure |
| (Alternative) | Additional sustain for direct fights |
Beef Stew
is an excellent choice for this build.
It increases all the damage we deal, which works perfectly with our burst-focused playstyle.
We're already getting additional damage from and .
gives us another damage bonus without requiring us to activate an additional ability during combat.
And since the entire goal is to deal as much damage as possible with , there's really no reason to change the food for the standard setup.
Invisibility Potion
Invisibility Potions are a core part of this build.
They allow us to approach targets without being visible.
This makes it much easier to catch someone who isn't expecting a fight.
For example, if you find someone farming mobs or gathering resources, you can prepare your Charges and approach using an .
However, remember the damage penalty.
All damage you deal is reduced by 50% while invisible and for two seconds after being revealed.
That's why we're combining the potion with .
The channel can help us wait out the penalty before our main burst.
Don't simply reveal yourself and immediately use without considering the timing.
Major Poison Potion (Alternative)
Poison Potions are a good alternative when you want additional damage rather than an invisible approach.
They apply damage over time and can help pressure opponents who survive your first combination.
However, you're giving up , which is one of the main reasons why this setup is effective for solo ganking.
I wouldn't recommend Poison Potions as the default.
But they're useful to carry if you want to switch to a more direct fighting setup.
Just remember that changing potions can temporarily put your abilities on cooldown, so prepare your consumables before committing to a fight.
Major Healing Potion (Alternative)
Healing Potions are another option if you want a little more survivability.
Since doesn't have much natural healing in this setup, a can help during extended fights.
However, this isn't really the playstyle we're building around.
Our goal is to finish the target quickly, not outlast them.
For dedicated solo ganking, I recommend keeping Invisibility Potions selected.
6. Choosing the Right Targets
This is probably the most important part of playing successfully.
You can execute your combination perfectly and still lose if you choose the wrong opponent.
The build is extremely strong when you catch someone who isn't expecting an attack.
But against experienced PvP players with all their defensive abilities available, landing your burst becomes much more difficult.
Which Targets Should You Look For?
| Situation | Recommendation | Reason |
|---|---|---|
| Player fighting several mobs | Excellent opportunity | They might have low Health or important cooldowns unavailable |
| Player with lower Item Power | Favorable | Easier to finish with your opening damage |
| Player with low Health | Excellent opportunity | Your burst might be enough to secure the kill |
| Player with weak defensive equipment | Favorable | Fewer ways to survive |
| Full-Health defensive brawler | Risky | Can survive your combo and fight back |
| Opponent with damage immunity | Be careful | Can completely deny your main burst |
| Opponent with damage reflection | Very dangerous | Can punish your |
| Several players nearby | High risk | You might get caught after committing |
| Highly mobile opponent | Situational | Can escape if your first combo doesn't finish them |
Players Fighting Mobs
These are some of the best opportunities for .
If someone is already fighting several mobs, they might have lost some Health or used important abilities.
That makes them easier to finish.
You can prepare your charges, approach with your , and use to land your burst.
However, don't immediately commit just because you see someone fighting mobs.
Check their equipment and surroundings first.
If they're wearing strong defensive gear with plenty of Health remaining, the kill might be much harder than it looks.
Players With Defensive Abilities
Be particularly careful against opponents who can block, reflect, or become immune to damage.
For example, abilities like 's can make using extremely dangerous.
Other abilities might completely avoid your damage.
That's why I recommend inspecting players whenever possible.
You want to know which defensive abilities could ruin your combination.
If someone has several reliable answers to , sometimes it's better to look for another target.
Avoid Fighting Groups
This build is designed around quickly killing a single player.
It isn't particularly good at fighting multiple opponents.
If several players attack you while your main abilities are on cooldown, you're going to struggle.
We don't have much healing, and aren't a reliable escape tool.
That's why I recommend being careful about targets who might have teammates nearby.
For example, if you see someone alone but notice several dismounted players nearby, that could be a trap.
Don't commit all your abilities without checking your surroundings.
Know When to Leave
One of the biggest advantages of solo ganking is that you get to choose when to engage.
You don't have to fight everyone you see.
If a target looks too difficult, move on.
If you engage and realize they have much more Health or defense than expected, consider disengaging.
And if your first combination doesn't deal enough damage, don't automatically commit to a second one.
Sometimes escaping with your loot is much more valuable than risking everything for another attempt.
7. Open World Roaming Tips
is designed mainly for PvP in this setup, but there are a few things I recommend keeping in mind when roaming the Open World.
Carry Siphoned Energy
If you're planning to hunt valuable targets, you can carry 10 Siphoned Energy.
This allows you to Overcharge your equipment when you want additional Item Power.
Overcharging can make a meaningful difference because scales with your damage bonuses and weapon strength.
However, Overcharge isn't free.
It consumes your Siphoned Energy, and your equipment can break when Overcharge expires.
That's why I recommend saving it for situations where the potential reward makes the additional cost worthwhile.
Don't Overcharge every time you see someone.
Use it when you're expecting a difficult but profitable engagement.
Be Patient
Solo ganking can involve quite a bit of waiting.
You might spend several minutes roaming without finding anyone worth attacking.
That's completely normal.
The important thing is not forcing bad fights simply because you haven't found a target yet.
You can also do other activities between encounters if you want.
Just remember that this build isn't particularly efficient for PvE compared to dedicated farming weapons.
PvE Ability Alternatives
If you want to clear some mobs while roaming, you can switch to more practical abilities.
| Ability | Best Use |
|---|---|
| Default ganking and burst preparation | |
| Better mobility and damage while clearing mobs | |
| Default PvP engage and chasing | |
| Additional damage against multiple targets | |
| Area damage and movement speed against groups |
Personally, I wouldn't spend too much time farming mobs with this exact setup.
We're using expensive equipment and consumables mainly to catch other players.
If your goal is efficient PvE, there are much better weapon and equipment combinations.
Protect Your Loot
If you manage to kill someone carrying valuable items, think carefully about whether you should continue roaming.
You don't necessarily need to look for another fight immediately.
Check your inventory value and cooldowns.
If you're carrying a significant amount of silver in loot, returning to safety might be the better decision.
And remember that after a fight, your most important abilities might still be on cooldown.
You don't want to get caught by another player while you're unable to defend yourself.
8. Common Beginner Mistakes
| Mistake | What You Should Do Instead |
|---|---|
| Using without three charges | Prepare all three Charges |
| Letting your charges expire during the approach | Time your invisibility and engage properly |
| Ignoring the damage penalty | Use to help wait out the penalty |
| Missing | Predict movement and aim carefully |
| Using as a normal sprint | Remember needs an enemy target |
| Using immediately | Save it for an important defensive or movement buff |
| Using too late | Reset before your Health becomes critically low |
| Fighting dedicated brawlers head-on | Look for favorable ganking opportunities |
| Attacking into reflection | Wait until the defensive effect expires |
| Assuming every combo will instantly kill | Check the target's Item Power and defensive options |
| Trying to fight multiple players | Focus on isolated targets |
| Forcing a second combo after a failed engage | Disengage when the situation becomes unfavorable |
| Forgetting your potion cooldown | Take advantage of properly |
| Overcharging for low-value targets | Save it for fights where the additional cost makes sense |
9. Final Tips
Always prepare three Charges. Your damage depends heavily on your stacks, so don't engage before you're ready.
Pay attention to the damage penalty. It lasts for two seconds after revealing yourself. The channel helps manage that timing.
Use to maximize your burst. gives you a powerful damage bonus after the dash, making your E considerably stronger.
Save when possible. If your first combination doesn't kill the target, you might need it to catch them.
Don't waste . can remove important movement speed or defensive buffs, but you need to use it at the right moment.
Use to reset fights. You don't necessarily need to use it for additional damage. Sometimes repositioning and waiting for cooldowns is much more valuable.
Take advantage of . Reducing your cooldown allows you to prepare another gank sooner.
Don't rely on for your main damage. This setup is built around , so your passive mainly helps when you have to continue attacking after the initial burst.
Avoid unnecessary 1v1 fights. This particular build is designed for catching vulnerable targets, not standing still and trading damage with experienced brawlers.
Carry Siphoned Energy for valuable opportunities. Overcharge can help secure a difficult kill, but make sure the potential reward is worth the cost.
Choose your targets carefully. is extremely dangerous when you catch someone off guard, but it can struggle against prepared opponents with strong defensive abilities.
Overall, is one of the most satisfying weapons for solo ganking if you enjoy a high-risk, high-reward playstyle.
You can deal an incredible amount of damage within a very short period, especially when you combine three Charges with and .
However, this isn't a particularly forgiving build.
If your initial combination fails, you need to know when to reset, when to chase, and when to escape.
The biggest difference between successful players and beginners isn't simply how much damage they deal.
It's knowing when to engage and making sure their damage lands at exactly the right moment.
Quick alternatives
 Replace PotionMajor Poison Potion T8.0