
Hallowfall Build
One of the best Hallowfall builds in Albion Online for solo PvE and PvP, combining strong healing with much better mobility and crowd control than a regular Holy Staff setup.
Your equipment


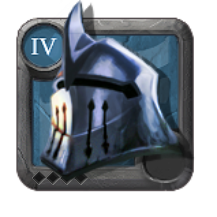
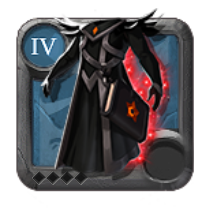
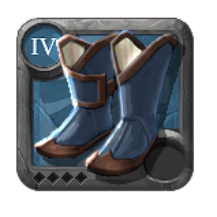
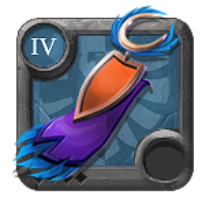
Copy an item name to search for it in game, or tap the chart to open the exact build item page with market prices.
Build Guide Contents8 sections
How to play this Hallowfall build?
is one of my favorite options for playing solo with a Holy Staff.
It has pretty much everything we need to survive difficult fights. We have strong healing, plenty of defensive abilities, and much better mobility and crowd control than a regular Holy Staff.
The main idea behind this build is to keep dealing damage with while using your healing and defensive abilities to survive your opponent's damage.
We also have , which provides a huge amount of additional sustain, and for another defensive shield.
However, just because we have plenty of healing doesn't mean we can stand still and tank everything. You still need to pay attention to your positioning, avoid unnecessary damage, and use your abilities at the right moments.
1. Main Abilities
Here's the ability setup we're using for both solo PvE and PvP.
| Slot | Ability | Purpose |
|---|---|---|
| Q | Main damage and constant pressure | |
| W | Healing, damage, and knockback | |
| E | Mobility, healing, and crowd control | |
| Passive | Additional knockback after casting five spells |
Smite (Q)
is our main damage ability, and you'll be using it throughout pretty much every fight.
It deals damage in a small area and places a mark on the enemies you hit. When a marked enemy takes direct damage again, they receive additional damage.
And another important thing is that hitting at least one enemy reduces 's cooldown by 50%.
This means that as long as you keep landing your Q, you can maintain quite a bit of pressure.
However, doesn't deal damage instantly. There's a short delay before it hits, so you need to pay attention to where your opponent is moving.
Against melee builds, this is usually easier since they need to come close to deal damage.
But against ranged builds, you'll have to predict their movement a little more.
For PvE, try to group mobs together so you can hit multiple enemies with the same cast.
Sacred Pulse (W)
is one of the reasons why I really like this setup.
It gives us healing, damage, and crowd control with a single ability.
When you cast it on yourself, you recover some health while damaging nearby enemies.
Against enemy players, it also knocks them back, making it extremely useful when someone gets too close.
For example, if a melee player is staying on top of you, allows you to heal yourself and create some distance at the same time.
You can also use it to interrupt certain enemy abilities.
In PvE, is useful for dealing additional damage to nearby mobs and interrupting their attacks with its crowd control.
Just don't waste simply because it's available.
Against some builds, having that knockback ready can be much more valuable than the extra damage.
Divine Intervention (E)
This is what makes different from the other Holy Staffs.
allows you to leap toward a targeted location. While you're in the air, you're immune to damage, debuffs, and crowd control effects.
Once you land, you heal yourself and nearby allies while knocking nearby enemies into the air.
So we have mobility, healing, crowd control, and damage immunity in a single ability.
And that makes it extremely useful in solo fights.
You can use it offensively to interrupt your opponent or reposition while staying close to them.
But personally, I think its defensive potential is much more important.
For example, if your opponent is about to use their strongest damage ability, you can use to avoid it.
You can also use it to create distance when you're in a bad position.
Just remember that your E has a fairly long cooldown, so you don't want to waste it for a little extra healing when you're already safe.
Another useful mechanic is that healing an ally with can reduce its cooldown. This becomes more relevant when you're playing with other players.
Magic Force (Passive)
For our passive, we're using .
After casting five spells, your next normal attack knocks your target back.
This is another useful crowd control ability that works really well with the rest of our build.
For example, if someone manages to get close after you use , you might have another knockback available through your passive.
You can also use it to interrupt certain abilities or create enough distance to start using again.
Try to pay attention to when your passive is ready.
You don't always have to use that empowered normal attack immediately.
Sometimes saving it for the right moment can make a big difference.
2. How to Fight With Hallowfall
Unlike builds that rely on one big damage combo, is more about surviving and dealing consistent damage.
You're not going to delete everyone in a few seconds, but you can make it extremely difficult for your opponents to kill you.
Here's how I usually approach fights.
| Step | What to Do | Why |
|---|---|---|
| 1 | Start dealing damage with | Apply pressure and trigger its cooldown reduction |
| 2 | Keep moving between casts | Avoid unnecessary damage |
| 3 | Use when needed | Heal and knock enemies away |
| 4 | Use | Avoid dangerous abilities, heal, or reposition |
| 5 | Use and | Absorb incoming damage |
| 6 | Activate when it's safe | Recover health and energy |
| 7 | Continue attacking | Keep pressure on your opponent while your cooldowns recover |
Keep Landing Your Smite
A big part of your damage comes from consistently landing .
If you keep missing, you'll lose quite a bit of damage and won't benefit from its cooldown reduction.
Try to predict where your opponent is moving instead of always casting directly underneath them.
Against melee players, you can sometimes place where they're trying to approach you.
If they want to continue attacking, they'll have to walk into your damage.
But you also don't want to stand still just to land every Q.
You have enough sustain to play longer fights, so there's no reason to take unnecessary damage.
Use Your Crowd Control Properly
Between , , and , you have quite a few ways to control your opponent.
But that doesn't mean you should use all of them immediately.
For example, if someone gets close to you, might be enough to create some distance.
If they use their mobility to catch you again, you can respond with .
And if your passive is ready, you might have another knockback available.
Try to spread out your crowd control abilities instead of using everything at once.
This makes it much harder for melee opponents to stay on top of you.
Don't Waste Your E
Your E is probably the most important ability in this build.
It provides healing and mobility, but the damage immunity during your leap is what makes it particularly strong.
Against certain builds, you can completely avoid their main damage ability if you time it correctly.
That's why I generally recommend saving until you actually need it.
Of course, if you're winning a fight and your opponent is about to escape, you can use it offensively to catch them.
Just remember that once your E is on cooldown, you lose one of your strongest defensive tools.
How to Reset a Fight
One of the biggest advantages of this build is that you have multiple ways to recover after a bad trade.
For example:
- Use to knock your opponent away.
- Activate to gain a shield.
- Use to recover health and energy.
- Reposition and wait for your important abilities to become available again.
If your opponent manages to interrupt , you can still use or your boots to create some distance.
The important thing is to avoid using all your defensive abilities at once.
You want to survive long enough to get another opportunity to heal.
Habo Tip: Try to force your opponent to use their important damage abilities before committing to a long channel. If they're still holding an interrupt, you might want to create some distance first.
3. Equipment and Defensive Abilities
Besides , we're using several pieces of equipment that make the build even harder to kill.
| Equipment | Ability | Main Purpose |
|---|---|---|
| Passive bonuses | Faster casting and additional energy | |
| Shield and damage over time cleanse | ||
| Recover health and energy | ||
| Movement speed and energy regeneration | ||
| Additional shield and protection against purges |
Tome of Spells
For our off-hand, we're using .
It gives us additional energy and increases our casting speed.
The casting speed is particularly useful because we want to keep using as often as possible.
It also makes the build feel smoother when you need to react quickly during fights.
And since we're already using a Holy Staff, having faster casting is always useful.
Guardian Helmet
is one of our main defensive abilities.
provides a shield that absorbs incoming damage.
The shield becomes stronger when your health drops below 40%, which can make a pretty big difference in close fights.
It also removes damage over time effects.
This makes it especially useful against Cursed Staffs, Fire Staffs, and other builds that rely on damage over time.
However, there's another reason why we're using .
It also activates our .
This means that whenever we use , we receive another shield from our cape.
That's quite a bit of additional protection from a single button.
You can use this combination before activating to make it more difficult for your opponent to interrupt your recovery.
Just remember that the shields won't protect you from every type of crowd control.
Cultist Robe
is one of the biggest reasons why this build has such good sustain.
We're using , which allows us to recover a percentage of our maximum health and energy while channeling.
It also increases our damage resistances during the channel.
This works extremely well with because we already have plenty of healing and defensive abilities.
However, there's one important downside.
can be interrupted.
If your opponent has an interrupt ready, they might be able to stop your healing before you recover much health.
That's why I recommend being careful about when you activate it.
For example, you can use to knock your opponent away before channeling.
You can also activate first to gain the additional shields from and .
This gives you more protection while recovering.
Just don't expect to stand still and channel through every enemy ability.
Against some opponents, creating distance before using is much safer.
Scholar Sandals
For boots, we're using with .
This gives us movement speed and additional energy regeneration.
It's a perfectly fine option, especially when you're still learning the build.
However, we already have quite a bit of energy sustain from and .
That's why I also recommend considering Leather Shoes with .
| Boots | Main Benefit | When I'd Use Them |
|---|---|---|
| Movement speed and energy regeneration | When you want reliable energy sustain | |
| Leather Shoes | Movement speed and cooldown reduction | When you want your important abilities available more often |
Personally, I like the cooldown reduction from Leather Shoes because getting and back sooner is extremely useful.
But there's nothing wrong with using , especially if you're having energy problems.
Brecilien Cape
For our cape, we're using .
Its activates whenever we use our helmet ability, giving us another shield.
While that shield is active, we also gain immunity to purges.
This works really well with because we can activate both shields at the same time.
It's also useful when we're preparing to use .
However, try not to waste just to activate your cape when you're already safe.
It's better to use the combination when you're expecting to take damage.
Budget Alternative:
If you want to make the build cheaper, you can use instead.
It automatically increases your defenses when your health gets low.
You lose the additional shield and purge protection from , but it's still a useful defensive option.
4. Food and Potions
We're using and Major Resistance Potions in the main setup.
| Consumable | Purpose |
|---|---|
| Faster casting and shorter cooldowns | |
| Reduce incoming damage during dangerous moments | |
| (Alternative) | Additional health recovery during fights |
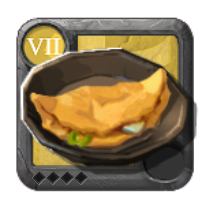
Pork Omelette
is an excellent food option for .
It increases our casting speed and reduces our cooldowns.
Both bonuses are extremely useful because we want to keep using while getting our healing and defensive abilities back as often as possible.
The cooldown reduction is especially valuable for , which has a relatively long cooldown.
I wouldn't really change the food for this particular setup.
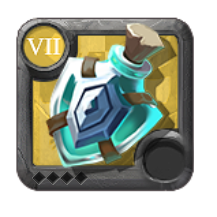
Major Resistance Potion
Resistance Potions give us another defensive option when we're expecting to take a lot of damage.
You can use them against dangerous burst combinations or when your other defensive abilities aren't available.
However, just like with and , try not to use everything at once unless you really need to.
You want to spread out your defensive abilities so you can survive longer fights.
Healing Potion Alternative
You can also switch to Healing Potions if you want even more sustain.
We already have strong healing from and , but an additional can still be useful.
Personally, I think both options are good.
Resistance Potions are better when you need to survive dangerous burst damage, while Healing Potions give you another way to recover health.
5. Matchup Tips
is a strong defensive weapon, but that doesn't mean every matchup is easy.
You still need to pay attention to your opponent's equipment and adjust how you use your abilities.
| Opponent | What I Recommend |
|---|---|
| Melee Brawlers | Use and to keep them away |
| Burst Builds | Save for their biggest damage |
| Cursed Staffs | Use to cleanse dangerous damage over time effects |
| Highly Mobile Builds | Don't waste your E or boots while chasing |
| Interrupt Heavy Builds | Create distance before using |
| Healers | Maintain pressure, but be careful about long fights |
Against Melee Builds
These are usually the fights where our crowd control becomes extremely valuable.
Since melee opponents need to come close to deal damage, we can use to knock them away.
We also have for another knockback and for additional mobility.
Try to keep using while maintaining enough distance to avoid their most dangerous attacks.
But you don't have to constantly run away either.
We have plenty of sustain, so we can afford to trade some damage as long as we're using our defensive abilities properly.
Against Burst Builds
Against builds that rely on one big damage combo, is extremely useful.
If you know which ability deals most of their damage, you can try to time your E to avoid it.
We also have and Resistance Potions for additional protection.
The important thing is not to panic and use everything immediately.
For example, if your E is enough to avoid their main burst ability, there's no reason to waste your at the same time.
Against Cursed Staffs
is particularly useful here because it removes damage over time effects.
Try to save until you can get some value out of that cleanse.
You can also use to avoid certain dangerous abilities if you time it correctly.
Between our healing and defensive abilities, we have quite a few options to survive.
However, don't underestimate their damage.
Even with all this sustain, you can still die if you allow your opponent to use their abilities without responding.
Against Highly Mobile Builds
These fights can be a little frustrating because isn't really designed around chasing players.
We have and our boots for mobility, but some weapons can easily create more distance than we can cover.
That's why I recommend not wasting your E just to get a little closer.
You might need it to survive their next attack.
If someone wants to run away and you don't have enough mobility to catch them, sometimes it's better to just let them go.
Against Builds With Interrupts
These are the opponents you need to be particularly careful about when using .
If they have an interrupt available, they can stop your channel and deny a large part of your healing.
Try to make them use their interrupt first.
You can also use to knock them away before activating your robe.
And if you have available, the additional shields can help you survive while recovering.
Just remember that shields don't automatically make your impossible to interrupt.
You still need to pay attention to your opponent's abilities.
6. PvE Tips
is a really good option for solo PvE, especially if you want something that can survive difficult encounters without relying on expensive equipment.
We have decent area damage from , additional damage from , and plenty of healing.
Here's how I recommend clearing mobs.
| Step | What to Do |
|---|---|
| 1 | Group a few mobs together |
| 2 | Start casting |
| 3 | Use |
| 4 | Use when needed |
| 5 | Activate |
| 6 | Continue using |
Clearing Groups of Mobs
Try to group enemies together so you can hit multiple mobs with the same .
Since hitting enemies reduces 's cooldown, you'll be able to keep dealing damage quite frequently.
You can also use for additional area damage and crowd control.
However, you don't want to pull too many mobs at once.
Even though we have excellent sustain, you can still get overwhelmed if several enemies use their strongest attacks at the same time.
And don't forget that can be interrupted.
Try to use it when you're not surrounded by enemies that can interrupt the channel.
Fighting Stronger Enemies
Against stronger mobs, you can take your time.
Keep using to deal damage while saving and for dangerous moments.
If the enemy uses a powerful attack, you can use your E to avoid it.
And if you need to recover health and energy, use when it's safe.
You don't need to kill everything as quickly as possible.
The main advantage of is that you can survive difficult encounters while still dealing enough damage to finish them.
Fighting Around Other Players
Since this is a hybrid PvE and PvP build, I recommend keeping an eye on other players while clearing mobs.
Don't use all your defensive abilities just to clear a pack a few seconds faster.
If someone attacks you while and are both on cooldown, you're going to have a much harder time surviving.
Try to keep at least one important defensive ability available whenever possible.
And if someone shows up while you're fighting several mobs, sometimes it's better to reposition instead of immediately trying to fight them.
7. Common Mistakes
| Mistake | What You Should Do Instead |
|---|---|
| Missing repeatedly | Predict your opponent's movement and aim carefully |
| Using only for damage | Save it when you need healing or knockback |
| Wasting | Keep it for dangerous abilities or important repositioning |
| Using while enemies have interrupts ready | Create distance or bait their interrupts first |
| Using every defensive at once | Spread them out to survive longer |
| Chasing mobile players too far | Focus on staying alive and maintaining pressure |
| Forgetting | Use your empowered normal attack for additional crowd control |
8. Final Tips
Keep landing your . A large part of your damage comes from using consistently and benefiting from its cooldown reduction.
Don't waste . It's not just another damage ability. The healing and knockback can make a huge difference in close fights.
Save for important moments. The damage immunity during your leap is extremely valuable, especially against burst damage.
Be careful with . It provides excellent sustain, but opponents can interrupt it. Try to create distance or use your defensives before channeling.
Take advantage of . Using also activates another shield from your cape, giving you additional protection.
Don't forget your passive. gives you another knockback after casting five spells, which is great for keeping melee opponents away.
Don't chase everyone. has better mobility than a regular Holy Staff, but it's still not a dedicated chasing weapon.
Overall, is an excellent choice if you enjoy playing solo and want a weapon with strong sustain, good damage, and plenty of defensive options.
It's particularly good for players who prefer surviving longer fights instead of relying on one big burst combo.
And even though it might take some practice to manage all your healing and defensive cooldowns properly, once you get comfortable with the build, it can be extremely difficult for your opponents to kill you.
