
Holy Staff Ancient Lands
One of the best Holy Staff builds in Albion Online for solo Ancient Lands, with strong sustain, consistent damage, and enough defensive tools to survive long fights against most matchups.
Your equipment


Copy an item name to search for it in game, or tap the chart to open the exact build item page with market prices.
Build Guide Contents8 sections
How to play this Holy Staff build?
is one of the strongest weapons for solo Ancient Lands because you can deal consistent damage while recovering a huge amount of Health during fights.
However, there's one important thing you need to understand.
You're not playing a traditional healer. You're using for damage while taking advantage of 's powerful self-healing to outlast your opponents.
Our main damage comes from , which becomes available much faster when we successfully hit an enemy.
gives us another source of damage, healing, and crowd control, while is our main emergency heal.
We're also using , , and to make ourselves even harder to kill.
The biggest weakness is mobility. We don't have a reliable weapon dash, and our damage depends on consistently landing .
The goal is to keep applying pressure while managing your healing, Energy, and defensive cooldowns properly.
1. Main Weapon Abilities
Here's our default setup for solo Ancient Lands.
| Slot | Ability | Main Purpose |
|---|---|---|
| Q | Consistent damage and fast cooldowns | |
| W | Healing, damage, and knockback | |
| E | Powerful emergency healing | |
| Passive | Increased healing after repeated spell casts |
Smite (Q)
is our main damage ability, and you'll be using it constantly.
It deals magical damage in a small area at your targeted location.
Enemies hit also receive a mark that triggers additional damage when they take direct damage shortly afterward.
However, the most important mechanic is the cooldown reduction.
Every successful that hits at least one enemy reduces its cooldown by 50%.
This makes it extremely effective for both PvP and PvE.
Against mobs, you can continuously deal area damage while keeping your healing abilities available.
Against players, you can maintain pressure without needing to commit to one large damage combination.
Landing Smite Consistently
Since is a ground-targeted ability, you need to predict your opponent's movement.
Against slower melee builds, this is usually pretty easy.
You can place underneath them while they're approaching or attacking.
Against ranged opponents who constantly move around, you'll need to pay more attention.
Try to aim where they're going rather than where they're currently standing.
Missing several Smites in a row makes a huge difference because you lose both the damage and the cooldown reduction.
Don't Ignore the Additional Damage
's mark triggers when the affected target receives direct damage during its short duration.
This means your follow-up attacks can deal more damage than the initial alone.
However, you don't need to build an elaborate combination around the mark.
For most fights, consistently landing and continuing to pressure your opponent is enough.
Habo Tip: Don't get so focused on casting that you forget to heal. This build is strong because you can survive longer than many opponents, not because you're supposed to outdamage every weapon immediately.
Sacred Pulse (W)
is one of the most useful abilities in this build.
It heals your selected ally, including yourself, while damaging nearby enemies.
It also knocks enemy players away and knocks mobs into the air.
This makes it extremely valuable for both PvP and PvE.
For example, if a melee opponent gets too close, you can use on yourself.
You'll recover some Health while damaging and knocking the opponent away.
This creates another opportunity to continue casting .
Sacred Pulse for PvP
Against melee builds, I recommend saving until your opponent gets close enough that the knockback matters.
You don't necessarily need to activate it immediately just because you're missing some Health.
Sometimes the crowd control is much more valuable.
For example, if someone uses their main dash to reach you, can create distance after they've committed.
You can then continue pressuring with .
can also interrupt vulnerable channels through its knockback.
However, it won't interrupt opponents protected against forced movement.
Sacred Pulse for PvE
Against mobs, provides healing, damage, and a short knockup.
This is particularly useful when clearing groups.
You can use for your main damage and when the mobs get close.
However, don't waste it against enemies that are about to die anyway.
It's often better to keep the ability available for stronger mobs or an unexpected PvP encounter.
Desperate Prayer (E)
is the most important healing ability in this build.
It provides an instant heal, but the amount depends on your current Health.
When your Health is below 40%, heals considerably more.
However, there's another useful mechanic.
If you use while your Health is above 40%, you receive a Healing Cast bonus for 15 seconds.
This bonus can stack up to three times.
| Your Health | Effect |
|---|---|
| Above 40% | Regular heal and a stacking Healing Cast bonus |
| Below 40% | Much stronger emergency heal |
| Repeated casts above 40% | Build up to three Healing Cast bonuses |
Should You Wait Until You're Below 40%?
Not always.
This is one of the biggest things you need to learn with .
Using above 40% gives you a smaller heal, but you also gain additional healing power for later.
This can be useful during longer fights.
However, using it below 40% provides considerably more immediate recovery.
The problem is that waiting too long can get you killed.
Don't intentionally drop to extremely low Health just to get the stronger heal.
If your opponent has dangerous burst damage available, using earlier can be the safer decision.
Combining Your Healing Abilities
and work extremely well together.
For example, you can use to recover some Health and knock an opponent away.
Then save for when your Health gets low enough to benefit from the stronger heal.
Alternatively, you can use earlier to build your Healing Cast bonus before a longer engagement.
The correct decision depends on the fight.
Adrenaline Driven Charity (Passive)
For our passive, we're using .
After every four spells you cast, your Healing Cast increases by 20% for three seconds.
This works particularly well with because we're using it frequently.
You can build toward the passive naturally while dealing damage.
Once it activates, your healing becomes stronger for a short period.
However, I wouldn't recommend delaying an emergency just to activate the passive.
Surviving is more important than getting the perfect healing combination.
If the bonus is already available, take advantage of it.
2. How to Fight With Holy Staff
The main idea is pretty straightforward.
You want to deal consistent damage with while using your healing and defensive abilities to survive your opponent's damage.
However, that doesn't mean you should stand still and trade damage against everyone.
Some builds can deal enough burst to kill you before you recover.
Others can reduce your healing or constantly create distance.
Basic PvP Rotation
Here's an example of how I would approach a regular fight.
| Step | Ability | What to Do |
|---|---|---|
| 1 | Start applying damage | |
| 2 | Maintain pressure and reduce your Q cooldown | |
| 3 | Heal and knock back opponents who get close | |
| 4 | Continue pressuring | |
| 5 | Punish an opponent's important buffs | |
| 6 | Recover Health when necessary | |
| 7 | Absorb dangerous damage and cleanse damage over time | |
| 8 | Reposition or create distance | |
| 9 | Recover Energy and improve cooldown recovery |
This isn't a fixed combination that you need to follow every single fight.
Sometimes you'll need much earlier.
Other times, your opponent might never get close enough for 's knockback to matter.
The important thing is understanding what each ability accomplishes.
Don't Panic When Your Health Drops
One of the biggest advantages of this setup is how strong your defenses become when you're low Health.
provides additional healing below 40%.
also becomes stronger below 40%.
And provides additional protection when your Health drops below 25%.
However, that doesn't mean you should deliberately wait until you're almost dead.
You still need to respect enemy burst abilities and healing reduction.
Against an opponent who's dealing consistent damage, you might be able to take advantage of your stronger low-Health abilities.
But against someone with a dangerous finishing ability, healing earlier is usually safer.
Manage Your Energy
Energy management is extremely important.
becomes available very frequently when you're landing it.
And since we're also using and , it's possible to consume a lot of Energy during longer fights.
This is why we're using and .
If you run out of Energy, you lose access to both your damage and healing.
Don't wait until you're completely out of Energy before using your potion.
Try to recognize when a fight is going to last longer and recover your resources before they become a problem.
3. Equipment and Defensive Abilities
The rest of our equipment focuses on defense, cooldown reduction, and keeping our healing available.
| Equipment | Ability | Main Purpose |
|---|---|---|
| Passive stats | Faster casting and cooldown recovery | |
| Shielding and damage over time cleanse | ||
| Defense and removing enemy buffs | ||
| Movement and cooldown recovery | ||
| Automatic protection at low Health |
Timelocked Grimoire
is an excellent off-hand for .
It increases your casting speed while reducing your cooldowns.
Both bonuses are valuable.
Faster casting makes easier to use under pressure, while cooldown reduction helps you get your healing and defensive abilities available sooner.
is a cheaper alternative if you want to reduce the build's cost.
However, you'll give up the additional casting speed from .
Guardian Helmet
For PvP, we're using .
It provides a protective shield and removes damage over time effects.
The shield becomes stronger when your Health drops below 40%.
This works extremely well with .
For example, if you're getting low and the opponent is applying considerable damage over time, you can use to absorb damage and remove those effects.
However, the shield only lasts for a short duration.
Try to activate it when you're actually expecting damage.
Energizing Shield for PvE
When clearing mobs, I recommend switching to .
It provides a shield while restoring some of your missing Energy.
Since can consume a lot of Energy when constantly casting , this makes PvE much more comfortable.
| Helmet Ability | Best Use |
|---|---|
| PvP, dangerous damage, and damage over time cleanse | |
| PvE clearing and Energy recovery |
Just remember to switch back to before serious PvP when possible.
Mage Robe
For our chest, we're using with .
It temporarily increases your defenses.
While the effect is active, enemies who directly damage you have their purgeable buffs removed.
This is particularly useful against opponents relying on temporary offensive or defensive buffs.
For example, if someone activates with , can remove the buff when they directly damage you during the shield's duration.
However, there's an important limitation.
is reactive. You can't simply activate it at a distance and remove an opponent's buffs.
They need to directly damage you while the shield is active.
And certain effects, including healing over time effects, cannot be removed this way.
Frost Shield (Alternative)
If your opponent doesn't have anything important to purge, is another excellent option.
It increases your defenses while reflecting part of incoming damage and slowing attackers.
This is useful against melee opponents who want to stay close.
| Chest Ability | Best Use |
|---|---|
| Against important purgeable enemy buffs | |
| Against brawlers when you need additional defense |
Hunter Shoes
For our boots, we're using .
It provides movement speed and cooldown recovery.
Both are extremely useful because doesn't have a reliable weapon dash.
You can use to create distance, follow ranged opponents, or wait for your next healing ability.
However, don't waste it simply to chase someone who's already escaping.
Sometimes you'll need that movement speed to survive their next engage.
Martlock Cape
automatically provides additional protection when your Health drops below 25%.
This works particularly well with because your healing becomes stronger when you're low.
The cape can give you an opportunity to survive a dangerous damage window and recover with .
However, it isn't a guaranteed lifesaver.
Don't rely on to protect you from every finishing attack.
If you recognize dangerous burst damage coming, use your other defenses before it's too late.
4. Food and Potions
We're using and .
Both are important because we want our abilities available as frequently as possible.
| Consumable | Main Purpose |
|---|---|
| Casting speed, cooldown reduction, and defense | |
| Energy recovery and increased cooldown rate | |
| (Alternative) | Additional protection against burst |
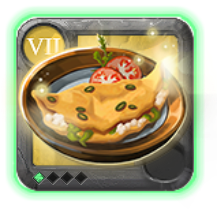
Avalonian Pork Omelette
is an excellent food option for this build.
It improves your casting speed, reduces cooldowns, and increases defense.
All three effects are useful.
Faster casting helps with , shorter cooldowns improve access to healing, and additional defense makes you harder to finish.
For this particular setup, I recommend keeping as the default.
Major Energy Potion
is especially important during longer fights.
It restores Energy while increasing your cooldown rate temporarily.
This allows you to keep using and your healing abilities without running out of resources as quickly.
However, you need to use it at the right moment.
If you activate it while you still have almost full Energy, you may waste much of its recovery value.
But if you wait until you're completely out, you might not have enough Energy left to heal yourself in time.
Try to use it before reaching that point.
5. Matchup Tips
is extremely strong in longer fights, but you need to understand what your opponent is trying to accomplish.
| Opponent | What I Recommend |
|---|---|
| Melee Brawlers | Keep landing and save for their engage |
| Ranged Kiters | Use carefully and focus on landing |
| Burst Builds | Don't wait until very low Health to activate your defenses |
| Time around and incoming direct attacks | |
| Damage Over Time | Use to cleanse dangerous effects |
| Healing Reduction | Respect the debuff and avoid unnecessary damage |
| Highly Mobile Builds | Avoid wasting movement chasing opponents |
| Purge Users | Don't rely entirely on protective buffs that can be removed |
Against Melee Opponents
Against melee builds, your goal is to make them take damage while approaching.
Keep landing and use when they get close.
If they activate an important offensive buff, can be useful when they attack into it.
However, some melee opponents have several movement abilities.
Don't assume will permanently keep them away.
Try to preserve for when you actually need additional distance.
Against Ranged Opponents
Ranged opponents can be more difficult because we don't have much mobility.
You need to stay close enough to land without constantly exposing yourself to unnecessary damage.
Use to reposition, but don't waste it trying to chase someone with considerably better mobility.
Sometimes it's better to let an opponent disengage rather than follow them into a bad position.
Against Burst and Healing Reduction
These are the matchups where you need to be particularly careful.
Although has excellent sustain, opponents with high burst can still finish you before you recover.
And healing reduction makes less effective.
Try to use and your other defensive abilities before a dangerous attack connects.
Having powerful healing doesn't mean you can ignore enemy damage.
6. Ancient Lands Strategy
is particularly effective in Ancient Lands because you can clear mobs while recovering Health without needing to stop after every fight.
However, Ancient Lands has different death rules and Item Power scaling depending on which version you enter.
Orange vs. Black Ancient Lands
| Type | Death Rules | IP Soft Cap |
|---|---|---|
| Orange | Lose inventory loot, keep equipped gear | 1200, 20% scaling above cap |
| Black | Full loot, including equipped gear | 1200, 35% scaling above cap |
This is important when deciding how expensive your equipment should be.
For example, going considerably above 1200 IP still provides an advantage, but only part of that additional Item Power counts.
In Orange Ancient Lands, the scaling is particularly restrictive.
That means an extremely expensive set might not be worth the additional investment.
Black Ancient Lands provides better scaling above the cap, but you risk losing your entire equipment set.
Recommended PvE Setup
You don't need to change your entire build for PvE.
| Slot | Recommended Ability |
|---|---|
| Q | |
| W | |
| E | |
| Passive | |
| Helmet | |
| Chest | or as needed |
| Boots |
The biggest adjustment is switching to .
This makes Energy management easier while clearing.
Basic PvE Rotation
- Group a few mobs together when it's safe.
- Use to deal area damage.
- Keep landing to benefit from its cooldown reduction.
- Use when mobs get close for additional damage, healing, and crowd control.
- Use when you need more healing.
- Activate when you're missing enough Energy to benefit from recovery.
You don't need to use every ability against weak mobs.
Try to preserve important cooldowns when another player might appear.
Spirit Essence and Clearing Efficiency
Ancient Lands rewards continued progress through Spirit Essence.
This provides bonuses that help with PvE as you clear more enemies and complete objectives.
However, don't become overconfident just because you've collected several bonuses.
You still need to respect dangerous enemies and other players.
Try to avoid unnecessary damage, especially when you're about to enter PvP.
Always Prepare for PvP
One of the easiest mistakes is forgetting to switch back to .
is excellent for PvE, but provides much more useful protection against dangerous damage and damage over time effects.
You should also check your and important cooldowns before engaging another player.
And remember that the safest fight is sometimes the one you don't take.
In Black Ancient Lands, losing means risking your entire equipment set.
7. Common Beginner Mistakes
| Mistake | What You Should Do Instead |
|---|---|
| Missing repeatedly | Predict movement and aim carefully |
| Spamming without checking Energy | Monitor resources and use properly |
| Using only for healing | Take advantage of its damage and knockback |
| Waiting until almost dead to heal | Use before dangerous burst kills you |
| Forgetting Healing Cast bonuses | Take advantage of and early casts |
| Using too early | Save it for meaningful damage or damage over time effects |
| Expecting to purge from a distance | Let the buffed opponent directly attack into it |
| Using against enemies with nothing useful to purge | Consider |
| Wasting | Preserve mobility for important moments |
| Running out of Energy | Use in PvE and during longer fights |
| Depending entirely on | Use defensive abilities before lethal damage |
| Forgetting to change PvE abilities | Prepare for PvP |
| Overinvesting in gear | Consider Ancient Lands' 1200 IP soft cap |
8. Final Tips
Keep landing . Its cooldown reduction makes it excellent for sustained damage, but you need to be accurate.
Use for more than healing. The damage and knockback can be just as important, especially against melee opponents.
Understand . Above 40% Health, you can build additional Healing Cast. Below 40%, you receive a much stronger heal.
Don't deliberately stay at low Health. Strong finishing abilities and healing reduction can still kill you.
Switch depending on the activity. is excellent for PvE, while is much stronger for surviving PvP.
Use at the right moment. It removes important buffs when the enemy directly damages you during its duration.
Don't forget . It's a good alternative when your opponent doesn't have anything worth purging.
Manage your Energy properly. Running out of Energy means losing access to both your damage and healing.
Take advantage of and . Their casting speed and cooldown bonuses work extremely well with .
Don't waste . You have limited mobility, so save it for when you really need to move.
Remember the Ancient Lands IP soft cap. Going far above 1200 IP provides diminishing benefits, especially in Orange Ancient Lands.
Overall, is an excellent weapon for solo Ancient Lands because you can deal consistent damage while recovering an enormous amount of Health.
You have enough sustain and defensive options to survive difficult fights, but you still need to manage your Energy and positioning.
The biggest thing you need to learn is when to keep pressuring with , when to create space with , and when to use before your opponent can finish you.
Once you get comfortable with those mechanics, becomes an extremely reliable option for solo Ancient Lands PvP and PvE.
Quick alternatives
 Replace Off-handMistcaller T6.2
Cheaper option.
