Warbow Build
One of the best Warbow builds in Albion Online for solo Open World and Mists, especially if you want a cheap build with strong ranged pressure and very short Magic Arrow cooldowns.
Your equipment
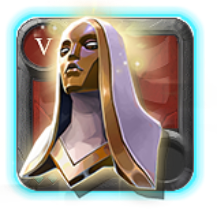
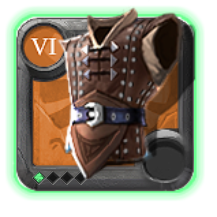
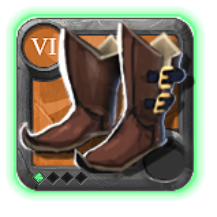
Copy an item name to search for it in game, or tap the chart to open the exact build item page with market prices.
Build Guide Contents8 sections
How to play this Warbow build?
is one of my favorite weapons for solo PvP because of how much damage you can deal while keeping your distance.
However, there's one thing you need to understand about this build.
isn't about standing still and trading damage. You want to keep moving, land your skill shots, and make your opponent work for every bit of damage they deal to you.
Our main damage ability is , which has excellent range and becomes available much faster when we successfully hit an enemy.
We're also using for constant pressure and defense reduction, while helps us create distance against opponents who get too close.
gives us additional damage and an interrupt, and provides another way to reposition or prepare a stronger attack.
We also have for movement and cooldown reduction, alongside and Healing Potions for additional sustain.
The biggest advantage of is that you can keep dealing damage without constantly being in your opponent's attack range.
But to get the most out of it, you need to learn how to land consistently and manage your movement abilities properly.
1. Main Abilities
Here's the default ability setup we're using.
| Slot | Ability | Main Purpose |
|---|---|---|
| Q | Ranged damage and defense reduction | |
| W | Mobility, slowing enemies, and creating distance | |
| E | Main damage with cooldown reduction on hit | |
| Passive | Additional defense reduction from normal attacks |
Deadly Shot (Q)
is our main Q ability, and you'll be using it constantly.
It fires an arrow in the targeted direction, dealing physical damage to every enemy it passes through.
It also reduces the damage resistances of enemies you hit, stacking up to three times.
This makes excellent for maintaining pressure.
You want to keep landing between your casts.
The defense reduction makes your opponent more vulnerable to damage, and since the projectile can pierce through multiple enemies, it's also useful for PvE.
Another advantage is its excellent range.
You can pressure opponents without needing to move close enough for normal attacks.
However, there's something important you need to understand.
is a skill shot.
You need to aim it properly, especially against mobile opponents.
If you keep missing, you'll lose a significant part of your damage and won't maintain the resistance reduction.
Stacking Defense Reduction
can apply up to three stacks of resistance reduction.
You don't necessarily need to reach three stacks before using .
However, keeping the debuff active makes your overall damage more effective.
For example, you can land once or twice while positioning, then follow up with when you have a clear shot.
Against slower opponents, maintaining the full three stacks is usually easier.
Against highly mobile players, focus on landing consistent damage rather than delaying every E until you have three stacks.
Habo Tip: Don't stand still just to land another . works best when you're dealing damage while avoiding your opponent's strongest abilities.
Frost Shot (W)
is probably the most important defensive ability in this build.
It fires an icy arrow in front of your character while knocking you backward.
Enemies hit take damage and receive a movement speed reduction.
This makes extremely useful against melee opponents.
For example, if someone uses a dash to get close, you can activate to knock yourself away while slowing them.
Now you've created distance and can continue pressuring them with and .
However, there's one important thing you need to understand.
has a relatively long cooldown, so you don't want to waste it just because someone is approaching.
Against certain opponents, you might be able to maintain distance by walking and using .
Save until they actually commit their mobility.
Positioning With Frost Shot
Since knocks your character backward, the direction you're facing matters.
You want to make sure you're creating distance toward a safe area.
For example, if you're fighting near a wall, using in the wrong direction might leave you stuck against the terrain.
And in the Open World, you also need to pay attention to mobs and other players.
Don't accidentally knock yourself into a group of enemies while trying to escape one opponent.
Try to keep enough room behind you before using the ability.
Frost Shot Against Melee Builds
Against aggressive melee weapons, is one of your strongest tools.
For example, if someone activates their boots and starts chasing, you can use to create a large gap.
You also slow them if they get hit.
This gives you another opportunity to cast safely.
However, some melee weapons have several dashes.
Don't assume that using means you're completely safe.
They might have another gap closer available.
That's why I recommend saving or whenever possible.
Ray of Light (Alternative W)
is another excellent option, particularly against slower opponents.
It fires an arrow into the air that lands at a targeted location after a short delay.
Enemies caught inside the area take damage and become rooted.
This gives us a powerful way to control an opponent while dealing additional damage.
However, there's one obvious downside.
You're giving up the mobility from .
Against highly mobile opponents or aggressive melee builds, that can be dangerous.
But against players who don't have many movement abilities, can be considerably stronger offensively.
Combining Ray of Light With Magic Arrow
One of the best things about is that it can make easier to land.
For example:
| Step | Ability | Purpose |
|---|---|---|
| 1 | Deal damage and reduce defenses | |
| 2 | Root your opponent | |
| 3 | Land your main damage while they're controlled | |
| 4 | Continue pressuring | |
| 5 | Take advantage of the shorter cooldown |
This combination can deal excellent damage when everything connects.
However, has a delayed impact, so you need to predict your opponent's movement.
If you miss the root, landing the following becomes much more difficult.
| W Ability | Best Use |
|---|---|
| Default roaming, kiting, and fighting aggressive melee opponents | |
| Additional damage and controlling slower targets | |
| Extra Q pressure and short movement speed bursts |
Personally, I'd keep for general solo roaming.
The additional mobility is extremely valuable when you don't know what kind of opponent you'll run into.
Magic Arrow (E)
is what makes so strong.
It fires a magical arrow in a targeted direction, dealing significant magical damage to the first enemy it hits.
It has excellent range, allowing you to pressure opponents from much farther away than your regular Q or normal attacks.
However, the most important mechanic is its cooldown reduction.
Every successful hit reduces the ability's cooldown by two seconds.
This means that as long as you keep landing your E, you can use it much more frequently than you might expect.
And with , , and , we have additional cooldown reduction from our equipment.
That's what makes this setup particularly effective.
Understanding Magic Arrow Damage
currently deals more damage when you hit an enemy from outside its six-meter close-range threshold.
If your opponent is closer than six meters when the arrow connects, the damage is reduced.
| Distance | Damage |
|---|---|
| Within 6 meters | Reduced damage |
| Beyond 6 meters | Full damage |
| Successful hit | Reduces cooldown by 2 seconds |
| Missed shot | No cooldown reduction |
This is another reason why we want to maintain our distance.
However, don't confuse this with a damage bonus that continuously increases with range.
You don't deal progressively more damage just because your opponent is 20 meters away instead of 10 meters away.
The important distinction is whether you're inside or outside the close-range threshold.
Don't Waste Magic Arrow
One of the biggest mistakes beginners make is constantly firing without paying attention to where the opponent is moving.
Yes, the cooldown is fairly short, especially when you land your shots.
But missing repeatedly still reduces your damage considerably.
Try to predict where your opponent is going.
For example, if someone is running in a straight line, aim slightly ahead of them.
Against opponents who constantly change direction, you might want to wait until they commit to an ability.
That's usually when landing becomes easier.
Be Careful Around Mobs
is a projectile that stops when it hits its first enemy.
This means that mobs can block your shot.
For example, if you're fighting another player near a group of mobs and fire through the group, the arrow might hit a mob instead.
You'll still deal damage to whatever you hit, but you won't damage the player you were aiming for.
That's why positioning is particularly important in the Open World and Mists.
Try to keep a clear line between you and your opponent before using E.
Using Ambush for a Stronger Magic Arrow
gives us another useful interaction.
allows us to become invisible while building a damage bonus.
Once we leave invisibility, we can use that bonus to increase the damage of our next attack.
This works extremely well with .
For example, you can activate , reposition, and prepare a stronger E.
However, there's something important you need to remember.
The damage bonus doesn't last forever.
You need to attack shortly after leaving invisibility.
And if your opponent uses a defensive ability while you're invisible, you might want to wait instead of immediately committing your E.
Habo Tip: Don't use only for extra damage. Sometimes the ability to disappear, wait for your cooldown, and reposition is much more valuable than a stronger .
Piercing Arrows (Passive)
For our passive, we're using .
Every normal attack reduces the target's defenses for a short duration, stacking up to four times.
This gives us another way to increase our damage.
And since already reduces enemy resistances, we can apply quite a bit of pressure when combining both effects.
However, there's something important to understand.
You don't want to move closer just to land normal attacks if doing so puts you in danger.
's biggest advantage is its range.
Against melee opponents, maintaining distance is usually much more important than getting another stack.
But when your opponent is already close or can't immediately punish you, landing a few normal attacks can be useful.
Alternative Passives
| Passive | Best Use |
|---|---|
| Default damage and resistance reduction | |
| Additional slows from normal attacks | |
| Energy recovery during longer fights | |
| More normal attack pressure |
If you're having Energy problems, is a reasonable alternative.
can also be useful against melee opponents, especially when you want additional ways to control their movement.
However, for this particular build, I recommend keeping .
2. How to Fight With Warbow
The main idea is to deal consistent damage while maintaining enough distance to avoid your opponent's strongest abilities.
You don't want to stand still and trade damage.
Instead, move between your attacks and force your opponent to use their mobility before committing yours.
Basic PvP Rotation
Here's an example of how I'd approach a regular fight.
| Step | Ability | What to Do |
|---|---|---|
| 1 | Start dealing damage and reducing defenses | |
| 2 | Land your main damage from outside close range | |
| 3 | Maintain pressure | |
| 4 | Create distance when the opponent gets close | |
| 5 | Maintain distance and improve cooldown recovery | |
| 6 | Deal damage or interrupt an important cast | |
| 7 | Reposition or prepare another damage window | |
| 8 | Continue pressure when E becomes available | |
| 9 | Recover Health when necessary |
This isn't a fixed combination that works against every opponent.
For example, against someone who never gets close, you might not need at all.
And against aggressive melee builds, you might need to use it much earlier.
The important thing is knowing when to attack and when to prioritize your positioning.
Keep Moving Between Attacks
This is probably the most important part of playing .
You want to avoid standing still for longer than necessary.
For example, you can cast , move, cast , and reposition again.
You don't need to constantly run away, but you should avoid giving your opponent easy opportunities to land their abilities.
Against slower melee builds, this becomes particularly effective.
They need to close the distance to deal damage, while you can continue pressuring them from range.
However, don't make the mistake of running so much that you stop dealing damage completely.
The goal is to maintain pressure while avoiding unnecessary damage.
Use Magic Arrow Whenever You Have a Good Shot
Since 's cooldown is reduced when you successfully hit an enemy, landing your E consistently is extremely important.
You shouldn't necessarily wait for the perfect damage combination every time.
If your opponent is moving predictably and you have a clear shot, take it.
However, don't fire randomly just because the ability is available.
Against experienced players, missing repeatedly can make the fight much harder.
Sometimes waiting for them to use an ability is the better choice.
Force Enemy Mobility Before Using Frost Shot
Against melee builds, I recommend paying attention to their movement abilities.
For example, if someone has a dash available, you don't necessarily want to use immediately.
You can continue walking and using while maintaining distance.
Once they use their dash to catch you, activate .
Now you've created distance while their important mobility ability is on cooldown.
You can then use if they try to continue chasing.
Try to make your opponent use their movement first.
That's one of the easiest ways to get more value from 's kiting potential.
How to Reset a Fight
One of the biggest advantages of is that it allows us to reset certain situations.
For example, if someone manages to get close and deals a lot of damage, you can use to become invisible.
This gives you an opportunity to reposition while waiting for your abilities.
However, doesn't make you immune to damage.
Area attacks and reveal effects can still hit you.
You also need to stay within the ability's allowed movement area to maintain invisibility.
Don't wait until you're almost dead before using .
If you recognize that you're losing a trade, use it early enough that you still have options afterward.
3. Equipment and Defensive Abilities
The rest of our equipment focuses on improving our damage while giving us enough mobility and defense to survive longer fights.
| Equipment | Ability | Main Purpose |
|---|---|---|
| Additional ranged damage and interrupt | ||
| Invisibility, repositioning, and damage bonus | ||
| Movement speed and cooldown recovery | ||
| Shorter cooldown | ||
| Armor Passives | Additional cooldown rate |
Cowl of Purity
For our helmet, we're using with .
This ability fires a beam of energy in a straight line, dealing magical damage and interrupting enemy spell casting.
It also applies additional damage over time to enemies hit.
This works really well with because we can deal damage from a distance.
And since the beam can hit multiple enemies along its path, it's also useful when fighting near mobs.
However, there's another important reason why we're using it.
can interrupt important enemy abilities.
For example, if an opponent is channeling a powerful attack or healing ability, you can use to interrupt it.
That's why I don't recommend using it immediately every time it's available.
Sometimes saving the interrupt is much more valuable than the extra damage.
Force Field (Alternative Helmet Ability)
is another excellent option, especially against aggressive melee builds.
It creates a shockwave around your character, knocking nearby enemies away.
This gives us another way to create distance.
For example, if someone manages to reach you after you've used , can push them away again.
Now you have another opportunity to start kiting.
However, requires the enemy to be close.
You're also giving up the additional ranged damage and interrupt from .
| Helmet Ability | Best Use |
|---|---|
| Default ranged damage and interrupting casts | |
| Creating distance against aggressive melee opponents | |
| Additional shielding and Energy recovery |
Personally, I'd keep for general roaming.
But against opponents who can constantly stay on top of you, can be considerably stronger.
Assassin Jacket
For our chest, we're using with .
turns us invisible for a short duration while building a damage bonus.
This makes it useful both offensively and defensively.
Offensive Ambush
You can use to prepare a stronger .
For example, if your opponent has already used their important defensive abilities, you can activate and build your damage bonus.
Once you leave invisibility, fire while the bonus is active.
However, don't wait so long that your opponent manages to escape or recover all their cooldowns.
Sometimes using your damage abilities more frequently is better than trying to prepare the perfect attack.
Defensive Ambush
Personally, I think the defensive value is even more important.
Against opponents with powerful targeted damage, can break their pressure and give you time to reposition.
You can also wait for or to become available again.
However, remember that invisibility doesn't mean invulnerability.
Enemies can still hit you with area attacks or reveal you with certain abilities.
Try to use when you have enough Health to survive if your opponent manages to predict your position.
Inferno Shield (Alternative Chest Ability)
Against certain opponents, can be useful.
It increases your damage resistances and reflects part of the damage you receive.
This is particularly useful against aggressive melee builds that want to stay close.
However, you're giving up , which is one of your strongest ways to reposition.
And since relies heavily on maintaining distance, I generally recommend keeping for the main setup.
| Chest Ability | Best Use |
|---|---|
| Default kiting, repositioning, and damage preparation | |
| Defensive trading against aggressive opponents |
Hunter Shoes
For our boots, we're using .
It increases our movement speed and cooldown recovery.
Both are excellent for .
The movement speed helps us maintain distance, while the cooldown reduction makes our important abilities available sooner.
This works particularly well with and .
However, remember that is also one of your main escape abilities.
If you activate it simply to catch someone who's already running away, you might not have it available when they decide to fight back.
Try to use it when you actually need the movement speed.
Alternative: Any Leather Shoes
You don't specifically need for .
Any Leather Shoes with the same ability can work.
If another pair is cheaper, feel free to use it.
Just make sure you're using the correct ability and preferred passive.
Smuggler Cape
For our cape, we're using .
Its effect activates when we use a potion, reducing the cooldown of our potion slot ability.
This is particularly useful because we're using Healing Potions.
During longer fights, the cooldown reduction can give us another opportunity to heal much sooner.
However, there's something important you need to understand.
doesn't immediately give you another .
It reduces your potion cooldown by 80 seconds when its effect is available.
The cape also has its own cooldown, so you can't activate this effect with every potion.
That's why I recommend paying attention to when you use your first .
If you waste it when you're only missing a small amount of Health, you're still wasting an important defensive resource.
Martlock Cape (Alternative)
If you want a more straightforward defensive option, you can use .
It automatically increases your defenses when your Health gets low enough.
However, you're giving up the potion cooldown reduction from .
For longer fights, I prefer because getting another sooner can make a considerable difference.
4. Food and Potions
For our main setup, we're using and Major Healing Potions.
| Consumable | Main Purpose |
|---|---|
| Faster casting and shorter cooldowns | |
| Health recovery during fights | |
| (Alternative) | Additional damage and cooldown reduction |
| (Alternative) | Protection against dangerous burst damage |
Pork Omelette
is one of the best food choices for .
It increases our casting speed and cooldown rate.
Both bonuses are useful because we want to keep using and as frequently as possible.
The additional cooldown reduction also helps us get back sooner.
Since we're already using on our armor and on our boots, we have quite a bit of cooldown support.
This works extremely well with 's general playstyle.
For this particular setup, I recommend keeping as the default.
Deadwater Eel Stew (Alternative)
is another excellent option.
It increases our damage while also reducing our cooldowns.
This makes it useful when you want to play more aggressively and get stronger hits.
However, you're giving up the additional casting speed from .
| Food | Main Advantage | Best Use |
|---|---|---|
| Casting speed and cooldown reduction | Default kiting and consistent pressure | |
| Additional damage and cooldown reduction | More aggressive PvP |
Personally, I prefer for general roaming.
But is definitely worth considering if you want more damage.
Major Healing Potion
Healing Potions are our main source of sustain during combat.
Since doesn't have any built-in healing from its weapon, I recommend keeping Healing Potions selected.
And with , we have the opportunity to use another potion sooner.
However, don't wait until you're almost dead.
You want to recover enough Health that you can continue fighting while your defensive abilities are still available.
You can also use or to create space while recovering.
Just remember that taking more damage than you're healing can still get you killed.
Resistance Potion Alternative
Resistance Potions are useful against certain burst-heavy opponents.
They reduce incoming damage for a short duration.
However, you're giving up the direct healing from Healing Potions.
For most solo Open World and Mists fights, I'd keep Healing Potions selected.
5. Matchup Tips
can handle quite a few different matchups, but it's important to understand which opponents can punish your kiting playstyle.
| Opponent | What I Recommend |
|---|---|
| Melee Brawlers | Save for their engage |
| Ranged Kiters | Focus on landing and maintaining pressure |
| Burst Builds | Use to avoid targeted damage and reposition |
| Healing Builds | Maintain resistance reduction and avoid unnecessary resets |
| Highly Mobile Builds | Save and until they commit |
| Reflect Builds | Avoid committing into active reflection |
| Interruptible Channels | Use to interrupt important abilities |
| Slower Opponents | Consider for additional damage |
Against Melee Brawlers
Against melee opponents, your main goal is to maintain distance.
You want to deal damage with and while avoiding their strongest attacks.
For example, if someone uses a dash to reach you, respond with .
This creates distance while slowing them.
If they continue chasing, you can use .
And if they manage to reach you again, gives you another opportunity to reposition.
However, don't automatically use everything at once.
If creates enough distance, save your other mobility abilities.
You want to make your opponent use their movement abilities before committing yours.
Against Ranged Builds
Against other ranged weapons, positioning and accuracy become particularly important.
Since both players can deal damage from a distance, you'll have fewer opportunities to completely avoid attacks just by walking away.
Try to maintain consistent pressure while looking for good opportunities.
You can also use to interrupt important casts when possible.
Against certain ranged opponents, can be useful.
However, you're giving up , so make sure you won't need the additional mobility.
Against Burst Builds
Against opponents with strong burst damage, becomes extremely valuable.
You can use it to disappear when they're preparing their main combination.
This can make it difficult for them to continue using targeted abilities.
However, doesn't protect you from area damage.
Experienced opponents might try to predict your position and continue attacking.
That's why you should still pay attention to their damage abilities.
You can also use to create distance before their burst connects.
Against Healing Builds
Healing builds can be frustrating because they might recover most of your damage if you give them too much time.
Try to maintain resistance reduction through and whenever it's safe.
You can also save to interrupt important healing casts.
However, doesn't have built-in healing reduction in this setup.
So if your opponent consistently recovers more Health than you're dealing, finishing the fight can become difficult.
Sometimes it's better to disengage rather than continue fighting indefinitely.
Against Highly Mobile Builds
These are some of the most difficult matchups for .
Even though we have and , certain weapons can cover distance much more frequently.
For example, and have several ways to reach you.
Against those weapons, you need to be particularly careful about your cooldowns.
Try to use after they commit an important dash.
You can also use to wait for your movement abilities.
However, don't assume you can kite every opponent forever.
Some builds will eventually reach you.
That's why it's important to deal enough damage while creating distance.
Against Damage Reflection
Be careful against opponents using damage reflection.
For example, if someone activates with , you don't want to blindly fire your strongest into it.
You can end up taking a significant amount of reflected damage.
Try to recognize the defensive effect and wait until it expires.
Since has excellent range, you can often maintain distance while waiting.
And remember that you don't need to attack every second to win a fight.
Sometimes avoiding damage is more important than getting another shot.
6. PvE and Open World Roaming Tips
is mainly a PvP weapon, but you can still use it for solo PvE.
You have reasonable damage from and , while provides additional area damage.
However, this isn't necessarily one of the fastest weapons for clearing groups of mobs.
If your main goal is efficient fame farming, there are better options.
Clearing Groups of Mobs
Here's how I recommend approaching regular mob packs.
| Step | Ability | Purpose |
|---|---|---|
| 1 | Group a few mobs together | Make your area abilities more effective |
| 2 | Pierce multiple enemies and reduce defenses | |
| 3 | Deal additional damage along a line | |
| 4 | Focus stronger enemies and reduce E cooldown on hit | |
| 5 | Continue clearing | |
| 6 | Reposition | Avoid dangerous attacks while waiting for cooldowns |
is particularly useful against grouped mobs because it can pierce through several enemies.
You can also use to damage multiple enemies in a line.
However, only hits the first enemy in its path.
That's why I recommend using it against stronger targets rather than trying to hit several mobs at once.
Alternative Q for PvE
If you're focusing on clearing groups, can be another useful option.
It fires several arrows in a cone in front of you, dealing area damage and slowing enemies.
However, its range is shorter than , so you need to get closer to your targets.
| Q Ability | Best Use |
|---|---|
| Default PvP, ranged pressure, and piercing through mobs | |
| Close-range area damage and slowing groups | |
| Additional single-target damage over time |
Personally, I would keep for general roaming.
It's useful for PvE while still giving us the range and resistance reduction we want for PvP.
Fighting Stronger Mobs
Against stronger enemies, focus on dealing consistent damage while avoiding dangerous attacks.
You can use to reduce their resistances and for your main damage.
is also useful for repositioning when an enemy gets too close.
However, remember that has a long cooldown.
If you're in a dangerous area, you might want to save it in case another player attacks you.
The same applies to .
You don't necessarily need to use every ability to kill a regular mob.
Sometimes clearing a little more slowly while keeping your defensive abilities available is the safer choice.
Choosing Your Fights
is excellent when you have enough room to kite.
However, some locations can make that difficult.
For example, fighting near several mobs, walls, or narrow passages can limit your movement.
That's why I recommend paying attention to your surroundings before engaging.
If you're fighting someone in an open area, you usually have more opportunities to use and properly.
But if you get trapped against terrain, even a weaker opponent might become dangerous.
Try to choose fighting locations where you have enough space to move.
And if you're carrying valuable loot, think carefully before committing to another fight.
Don't Waste Your Defensives While Farming
Since we're playing in the Open World and Mists, other players can appear while you're clearing mobs.
For example, if , , , and your are all unavailable, you're going to have a much harder time surviving an unexpected attack.
Try to keep at least one important defensive ability available.
You don't need to maximize your PvE damage every single time if doing so leaves you completely vulnerable.
7. Common Beginner Mistakes
| Mistake | What You Should Do Instead |
|---|---|
| Missing repeatedly | Predict enemy movement and wait for clear shots |
| Using too close | Try to stay outside the six-meter reduced damage range |
| Forgetting the E cooldown reduction | Focus on consistently landing |
| Ignoring 's resistance reduction | Keep applying pressure between E casts |
| Using before an opponent commits | Save it for their important movement abilities |
| Knocking yourself into dangerous terrain | Check your position before using |
| Using too late | Reposition before you're almost dead |
| Using only for damage | Save it to interrupt important casts when needed |
| Forgetting | Use normal attacks when it's safe |
| Using every movement ability at once | Spread out your defensive cooldowns |
| Wasting Healing Potions | Recover when you can actually benefit from the healing |
| Expecting to reset potions instantly | Remember that it reduces the cooldown |
| Firing through mobs | Make sure you have a clear shot at your target |
| Trying to outtrade dedicated brawlers | Keep your distance and take advantage of your range |
| Fighting in narrow areas | Look for open space where you can kite effectively |
8. Final Tips
Keep landing . Successful hits reduce its cooldown by two seconds, making accuracy one of the most important parts of this build.
Maintain your distance. deals reduced damage within six meters, and staying outside melee range makes it easier to avoid dangerous attacks.
Don't waste . Save it for when opponents commit their mobility or get too close.
Use consistently. Its range and resistance reduction make it an excellent ability for maintaining pressure between E casts.
Switch to when appropriate. The additional damage and root can be extremely useful against slower opponents.
Use properly. It's good additional damage, but interrupting an important enemy ability can be even more valuable.
Don't forget . Against opponents who can constantly stay close, having another knockback can make a huge difference.
Use to reposition. The damage bonus is useful, but sometimes waiting for your important cooldowns is much more valuable.
Take advantage of . Getting another sooner can help you survive longer fights.
Stick with for consistent pressure. The casting speed and cooldown reduction work extremely well with .
Watch your surroundings. can be blocked by mobs, and can put you in a bad position if you aren't paying attention.
Don't chase everyone. is excellent at kiting, but using all your movement abilities just to finish someone can leave you vulnerable.
Overall, is an excellent choice if you enjoy ranged solo PvP and prefer winning fights through positioning, accuracy, and cooldown management.
You have strong ranged pressure, useful defensive abilities, and excellent opportunities to keep attacking while your opponent struggles to reach you.
However, the build requires practice.
The biggest thing you need to learn is how to land consistently while maintaining enough distance to avoid your opponent's strongest abilities.
Once you get comfortable with that playstyle, can become an extremely effective weapon for solo Open World and Mists PvP.
Quick alternatives
 Replace FoodDeadwater Eel Stew T8.0