
How to Counter Builds in Albion Online
Knowing your own build is only half the fight. Here's how to spot an opponent's strongest abilities, deny their value, and attack when their defenses are down.
Spot the threat. Choose your counter.
Five common situations and what to look for before you commit your damage.


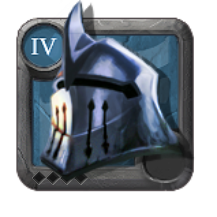


Example equipment and ability responses. A purge, cleanse or block only helps if the selected spell and its timing suit the matchup.
See the counters in real fights.
Knowing the right answer is one thing. Timing it is another. Watch how I deal with reflects, healing, burst damage and mobility in Albion Online PvP.
Watch on YouTubeYou can have a really strong build in Albion Online and still lose fights because you don't know how to counter your opponent. Attacking into Hunter Hood, letting a Mercenary Jacket heal for free, or spending your biggest attack into damage immunity can turn a winning fight into a loss.
Most of these mistakes are avoidable. The trick isn't memorizing every ability in the game. It's recognizing the important ones and using your counters at the right time.
Don't just press your abilities because they're ready. First identify the opponent's dangerous cooldown, force it out, counter or wait it out, then punish them while it's unavailable.
1. Inspect before you fight
One of the easiest ways to improve at PvP is to inspect your opponent before committing. Their equipment tells you what you should be looking out for, even if it doesn't guarantee which spells they're currently using.
Expect Bloodlust. Plan how to deny or purge their healing.
Expect Retaliate. Be ready to stop attacking or purge the reflect.
Expect a purge that could remove your most important buff.
Look for their likely damage pattern, gap closers, chase tools and escape options.
Inspecting won't win a fight on its own. But going in with a plan is much better than being surprised by every defensive ability.
2. Purge: remove the right buff
Purge removes removable positive buffs from an enemy. Fiend Cowl is one of the most useful examples. If your opponent activates a Mercenary Jacket's Bloodlust, a timely purge can take away the effect before they get meaningful healing.
It can also remove Hunter Hood's Retaliate and many movement speed or other combat buffs. The mistake is purging the first thing you see instead of the most threatening thing. If you purge their boots and they activate Bloodlust afterward, you've lost your answer to their sustain.
Keep the purge available for Bloodlust. If you lack one, deny hits and wait out the healing window.
Against Mercenary Jacket, try to hold your purge until Bloodlust activates. Against Hunter Hood, save it for Retaliate if your damage would otherwise be reflected.
Fiend Cowl isn't the only purge. Mage Robe's Purging Shield can strip removable buffs from an attacker. In some matchups, even that shield can itself be purged.
Remember that not every effect is purgeable. Sword weapons have Iron Will, which can temporarily provide purge immunity, allowing a player to protect a movement buff during its window.
3. Cleanse and damage-over-time counters
Purge removes positive effects from enemies. Cleanse helps remove certain negative effects from yourself, such as crowd control. Leather Helmet's shared Cleanse is especially valuable because it can be activated while stunned or silenced.
That makes it useful against players who stun or root you before delivering their strongest damage. Try to save it for the setup that actually threatens your life, rather than spending it on the first minor inconvenience.
Emergency Shield clears applicable damage-over-time stacks. Death Curse itself is not removed.
Guardian Helmet against curses, bleeds and burns
Guardian Helmet's Emergency Shield can remove damage-over-time effects and apply a shield. This is valuable against Curse stacks, Axe bleeds, Fire burns and similar pressure.
There's an important distinction against regular Cursed Staff: removing Vile Curse stacks does not remove Death Curse itself. The delayed explosion can still happen, so the shield and any other defensive timing still matter.
4. Reflect: know when to stop attacking
Hunter Hood is a classic example of a reflect ability that punishes players for attacking without thinking. When Retaliate is active, some of the damage you deal to the opponent is sent back to you.
That can be especially dangerous if you're playing a burst-heavy weapon. You might think you're about to finish the fight, only to lose a huge amount of health to your own attack.
Purge the removable reflect, or stop dealing damage until it expires.
Stop attacking until the reflect expires, move into a better position, or purge it if you have that option. Do not stand still and give your opponent free pressure while you're waiting.
Other reflect abilities include Inferno Shield, Deflecting Spin and Parry Strike. They don't all behave identically, but the same rule applies: check the defensive effect before committing your biggest damage.
5. Block burst and respect damage immunity
Some of the strongest defensive plays are about blocking one important ability, not reducing every small hit.
Channel it at the right time to avoid damage and crowd control. For example, you can time it around a Cursed Staff's delayed Death Curse hit.
When its immunity triggers, avoid wasting your main burst. Wait, bait it out, or remove the removable buff if your setup allows it.
A well-timed Dodge can avoid dangerous damage and control effects without expensive equipment.
Timing matters. Using Soldier Helmet too early gives your opponent time to wait it out. Using your strongest E into Cleric Robe immunity wastes your opportunity to win the trade.
6. How to counter healing
Not every counter requires a special spell. Mercenary Jacket's Bloodlust needs the wearer to land direct damage to get healing value. If you can't purge it, you can often kite away, use crowd control, or avoid their hits until the effect ends.
You can then return to the fight while that major cooldown is unavailable. Axe weapons can also apply healing reduction through Rending Bleed stacks, while certain other specialized abilities interfere with healing.
This is useful against sustain-focused opponents, including some Battleaxe, Nature Staff and Holy Staff setups. Standing still and trading damage is often exactly what a healing build wants you to do.
7. Kiting and mobility: control the distance
Kiting means dealing damage while managing the distance between you and the opponent. Ranged players often want room to attack; melee players usually need to get close to make their damage count.
As a Bow player, Frost Shot can help you create space against melee. Cloth Cowls' shared Force Field is another way to knock an enemy away and buy some room.
But if you're the melee player, don't spend every gap closer immediately. If a Bow still has Frost Shot available, they can simply escape again and leave you with no mobility. Try to force the escape first, then use your gap closer while theirs is on cooldown.
Ask yourself: whose mobility is still ready, and who wants this fight to happen at this distance?
8. Put it together: punish their cooldowns
Here's a simple example from the video. You're fighting a Battleaxe user with Hunter Hood and Mercenary Jacket. You know they can reflect damage and recover health, so bursting into both effects is a terrible trade.
Force their key defensive or sustain cooldown.
Purge it, counter it, or avoid giving it value.
Commit your damage while their answer is unavailable.
- Force Hunter Hood. Stop attacking during Retaliate, reposition, and return when the reflect ends.
- Deal with Mercenary Jacket. If they activate Bloodlust, purge it or create distance so they cannot get full healing value.
- Recognize the opening. Once their reflect and major sustain ability are on cooldown, you have a much better chance of getting value from your offensive spells.
- Commit when it matters. Keep an eye on weapon abilities and any other defensives they may still have, then try to finish the fight.
Real fights are rarely this clean. Opponents can have more defensive tools and may outplay you. Still, recognizing the abilities that decide a matchup is one of the biggest steps from beginner PvP toward better decision-making.
PvP counter quick reference
| What you see | What to try |
|---|---|
| Hunter Hood reflect | Stop attacking, kite, or purge. |
| Mercenary Jacket Bloodlust | Purge, deny their damage, or kite it out. |
| Stun, root or silence | Save a suitable Cleanse for the dangerous setup. |
| Curse, bleed or burn stacks | Use Guardian Helmet to remove applicable damage-over-time effects. |
| Large delayed burst | Time Block, Dodge, or another appropriate defensive ability. |
| Cleric Robe immunity | Wait it out or purge when possible. |
| Ranged player kiting you | Force their escape, then use your gap closer. |
Ability effects and balance can change between patches. Always check the current in-game spell descriptions for your matchup.
Put these counters into practice
Seeing the timing makes a difference. Use the fight examples in the video above, then try baiting the key defensive before you commit your damage in your next fight.
Want to see where I actually apply these ideas? Read What I Do as a Solo Player for my current Ancient Lands, Open World and Corrupted Dungeon routine.
Looking for a build to put these ideas into practice? Check my Albion Online Builds, explore Beginner Guides, or find a matchup to practice in the Corrupted Dungeon Builds section.
Build knowledge wins fights.
The goal is to stop reacting blindly and start choosing your cooldowns based on what the other player is doing.